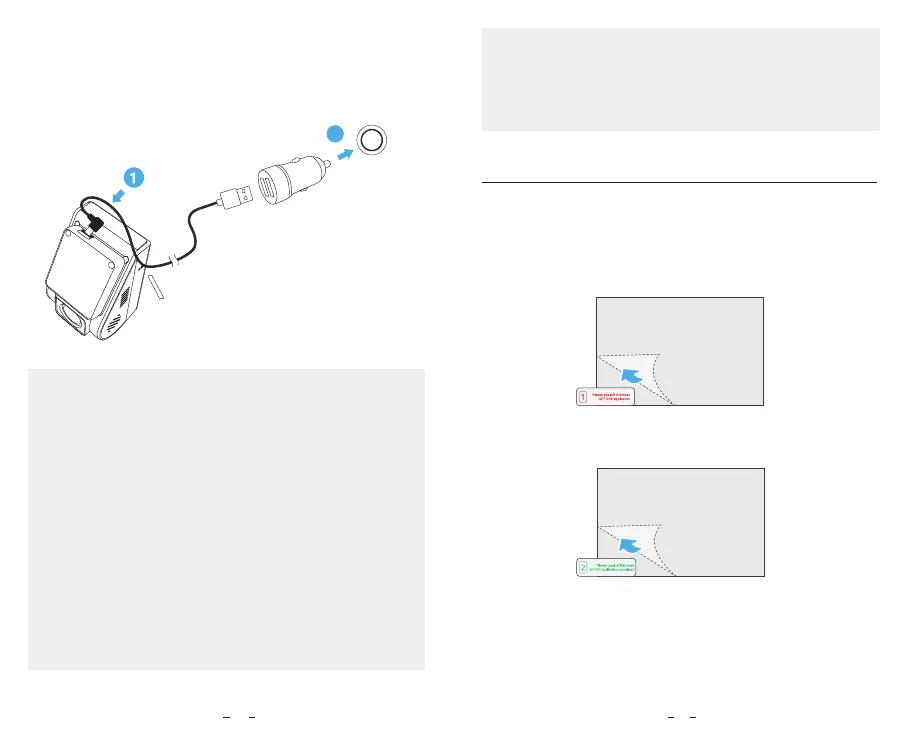
7. Connect to Power
Insert the car charger USB cable’s male port into the
camera mount's USB Type-C port. Plug the USB power
adapter into your vehicle’s 12V / 24V female power socket.
4. Peel the protection film off the sticky pad on the mount,
and attach it to the sticker. Press the camera hard for a
few seconds, making sure it is attached firmly.
3. Peel the green sign protective film off the static sticker.
2
1
10 11
Tips:
1. Do not install / mount the camera in a location that
interferes with the driver’s visibility and safety.
2. Install / mount the camera close to the rearview
mirror so that both sides of the scene being recorded
are equally covered by the camera’s FOV (field of
view).
3. To ensure a clear view on rainy days, the lens should
be positionwithin the windshield wiper’s sweeping
range.
4. Do not install / mount the camera on or near airbag
panels.
5. Installation / mounting location should not be
affected by sun control film (window tint). There should
not be any other electronic equipment close to the
camera for optimal performance.
Note:
Do not install / mount the camera or cables near an
airbag panel or within the airbag’s working range.
The manufacturer is not liable for any injury or death
caused by deployment of the airbag.
1. Wipe clean the surface of the windscreen before
installation.
2. Peel the red sign protective film off the static sticker,
then attach the sticker to the windscreen. Press it for a
few seconds, making sure no bubbles are left.
Install the Static Sticker (Optional)