REC
PLAY
PAUSE
PAUSE
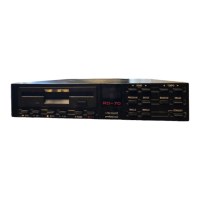
*Connect a MIDI cable (standard 5 pin DIN) from the MIDI OUT connector of
thedatasourcetoberecordedtotheMIDIINconnectorortheRD-70.
*Connect a MIDI cable (standard 5 pin DIN) from the MIDI OUT connector of
the RD-70 to the MIDI IN connector of the external sound module (or to the
MIDIINconnectorofthedatasourceitselfifithasabuilt-insoundsource).
*TheRD-70storesMIDImessageswiththe"directtodisk"recordingmethod.
Beforestartingtorecord,prepareafloppydisk(3.5",2DDor3.5",HD)foruse
(ie. formatted, with the tab in the upper right hand corner in the closed
position)andinsertitintothediskdrive(seeFloppy-Disks5.2).
*To actuate record mode, while holding the REC button press PAUSE (the
relative LEDs will light up). The RD-70 can be set on standby for recording in
twodifferentways:
1) AUTOMATIC METHOD: recording is carried out automatically as soon as a
MIDI code is sent to the MIDI IN connector from the connected data source.
(seesection6.3SYNCRONIZATION)
2) MANUAL METHOD: recordingis performedmanually bypressingagain the
PAUSE buttons, even if no data has yet been sent by the connected data
source.
*PressSTOPtostoprecording.
AC ADAPTOR
5 PIN CABLE
MIDI IN
MIDI IN
MIDI IN
MIDI OUT
MIDI OUT
MIDI OUT
REC START
DATA SOURCE
DATA
SOURCE
MIDI OUT
MIDI IN
MIDI IN
RD-70
RD-70
SOUND MODULE
RD-70
MIDI IN
MIDI OUT
220V/AC
4.1Preliminary Operations
4.2Recording a Song
RECORDING