EasyManua.ls Logo

Vision MAX Pro User Manual

Vision MAX Pro
183 pages
To Next Page IconTo Next Page
To Previous Page IconTo Previous Page
Page #21 background imageLoading...
Page #21 background image
Software Installation and Connections 21
© 2015 Vision Engraving Systems
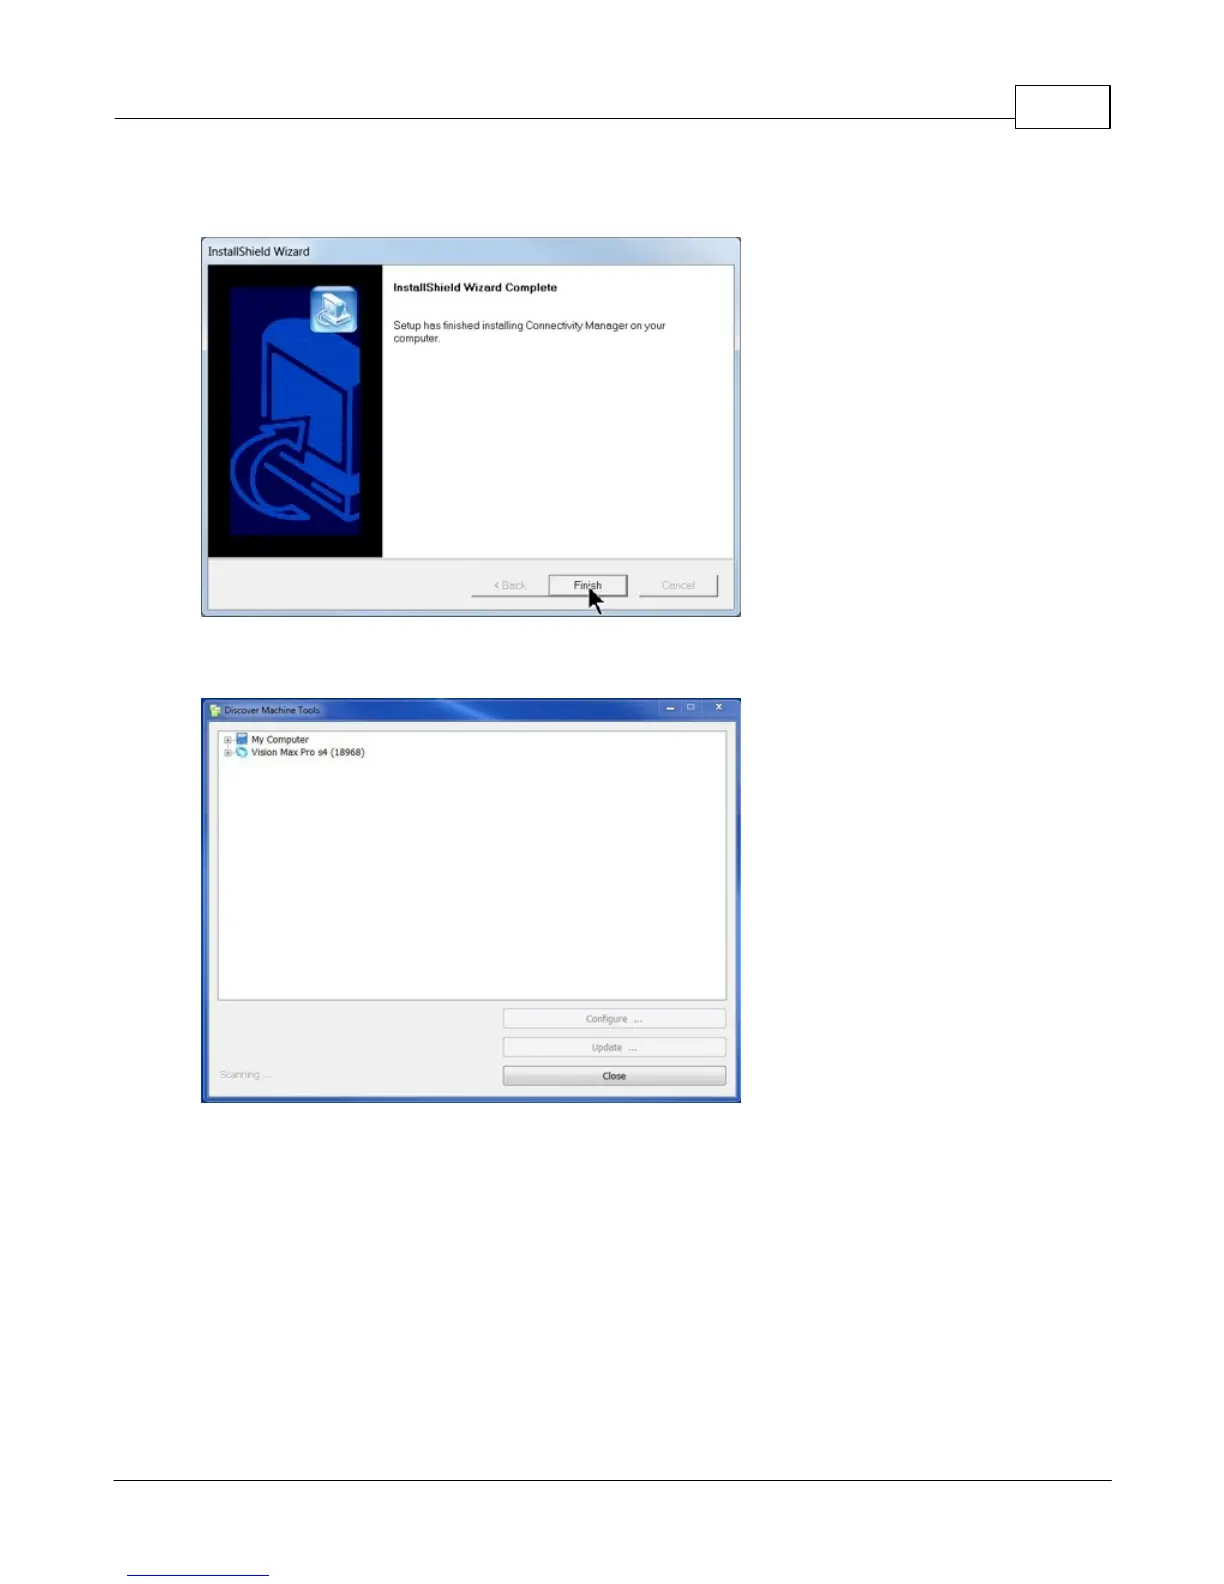
When the software is installed, select Finish.
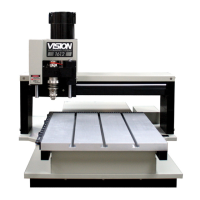
The Connectivity Manager will search for available Vision devices.
The configuration is complete at this point. Close the Machine Tools Discovery window and return to
the Main Installation Screen to proceed with the Vision software installation in the next section.

Other manuals for Vision MAX Pro

Question and Answer IconNeed help?

Do you have a question about the Vision MAX Pro and is the answer not in the manual?

Vision MAX Pro Specifications

General IconGeneral
BrandVision
ModelMAX Pro
CategoryEngraver
LanguageEnglish

Summary

Introduction

About This Manual

Overview of the manual's purpose and content.

Disclaimer and Warranty Information

Details on liability limits and warranty terms for the system.

Safety Precautions

Essential safety guidelines for operating the engraving machine.

Software Installation and Connections

Computer Requirements

Specifies minimum and suggested hardware for the software.

Max Pro Connections

Details physical cable connections for the Max Pro machine.

Direct Connection to Computer

Instructions for connecting the machine directly via a crossover cable.

Network Connection

Guide for connecting the machine to a network using standard cables.

Using a Network Hub - ONLY

Steps for connecting via a hub or router for network access.

Vision Software Installation

Procedures for installing the Vision engraving software.

Operation

General Description and Terminology

Identifies and describes key components and terms of the Max Pro engraver.

The Pendant Controls

Explains the functions of the pendant control pad for machine operation.

Set Home Procedure

Defines or resets the machine's home (0,0) position.

Set Surface Procedures

Guides for setting the material surface for engraving.

Holding Down Material

Techniques and methods for securing material on the t-slot table.

Sending Jobs to Your Machine

Process for transferring engraving jobs from software to the machine.

Water Feed System

Details on the integrated water system for cooling during engraving.

Example Jobs

Level 1 Jobs - Using the T-Slot Table

Basic engraving and cutting examples using the T-slot table.

Diamond Drag Engraving

Setup and execution for non-rotating diamond drag engraving.

Rotary Engraving

Instructions for engraving with a rotating cutter.

Burnishing

Process for engraving using a burnishing cutter for metal surfaces.

Profile Cutting

Engraving and cutting plastic badges with different tools.

Reverse Engraving/Color Filling

Techniques for creating signs with reverse engraved plastic.

Level 2 Job Examples - Using the Vise

Examples utilizing the vise fixture for various engraving tasks.

Example Job 6 - Engraving Pens

Engraving text onto a pen using the adjustable pen fixture.

Level 3 Job Examples - Using the Rotary Axis

Advanced examples using the rotary axis for circular objects.

Example Job 7 - Engraving Round Objects

Engraving text onto a metal mug using the rotary axis.

Example Job 8 - Engraving Objects Using the Water Feed Mechanism

Engraving a shot glass using water feed and diamond cutter.

Example Job 9 - Engraving Rings and Bracelets

Engraving inside and outside of rings and bracelets.

Feeds and Speeds

Maintenance

How to Remove and Clean the Air Filter

Instructions for cleaning the machine's input fan filter.

Cleaning and Lubrication of the Motion System

Procedures for cleaning and lubricating machine axes.

Draining and Refilling the Water Feed System

Steps for draining and refilling the machine's water system.

Replacing the Drive Belt

Guide on how to remove and replace the spindle drive belt.

Optional Accessories

Vacuum Chip Removal System

Details on the accessory for removing debris during engraving.

Hold Down Clamps

Various clamp types for securing materials on the t-slot table.

Edge Clamps

Clamps to secure materials from the top surface, avoiding bowing.

Corner Clamps

Clamps for holding square/rectangular plates with maximum engraving space.

Fixtures

Various fixtures for engraving uniquely shaped items.

Seal Fixture

Fixture for engraving seals, medallions, coasters, and other round objects.

Adjustable Pen Fixture

Fixture for engraving cylindrical items with varying diameters.

Pen & Medallion Fixture

Double-sided fixture accommodating pens, medallions, or seals.

Clamping Vises

Vises for securing items on the t-slot table or for odd-shaped items.

Related product manuals