□ Remove the two 1/4" clamp bolts from the C-clamps. Expand
the clamps slightly and slide them over the front of the tank.
□ Apply Loctite and insert the 5/16"x1/2" top bolts through the
c-clamps and thread them into the mount brackets, do not
tighten. Leave out the lower bolts until tank is located in
correct position.
□ Install the discharge check valve fitting assembly into the
rear of the tank at the discharge port. Tighten the assembly
until the pressure transducer points towards the top of the
tank.
□ Install a suitable 3/4" fitting (not supplied) into the end of the
discharge check valve fitting assembly.
The tank will mount on the passenger side frame rail
under the cab and must be level. Variations in frame
design may affect the positioning of the brackets.
Always check fit before tightening the fasteners.
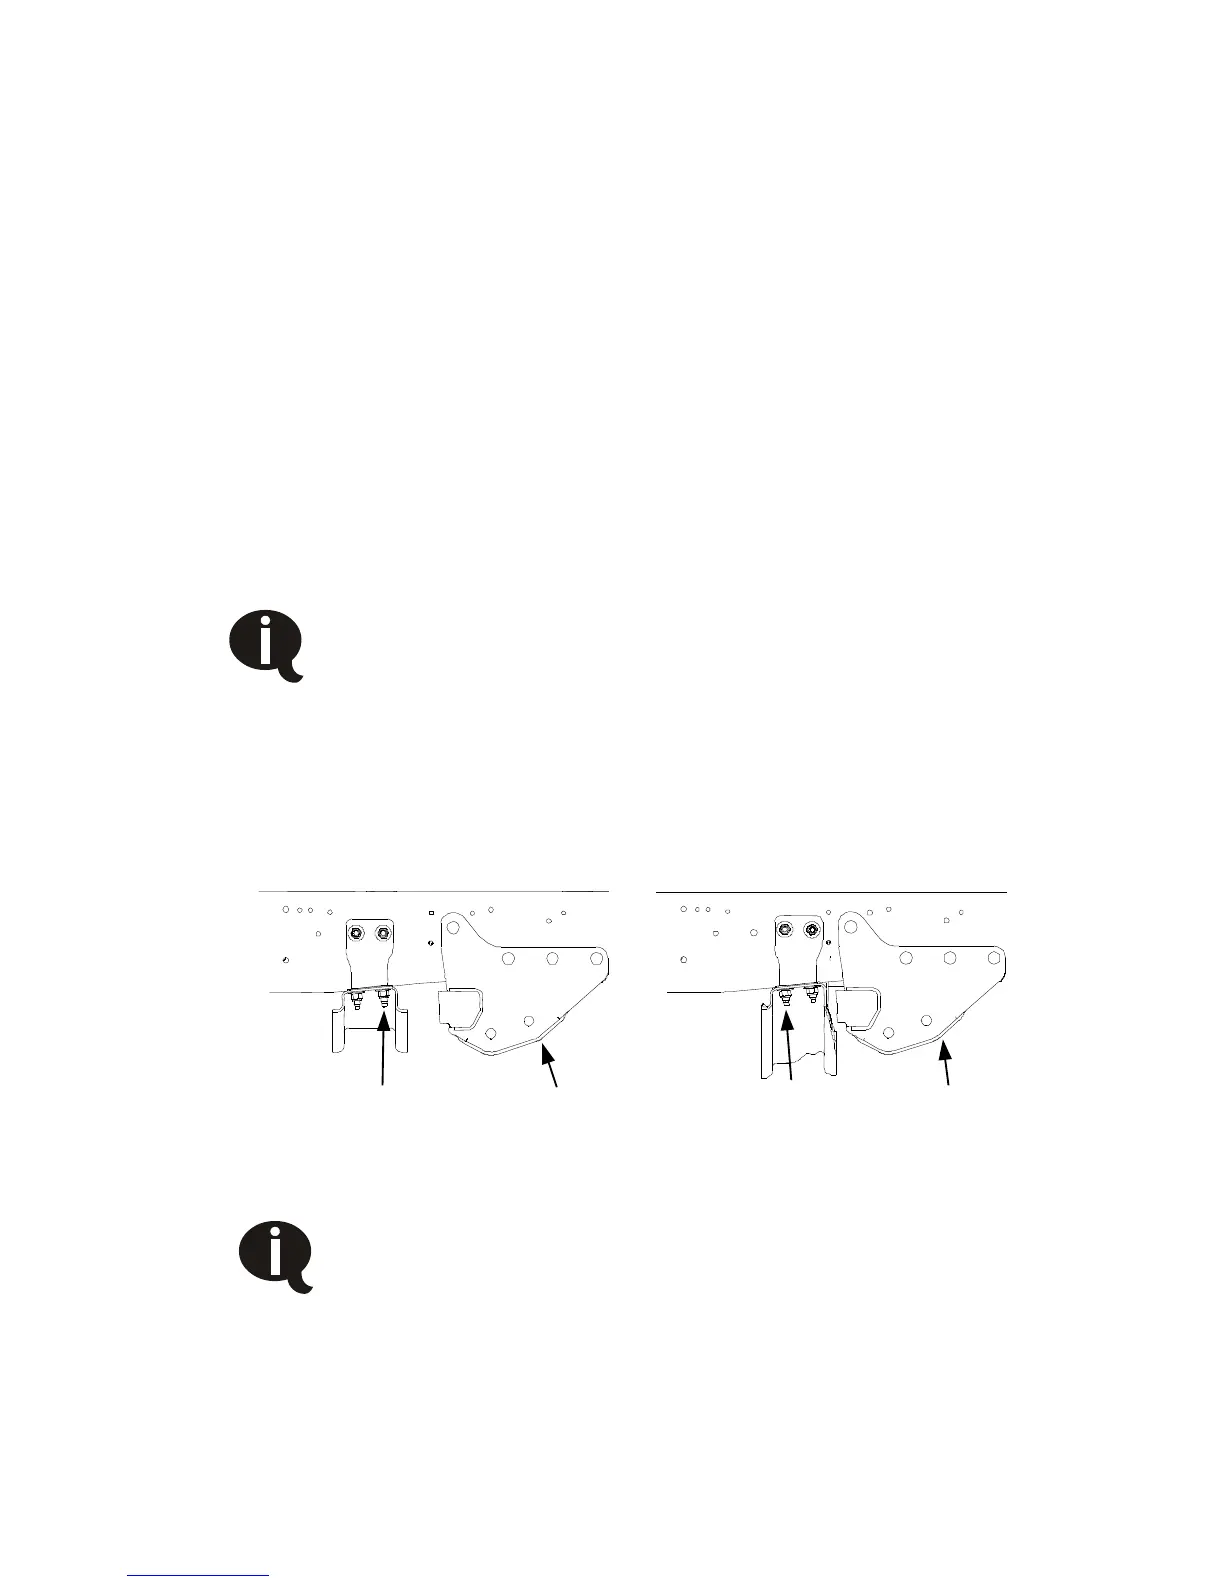
□ Remove 1 of 2 OEM Nuts attaching the transmission cross-
member to the frame. Depending on the truck configuration
cross-member location may differ (Figure 4.3).