DATA FILER
7. RECORDING SONG
7.1 FOREWORD
As well as playing back songs in Standard MIDI File 0 and 1 format (see point 2.2), the
Genius is also able to record the MIDI events received on the MIDI IN port, made available
with the aid of an optional Joy-to-MIDI adapter (see section 4). Once recorded, these data
can be saved in the form of Standard MIDI Files both on a floppy disk and in the internal
memory.
Bear in mind that the instrument does not allow any over-recording (total or partial), so if you
wish to replace a recorded song you will have to delete the song in question and record
another.
7.2 STARTING RECORDING
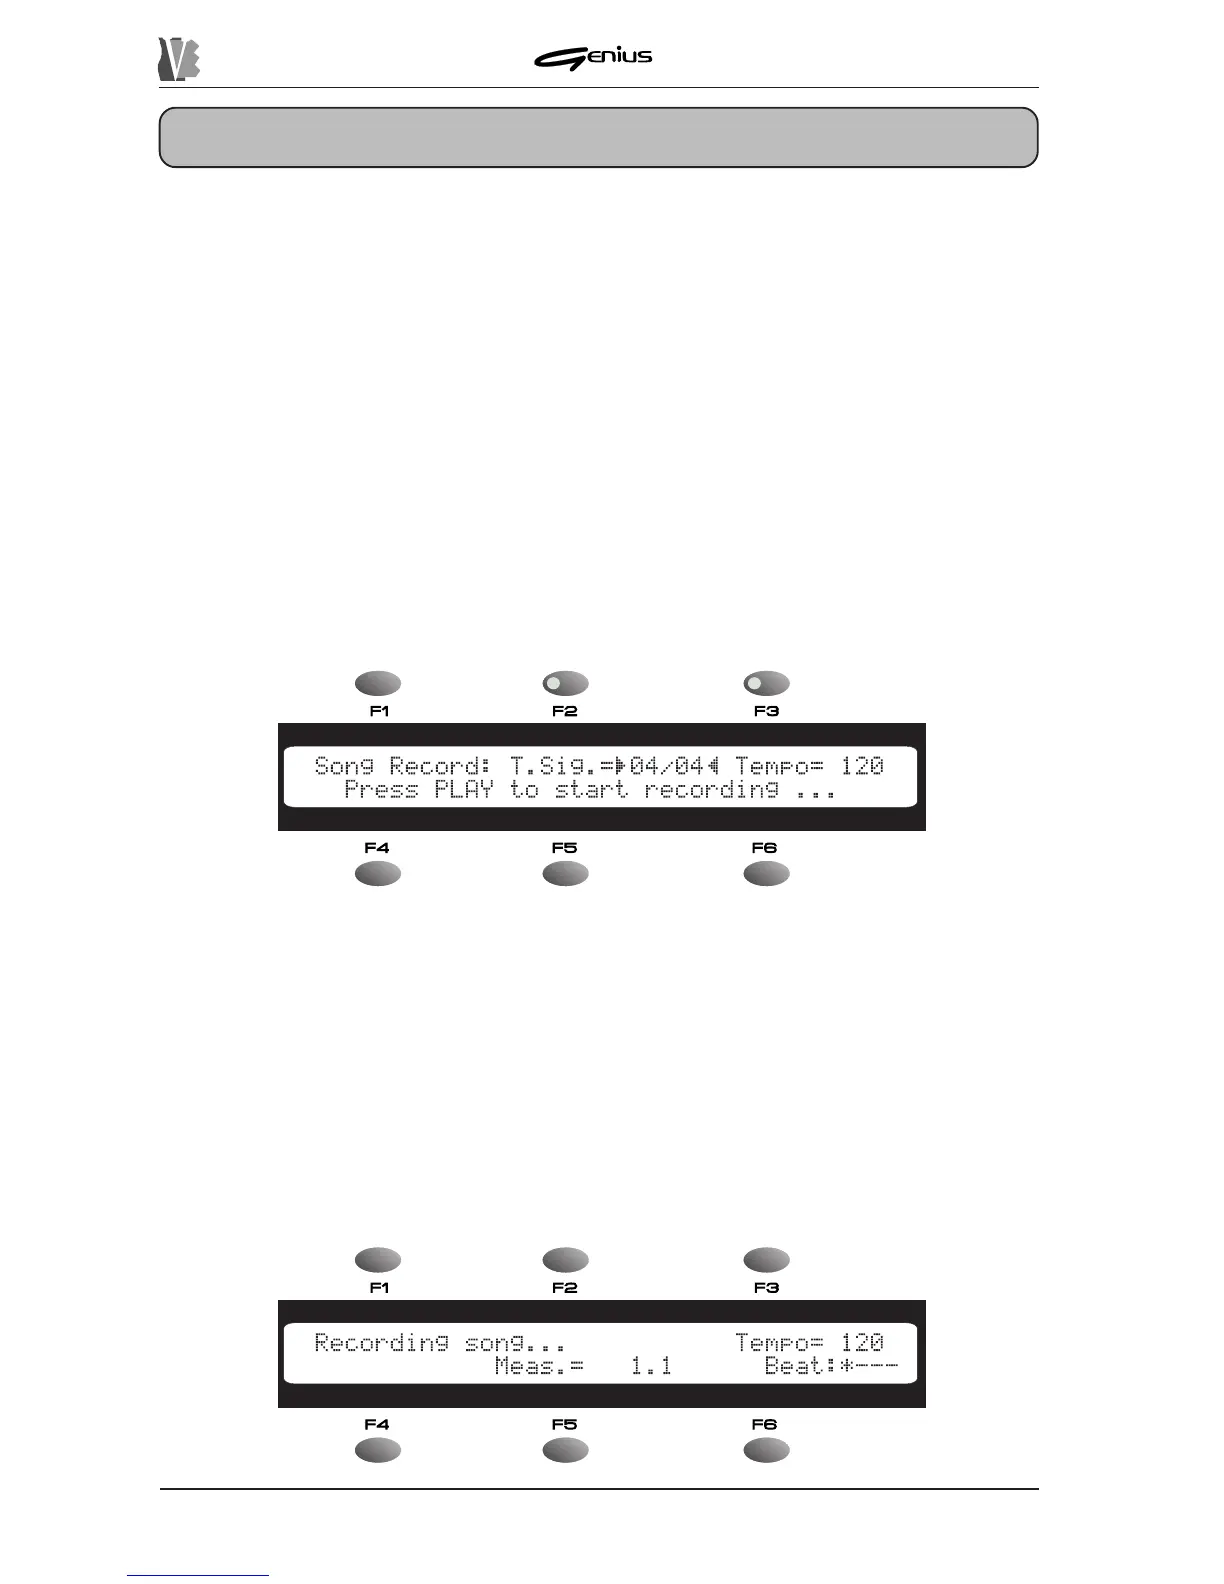
After making the connections correctly, press the [REC] key; the key LED will illuminate and
the display will show the following video page:
118
This video page contains the following fields:
o
T.Sig.
(can be selected using the [F2]) function key) – allowing the encoder to be
used to set the Time Signature of the song to be recorded. The possible values are: 3/8,
6/8, 9/8, 12/8, 2/4, 3/4, 4/4, 5/4, 6/4, 7/4 and 9/4.
o
Tempo
(can be selected using the [F3]) function key) – allowing the user to set the
metronome tempo of the new song in a range from 50 to 250 bpm (Beats per Minute).
After setting the values of the parameters to your requirements, press the [PLAY] button to
start the recording of [ESC] to abort.
Once the [PLAY] key has been pressed, the Genius will start to record the data present at the
MIDI IN port of the optional adapter and the display will show: