Group 25 Intake and Exhaust System Service Procedures
5
W2000941
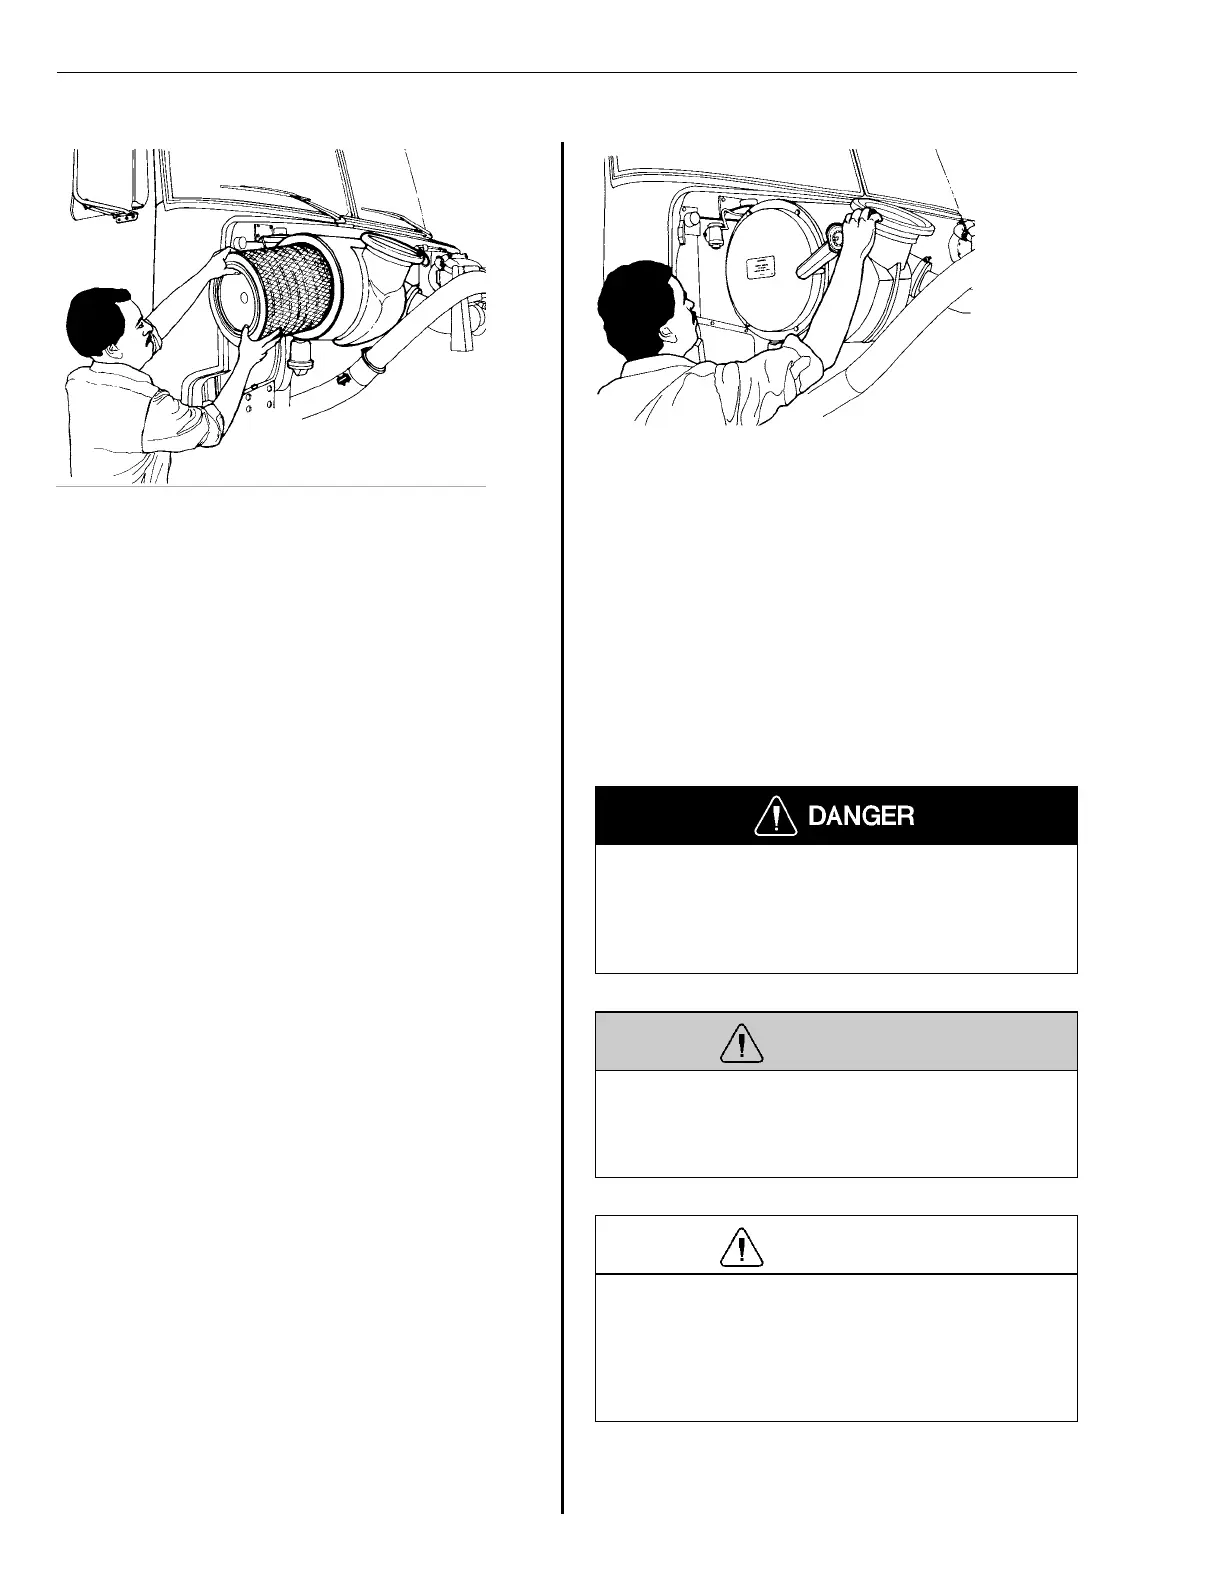
Fig. 33: Remove the air filter (WG, AC)
Remove the element from the canister.
If the element is held by a wing nut,
remove the wing nut before removing
the element.
Installation
6
Clean and inspect the inside of the
housing and endcap.
7
Lubricate the rear seal on the new fil-
ter with Vaseline or the like.
8
Install the new filter. Make sure that it
is correctly positioned in the filter
housing.
9
W2000746
Fig. 34: Endcap reinstall
Reinstall the endcap and attach, using
the necessary hardware. Tighten to a
torque of 24 ± 2 Nm (18 ± 2 ft-lb).
Note: Refer to the label attached in-
side the endcap on some models.
24 ± 2 Nm
(18 ± 2 ft-lb)
2512-03-02-01
Intake Manifold Gasket(s), Re-
placement
Before working on a vehicle, set the parking brakes,
place the transmission in neutral, and block the
wheels. Failure to do so can result in unexpected
vehicle movement and can cause serious personal in-
jury or death.
WARNING
HOT ENGINE! Keep yourself and your test equipment
clear of all moving parts or hot engine parts and/or
fluids. A hot engine and/or fluids can cause burns or
can permanently damage test equipment.
CAUTION
When removing and installing the intake manifold on
engines equipped with VEB, keep the work area as
clean as possible to prevent impurities from entering
the oil system. This also applies to the compression
brake oil delivery pipe between the cylinder block and
intake manifold.
30