Group 25 Intake and Exhaust System Service Procedures
2538-04-04-01
Exhaust Pressure Governor,
Overhaul
(Unit Removed)
Before working on a vehicle, set the parking brakes,
place the transmission in neutral, and block the
wheels. Failure to do so can result in unexpected
vehicle movement and can cause serious personal in-
jury or death.
WARNING
HOT ENGINE! Keep yourself and your test equipment
clear of all moving parts or hot engine parts and/or
fluids. A hot engine and/or fluids can cause burns or
can permanently damage test equipment.
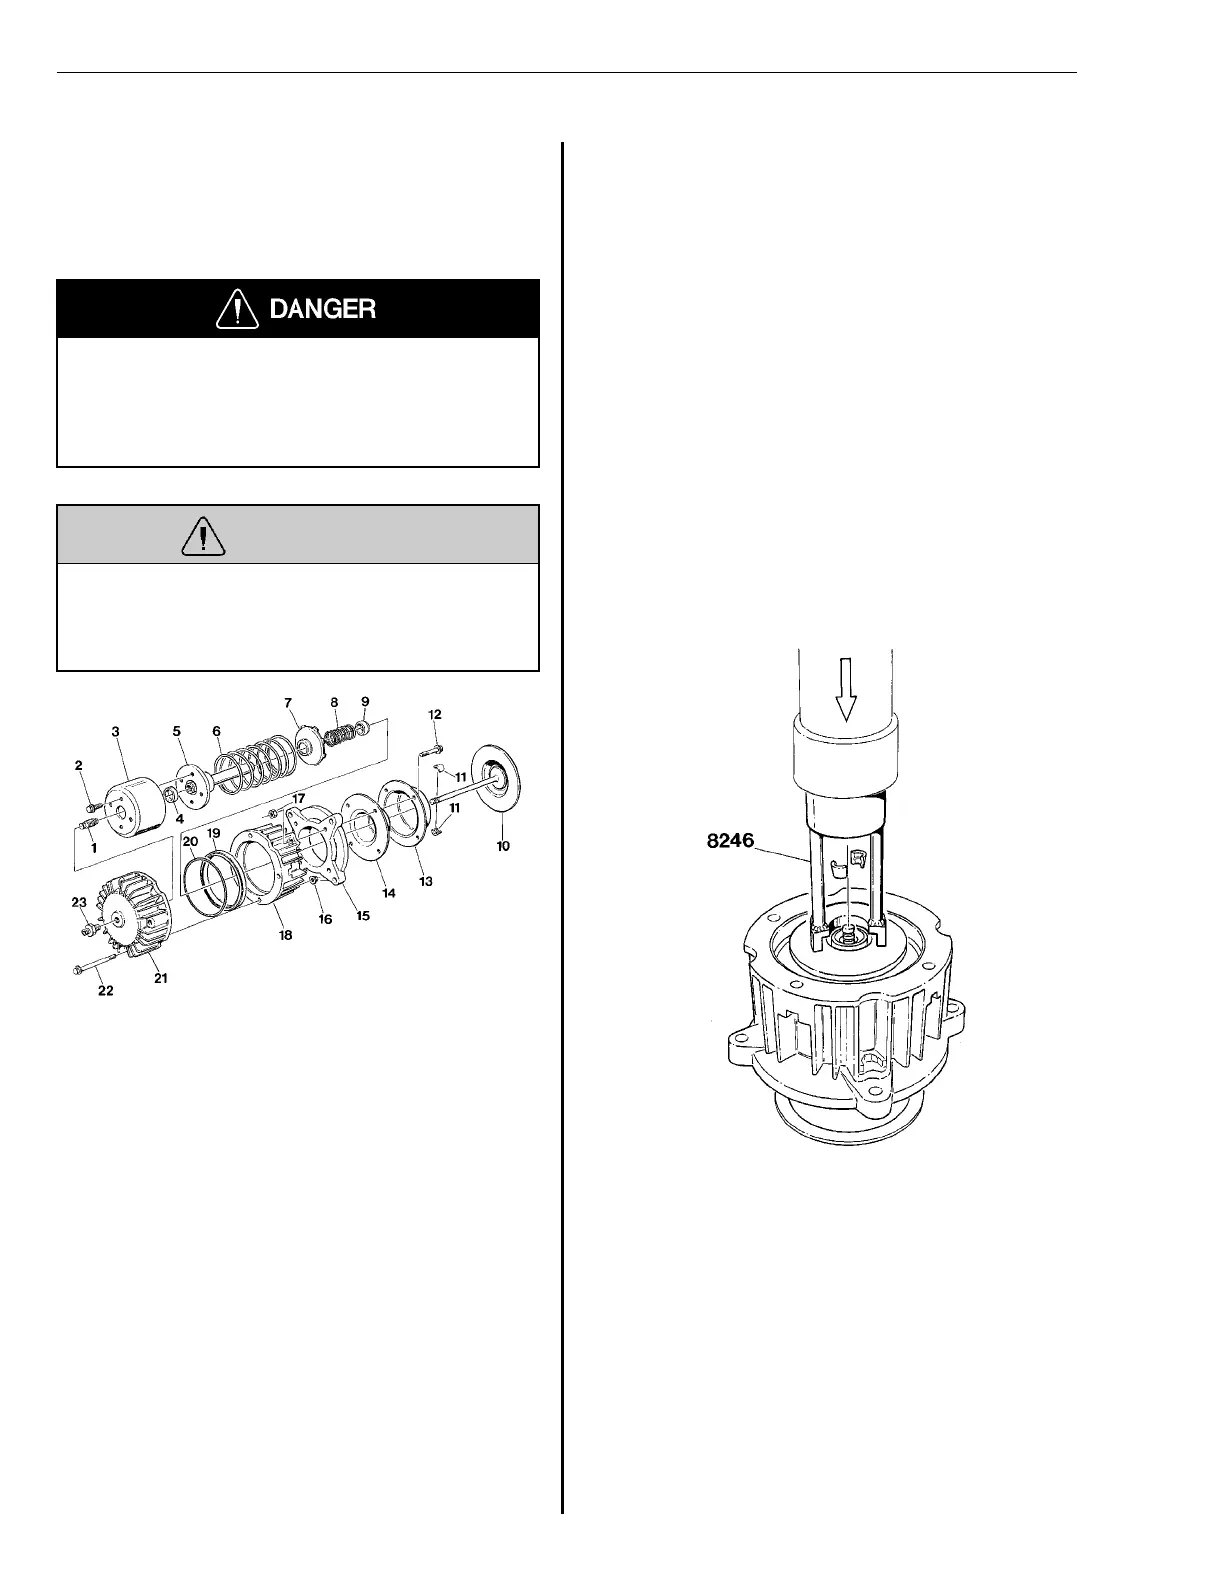
T2006749
Fig. 44: Exhaust pressure governor
1-Setscrew 11-Valve Collets
2-Bolts 12-Bolts
3-Plunger 13-Cover
4-Seazls 14-Heat shield
5-Plunger Rod 15-Securing flange
6-Spring 16-Nut
7-Spring holder 17-Nut
8-Spring 18-Housing
9-Seal 19-Seals
10-Shutter 20-Seals
21-End cover
Special tools: 999 2610, 999 8225, 999 8246
Disassembly
1
Remove the end cover from above the
plunger.
2
Remove the bolts and take out the
plunger.
3
Remove the seals (4, 20 and 19, Fig.
44: Exhaust pressure governor, page
36).
4
Remove the set screw on the plunger
rod.
5
T2006747
Fig. 45: Removing collets
Place the exhaust pressure governor
into a press. Compress the spring
enough to remove the valve collets
Note: Do not press more than
necessary to remove the collets. Com-
pressing the spring fully can damage
the cover.
6
Remove the plunger rod, spring and
shutter.
36