VTI Instruments Corp.
28 EX1629 Preparation for Use
CONNECTING/DISCONNECTING LINE POWER
When connecting the EX1629 to an outlet, there should be no connections to the front panel and
the power switch at the rear of the mainframe should be in the off position. Connect the power line
cord provided to the EX1629 and the outlet, then turn the power switch to the on position.
To power down the EX1629, disconnect all connections to the front panel, move the power switch
at the to the off position, then disconnect the power line cord from the outlet.
WARM-UP TIME
The specified warm-up time of the EX1629 is 60 minutes. If, however, the unit is being subjected
to an ambient temperature change greater than 10 C, extra stabilization time is recommended to
achieve maximum performance.
SOFTWARE INSTALLATION
The fastest way to begin controlling an EX1629 is to discover the unit using VTI’s LAN
Instrument Connection and Upgrade (or LInC-U) utility. To do this, the following is required:
A PC or laptop computer
A Microsoft™ Windows™ XP OS with Service Pack 2 (SP2) and Internet Explorer™ (IE)
An Internet connection
VTI’s LInC-U utility
The LInC-U Utility searches for all LAN-based VTI devices on the network and can be found on
the Distribution CD that shipped with the EX1629 or may be downloaded from the
VTI Instruments corporate website. This utility uses the VXI-11 discovery protocol to discover the
EX1629. This utility can also be used to upgrade the EX1629’s driver and firmware. For more
information on using the LInC-U utility, please refer to its online Help file. For more information
on discovering the EX1629, please refer to Opening the Web Page in Section 5.
LInC-U Installation
To install LInC-U as a discovery tool for the EX1200’s embedded webpage, insert the
VTI Instruments Corp. Drivers and Product Manuals CD into the host PCs CD-ROM and, using
Windows Explorer, navigate to the <CD-ROM Drive>:\EX Platforms Requisites directory. Next,
run the VTI_LInC-U_setup.exe program. Once installation begins, simply follow the on-screen
instructions.
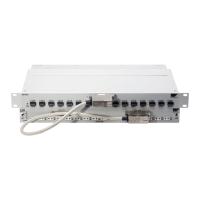
INPUT CONNECTIONS / WIRING
Extensive testing has resulted in the qualification of the standard RJ-45 telecom connector as the
ideal low-cost connector for strain gages. Not only are these connectors reliable, but low-cost
construction of custom length cables is also readily available. Reconfiguration or replacement of
strain gage connections is as easy as connecting a telephone. An example cable connection is
illustrated in Figure 2-1.
Figure 2-2 shows the pin assignment for each EX1629 strain gage connector. Depending on the
bridge configuration employed, anywhere from three to all eight of the signal connections will be
actively used, as illustrated in the bridge configuration diagrams that follow. For proper operation,
unused input connections must be left open, as opposed to being grounded or tied together.