Assembly Instructions
19
SETUP INSTRUCTIONS
WARNING
It is critical to follow the steps provided for
setup and assembly of the tractor and deck
to ensure the safety of the operator and
performance of the equipment.
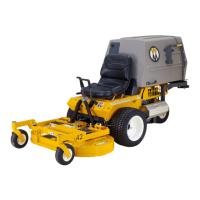
Walker Mowers are shipped partially assembled to
our distribution network, and are typically assem-
bled by the selling dealer. For any additional as-
sembly besides the following, contact your Walker
dealer.
Tire Installation (Tractor)
● Install the drive tires using the eight (8) lug
bolts supplied with the Owner’s Packet of
materials.
Bolts are torqued to 75 to 85 lb·ft
(102 to 115 N·m).
Drive tires are 18 x 8.50-10,
4-ply; rear tire is 13 x 6.50-6, 4-ply.
● Check and adjust the ination of the tires.
The tire ination recommendations are:
Drive = 15 PSI (103 kPa)
Tailwheel = 20 PSI (137 kPa)
Battery Service
The battery comes sealed and is maintenance-free,
so the electrolyte level will not need to be checked
or lled.
IMPORTANT: Make sure battery is securely mount-
ed in the frame. A loose battery may cause damage
to the case resulting in acid leakage and severe
damage to the machine. A hazard may be created
by damage to critical working parts and safety sys-
tems.
CAUTION
Important Battery Service, Installation, and
Charging Tips for Electronic Fuel Injection
Engines:
● Do not allow the battery cables to touch
opposing terminals. When connecting
battery cables attach the positive (+)
cable to positive (+) battery terminal
rst, followed by negative (-) cable to
negative (-) battery terminal.
● Never start the engine when the cables
are loose or poorly connected to the
battery terminals.
● Never disconnect battery while engine
is running.
● Never use a quick battery charger to
start the engine.
● Never “jump start” the engine using
another source. Electricity uctua-
tions can damage the ECU (Electronic
Control Unit).
● Always disconnect negative (-) battery
cable lead before charging battery, and
also unplug harness from ECU before
performing any welding on equipment.