WWW.WEBER.COM
®
17
ANNUAL MAINTENANCE
1
2
3
6
11
13
14
4
5
7
8
9
10
12
15
16
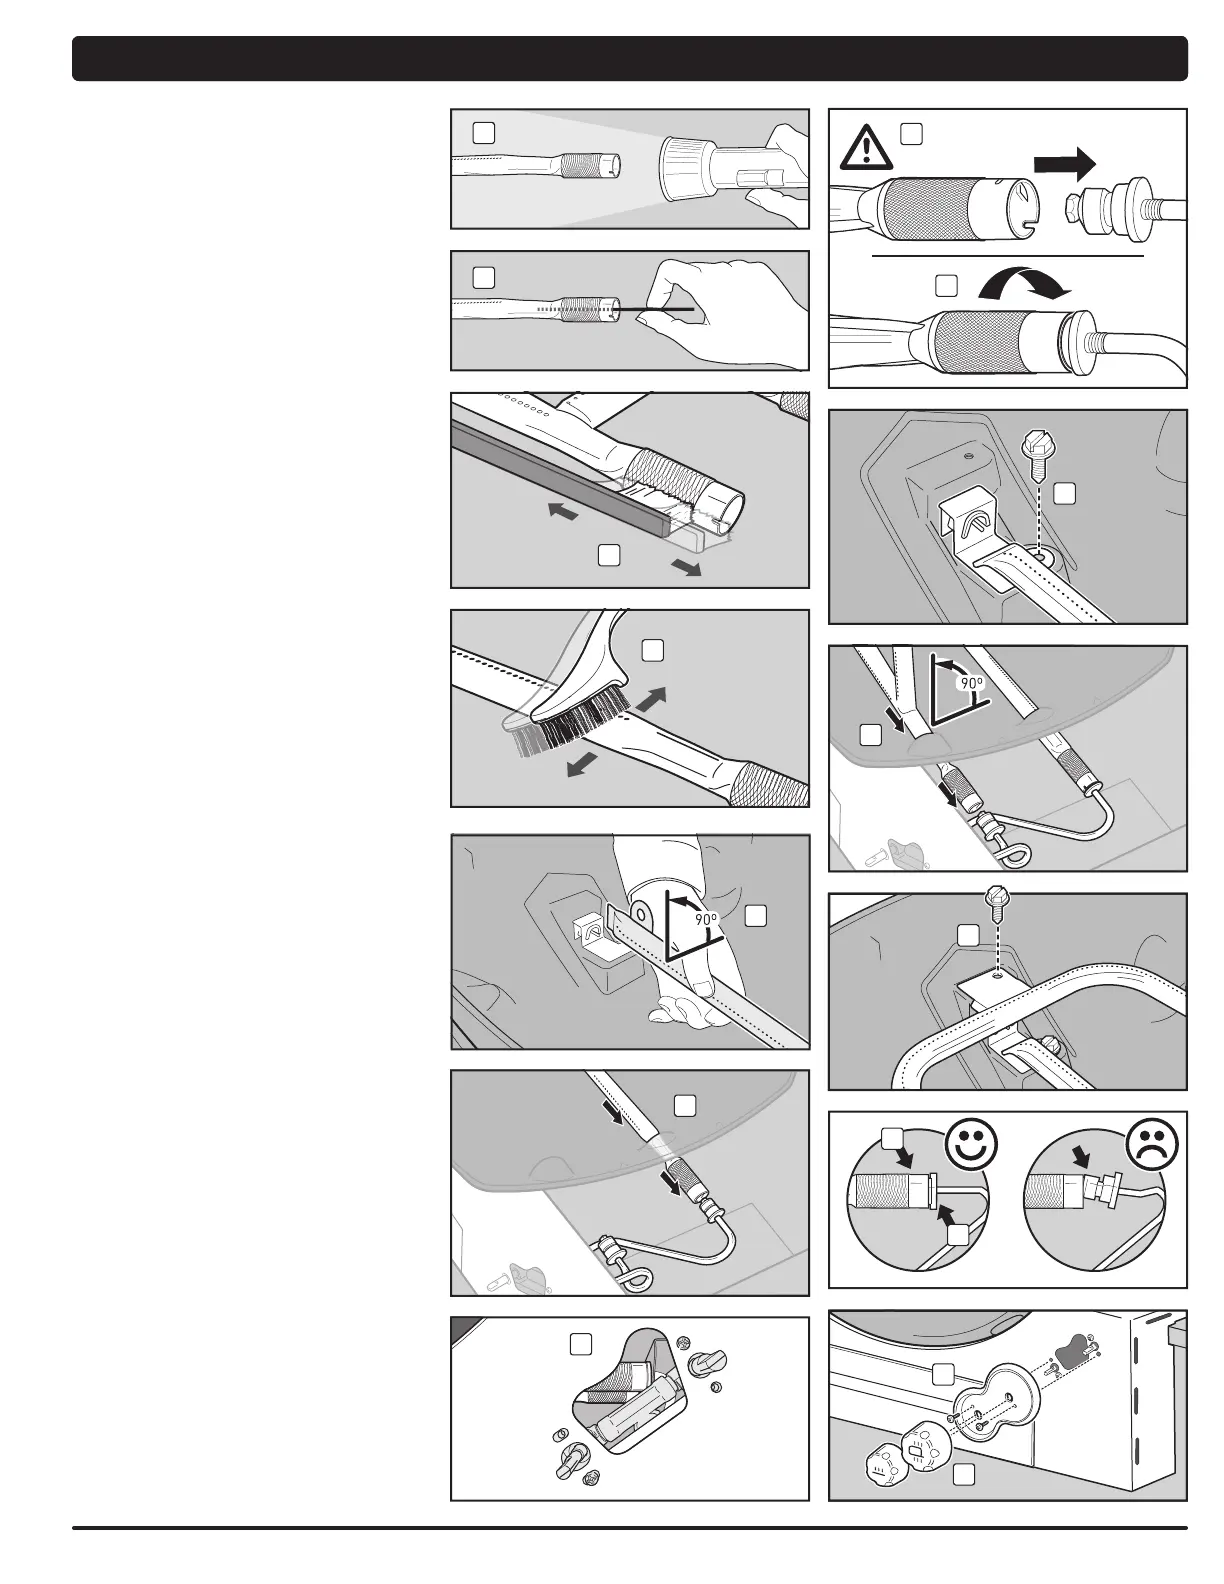
Clean Burner Tubes
You will need: A flashlight, a wire (a straightened-out coat
hanger), a suitable stainless steel bristle brush, and a soft
bristle brush (toothbrush).
A) Look inside each burner tube with a flashlight(1).
B) Clean any debris or blockage from the inside of the
burner tubes with the wire(2).
C) Check spider/insect screens at the ends of the burner
tubes and clean them using the soft bristle brush(3).
m CAUTION: Do not clean the spider/insect
screens with hard or sharp tools. Do not
dislodge the spider/insect screens or
enlarge the screen openings.
D) Use the steel bristle brush to clean the outside of the
burner tubes. This is done to make sure all burner
ports (openings) running along the length of the
burner tubes are fully open(4).
m CAUTION: Do not enlarge the burner
ports when cleaning.
Reinstall Burner Tubes
You will need: A 3/8" nut driver.
A) While holding the inside burner tube with the
mounting bracket rotated up 90° (5), carefully slide
the burner tube back into the hole on right side of
cookbox (6). Looking through the view port on the
front panel of the cabinet (7), align the locking tab of
the burner tube opening with valve orifice (8). Rotate
the burner tube 90° to the flat position to lock it to the
valve orifice (9).
B) Check that igniter electrode is properly seated under
burner tube and reinstall screw that holds the inside
burner tube to the cookbox (10).
C) Holding the outside burner tube with the mounting
bracket rotated up 90°, carefully slide the burner
tube back into the hole on right side of cookbox (11).
Looking through the view port on the front panel of
the cabinet (7), align the locking tab of the burner
tube opening with valve orifice (8). Rotate the burner
tube 90° to the flat position to lock it to the valve
orifice (9).
D) Reinstall screw that holds the outside burner tube to
the cookbox (12).
m CAUTION: The burner tube openings (13)
must be positioned properly over the
valve orifices (14).
E) Replace cookbox components.
F) Reinstall control knob bezel over the valve stems.
Position the bezel with the larger diameter on the
right and fasten the two screws with a Phillips
screwdriver (15).
G) Place burner control knobs onto valve stems (16).
m WARNING: You should check for
gas leaks every time you disconnect
and reconnect a gas fitting. Refer to
“CHECKING FOR GAS LEAKS.”