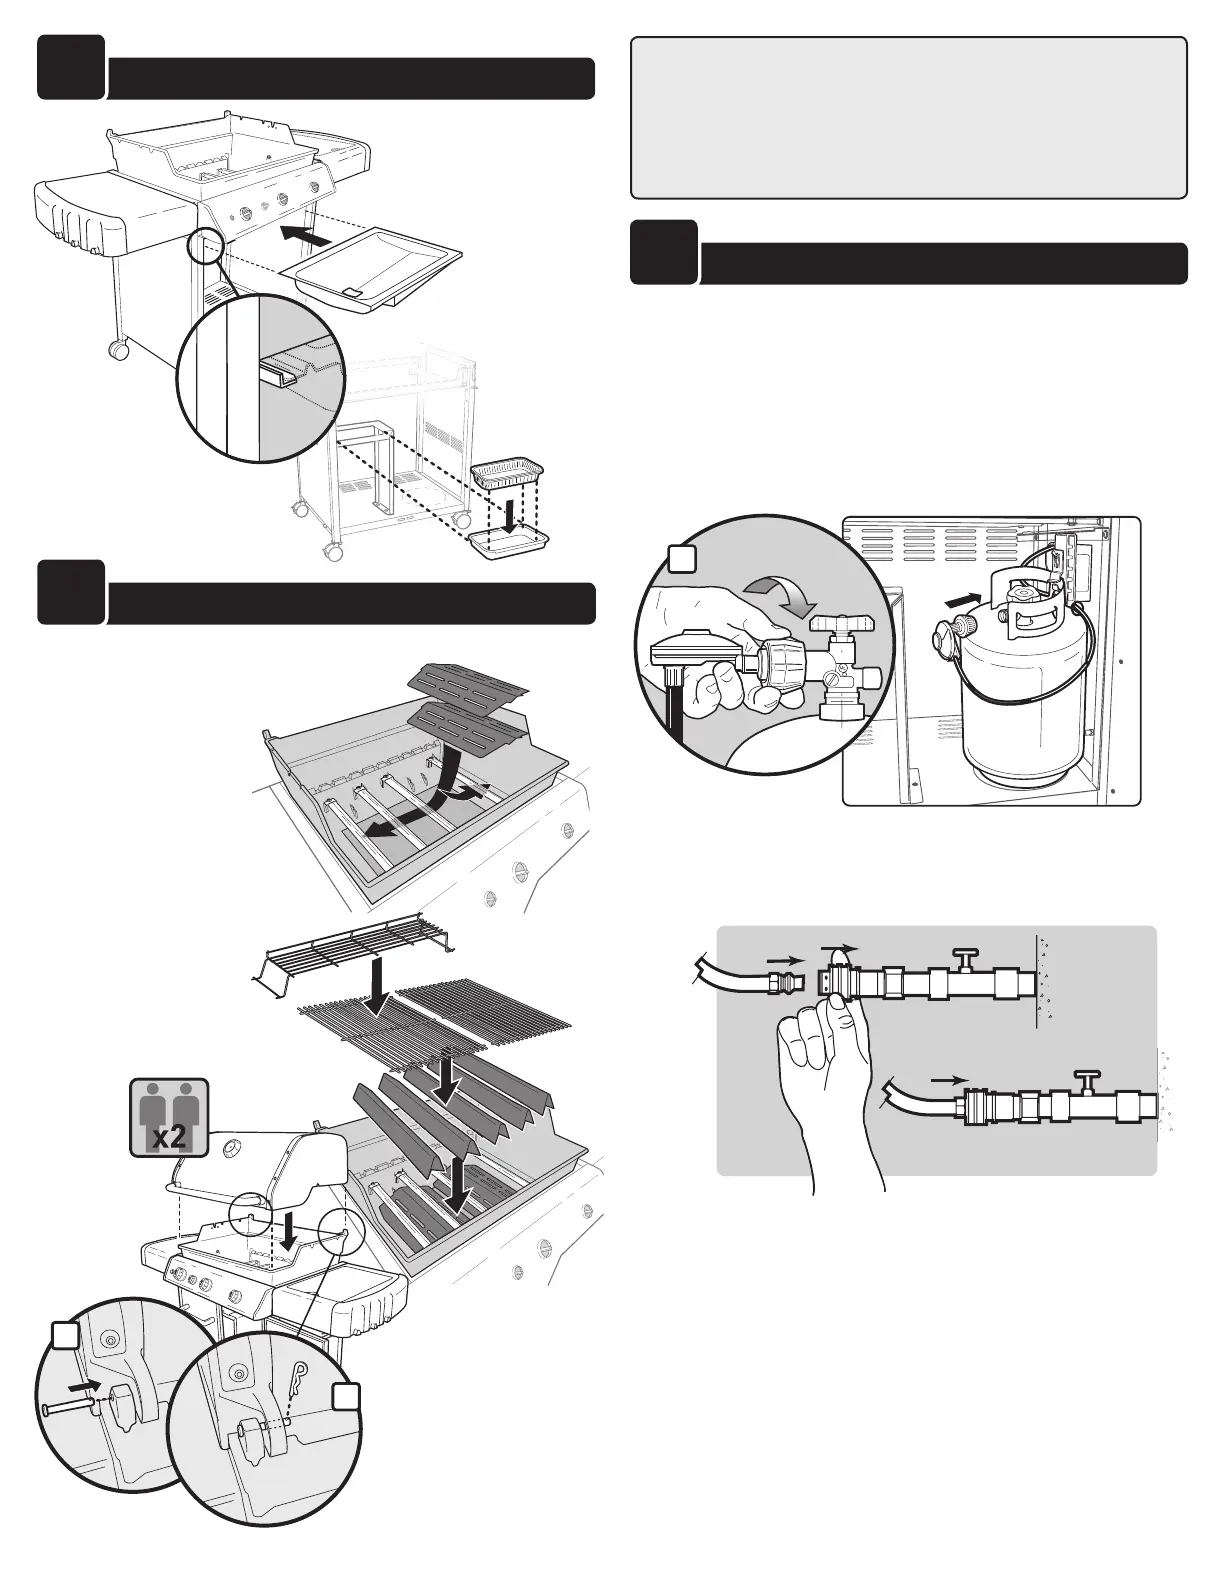
13
GREASE tRAY / DRip pAn REinStAllAtiOn
14
liD AnD COOKBOX COMpOnEntS REinStAllAtiOn
m CAUTION: Two people are required to lift
and install the lid assembly.
A) Install heat deflectors.
B) Install Flavorizer
®
bars.
C) Install cooking grates.
D) Install warming rack.
E) Place lid assembly onto
cookbox assembly.
F) While lid assembly is
in the closed position,
install clevis pins (1) into
cookbox assembly.
G) Install cotter pins into clevis
pins (2).
1
2
m WARNING: Make sure all control knobs are turned
to the OFF position before reconnecting gas supply
and operating grill. Your actions, if you fail to follow
this Product Warning, may cause a fire, an explosion,
or structural failure resulting in serious personal
injury or death as well as damage to property.
15
HOSE tO GAS SOURCE COnnECtiOn
1
FOR NG UNITS:
A) Slide back collar of quick-disconnect and reconnect
natural gas hose.
FOR LP UNITS:
m WARNING: Hose must be secured to tank scale with hose
retention clip. Failure to do so could cause damage to the
hose resulting in a fire or explosion which can cause serious
bodily injury or death, and damage to property.
A) Screw regulator coupling onto tank valve; turn clockwise, or to the right (1).
m WARNING: Do not use a wrench to tighten connection. Using
a wrench could damage regulator coupling and could cause a
leak.
NOTE: Grills illustrated may have slight differences than model purchased.