19
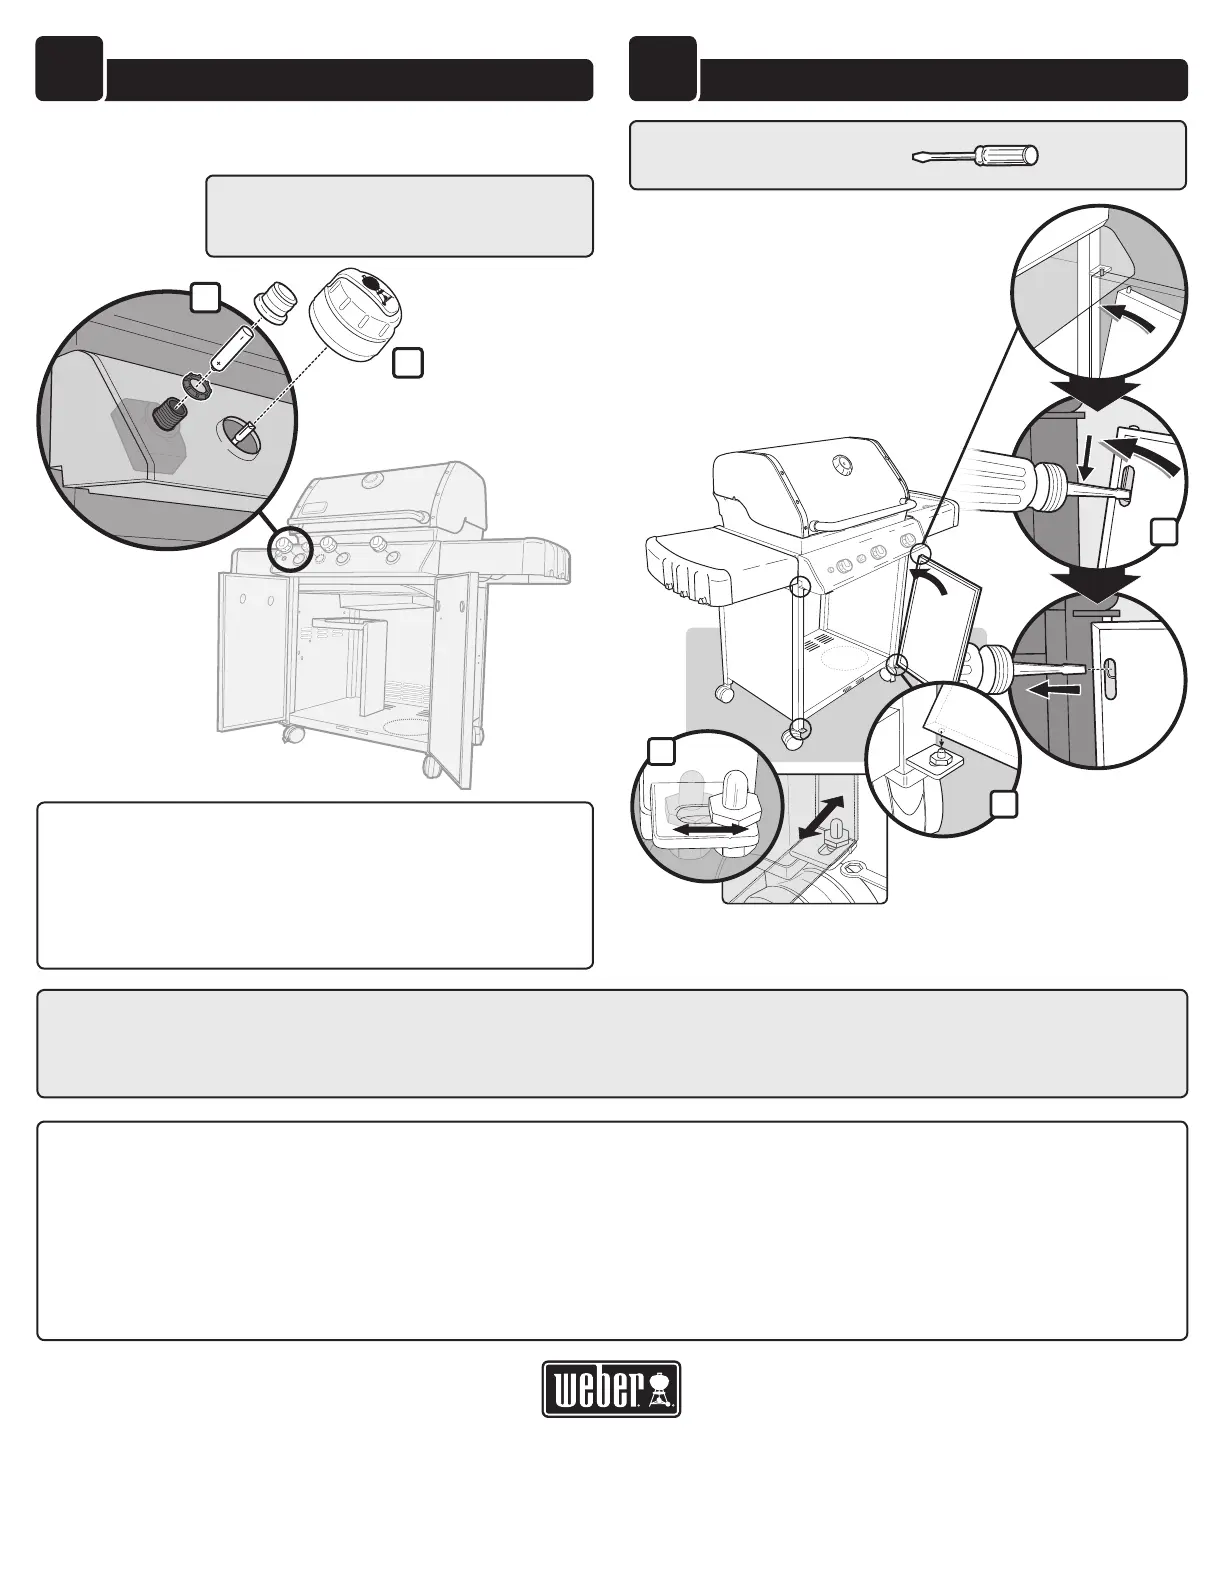
COntROl KnOB REinStAllAtiOn
A) Install ALL control knobs (1).
B) Install igniter button and battery (2).
1
2
m IMPORTANT NOTE: If it has been a year
since battery was changed, this would
be a good time to replace it.
m WARNING: Make sure all parts are assembled
and hardware is fully tightened before operating
the grill. Your actions, if you fail to follow this
Product Warning, may cause a fire, an explosion, or
structural failure resulting in serious personal injury
or death as well as damage to property.
20
DOOR REinStAllAtiOn
2
1
3
TOOLS NEEDED: - FLATHEAD
m
PROPOSITION 65 WARNING: HANDLING THE BRASS MATERIAL ON THIS PRODUCT EXPOSES YOU TO LEAD, A CHEMICAL
KNOWN TO THE STATE OF CALIFORNIA TO CAUSE CANCER, BIRTH DEFECTS OR OTHER REPRODUCTIVE HARM.
(WASH HANDS AFTER HANDLING THIS PRODUCT.)
m WARNING: All repairs to gas carrying, gas burning, igniter or structural components must be performed by an
authorized Weber-Stephen Products LLC service technician.
These parts may be gas carrying, gas burning, igniter or structural components. Please contact Weber-Stephen Products LLC, Customer
Service Department for Genuine Weber-Stephen Products LLC replacement part(s) information.
m WARNING: Do not attempt to make any repair to gas carrying, gas burning, igniter or structural components
without contacting Weber-Stephen Products LLC, Customer Service Department. Your actions, if you fail to follow
this Product Warning, may cause a fire, an explosion, or structural failure resulting in serious personal injury or
death as well as damage to property.
WEBER-STEPHEN PRODUCTS LLC
Customer Service Center
1890 Roselle Road, Suite 308
Schaumburg, IL 60195
1-800-446-1071 (USA ONLY)
www.weber.com
®
A) Set door onto bottom adjustable hinge pin (1).
B) Use a screwdriver to push down door pin
release (2). Slide door into frame assembly
and allow door pin release to snap into frame
support hole.
C) If necessary, use a 7/16" wrench to adjust
door alignment (3) by loosening/tightening bolt
underneath bottom adjustable hinge pin.