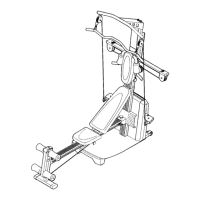
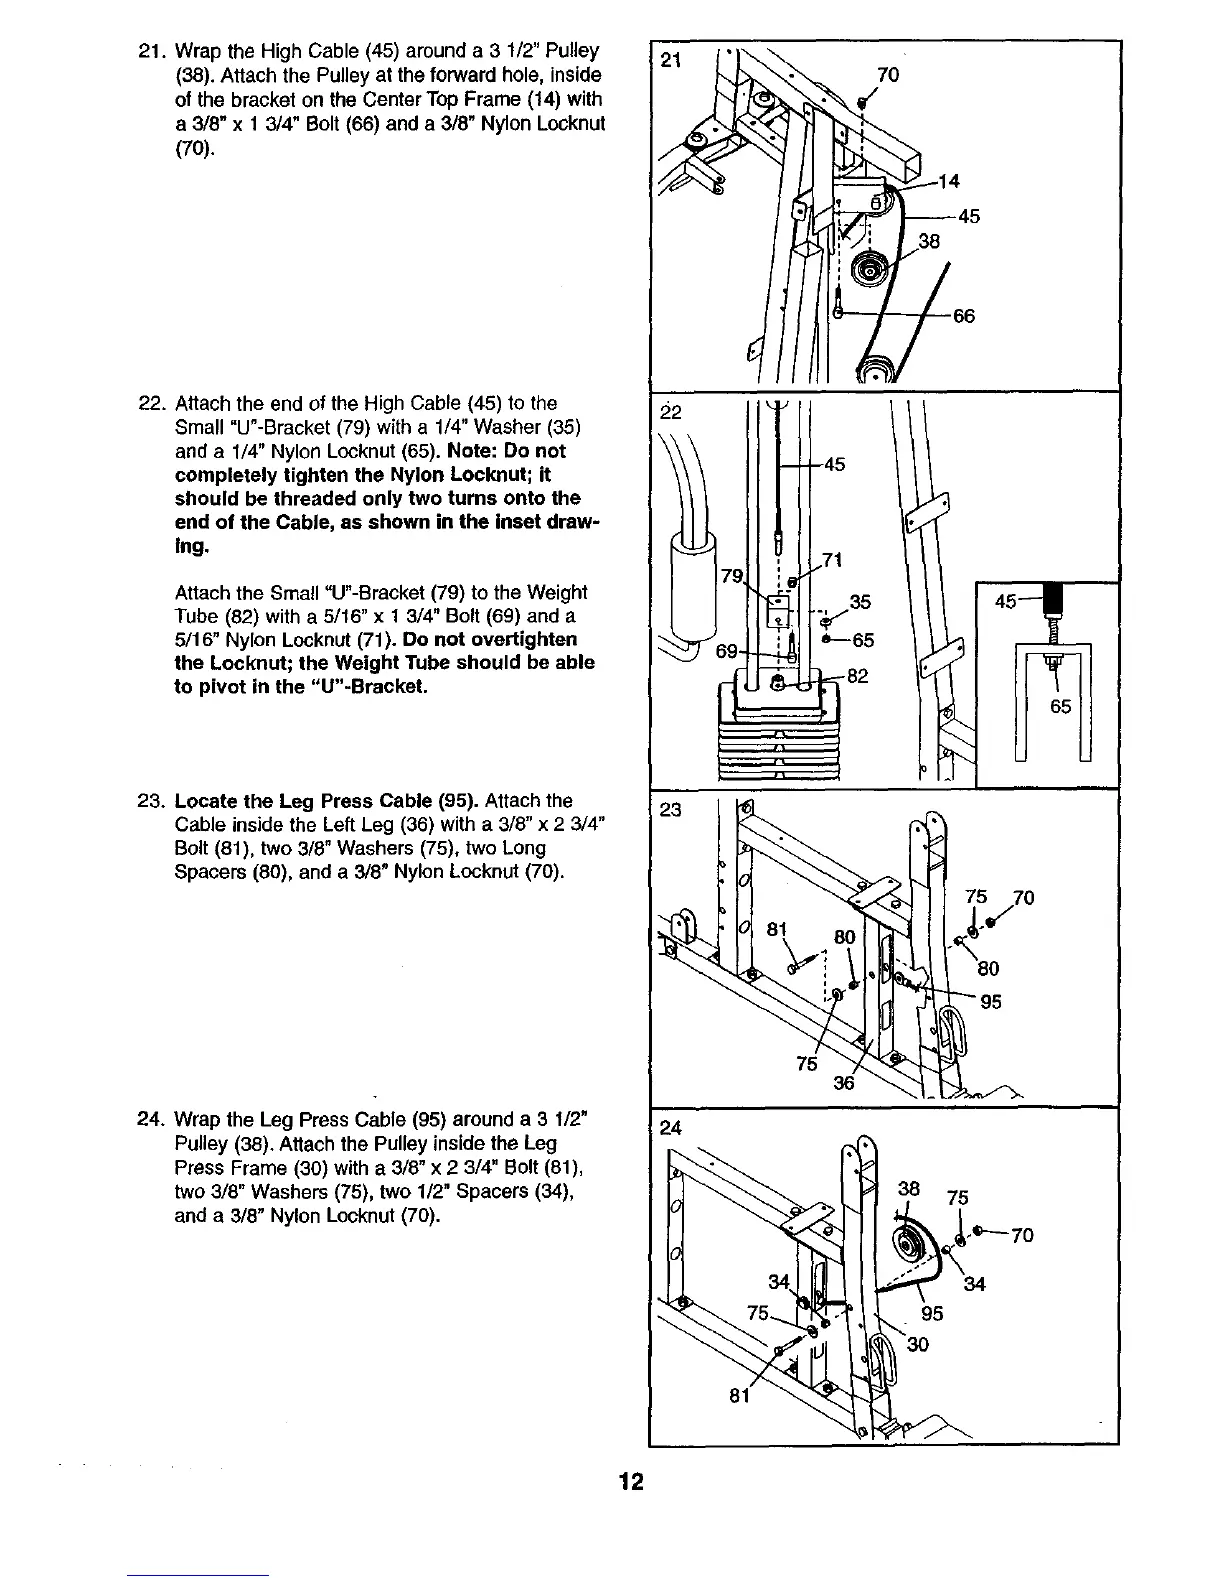
21. Wrap the High Cable (45) around a 3 1/2" Pulley
(38). Attach the Pulley at the forward hole, inside
of the bracket on the Center Top Frame (14) with
a 3/8" x 1 3/4" Bolt (66) and a 3/8" Nylon Locknut
(70).
22. Attach the end of the High Cable (45) to the
Small "U'-Bracket (79) with a 1/4" Washer (35)
and a 1/4" Nylon Locknut (65). Note: De net
completely tighten the Nylon Locknut; it
should be threaded only two turns onto the
end of the Cable, as shown in the inset draw-
Ing.
Attach the Small "U"-Bracket (79) to the Weight
Tube (82) with a 5/16" x 1 3/4" Bolt (69) and a
5/16" Nylon Locknut (71). Do not overtighten
the Locknut; the Weight Tube should be able
to pivot in the "U"-Bracket.
23. Locate the Leg Press Cable (95). Attach the
Cable inside the Left Leg (36) with a 3/8" x 2 3/4"
Bolt (81), two 3/8" Washers (75), two Long
Spacers (80), and a 3/8" Nylon Locknut (70).
24. Wrap the Leg Press Cable (95) around a 3 1/2"
Pulley (38). Attach the Pulley inside the Leg
Press Frame (30) with a 3/8" x 2 3/4" Bolt (81),
two 3/8" Washers (75), two 1/2" Spacers (34),
and a 3/8" Nylon Locknut (70).
22 i _''
1-°
'1
_ ,71
79, i
69- e'-'65
I1
.... ii
°°
I'
45--- I
24
° _.
; 38 75
,, --. _t_._'e'-'- 70
I h
II 30
II
65 ,
I
12