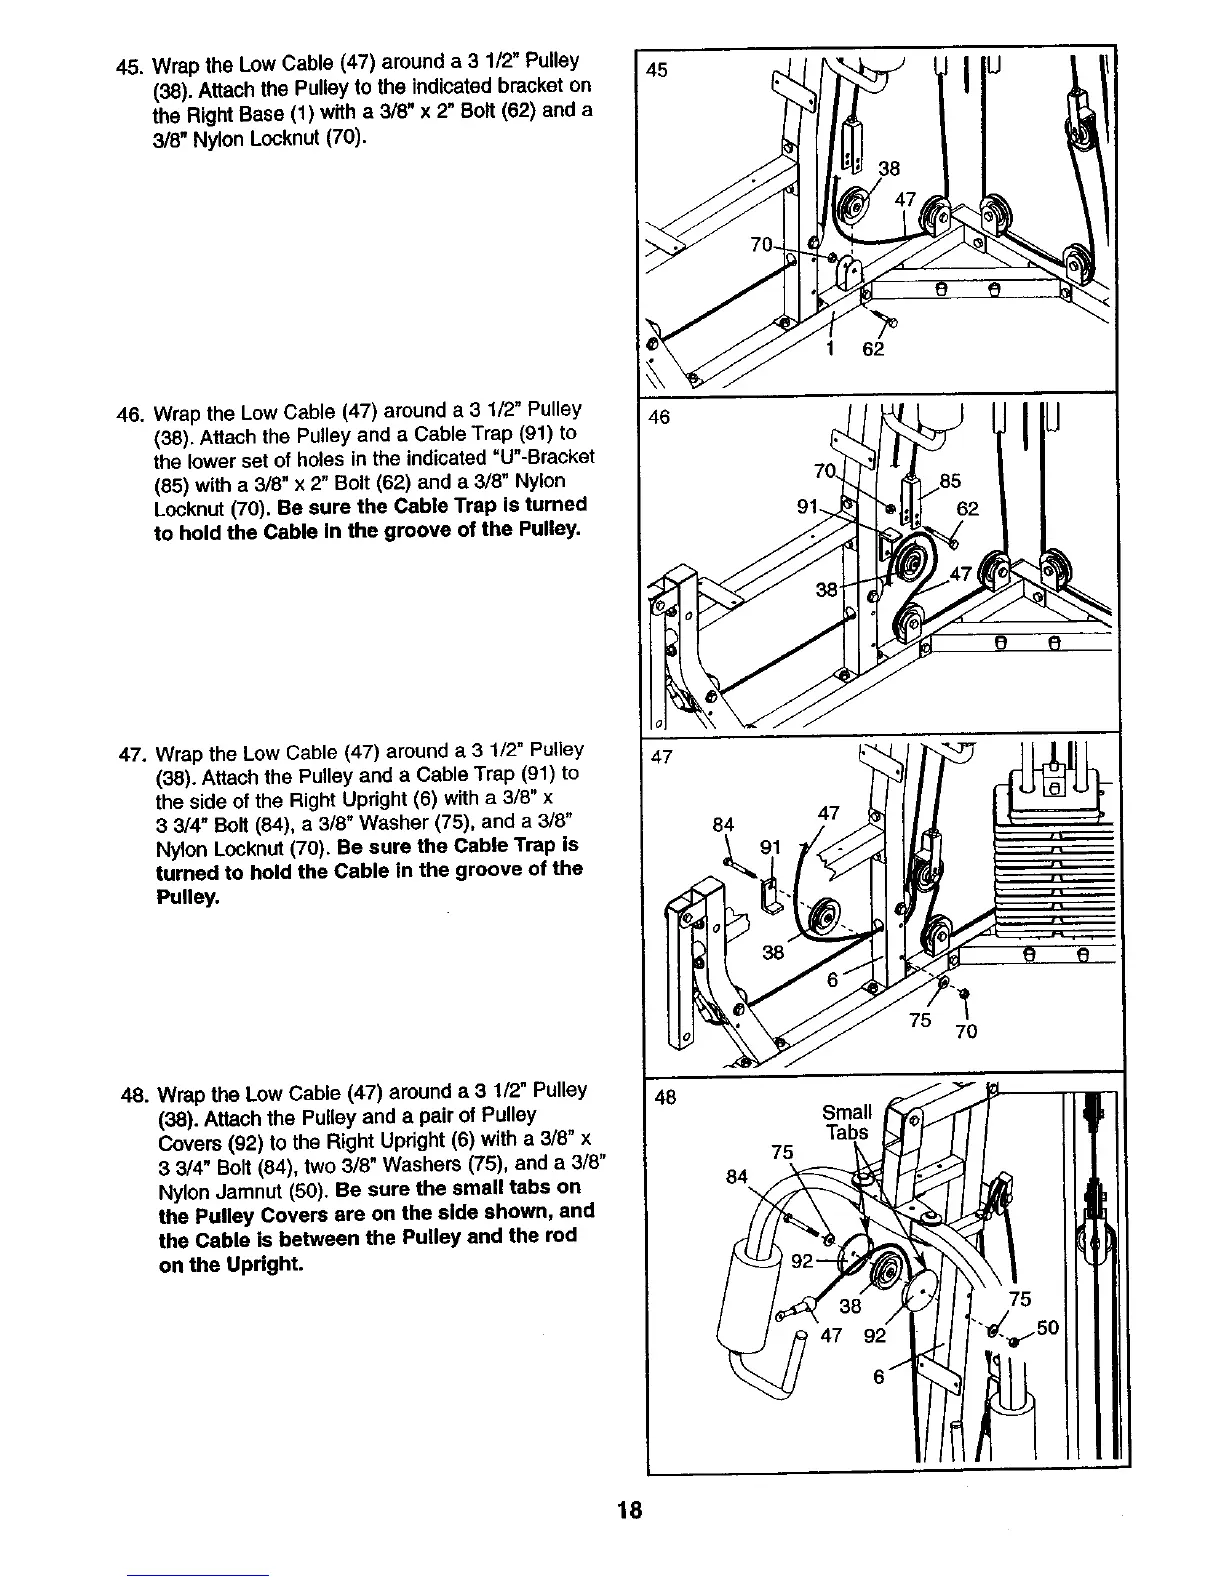
45. Wrap the Low Cable (47) around a 3 1/2" Pulley
(38). Attach the Pulley to the indicated bracket on
the Right Base (1) with a 3/8" x 2" Bolt (62) and a
3/8" Nylon Locknut (70).
46. Wrap the Low Cable (47) around a 3 1/2" Pulley
(38). Attach the Pulley and a Cable Trap (91) to
the lower set of holes in the indicated "U"-Bracket
(85) with a 3/8" x 2" Bolt (62) and a 3/8" Nylon
L0cknut (70). Be sure the Cable Trap is turned
to hold the Cable in the groove of the Pulley.
47. Wrap the Low Cable (47) around a 3 1/2" Pulley
(38). Attach the Pulley and a Cable Trap (91) to
the side of the Right Upright (6) with a 3/8" x
3 3/4" Bolt (84), a 3/8" Washer (75), and a 3/8"
Nylon Locknut (70). Be sure the Cable Trap is
turned to hold the Cable in the groove of the
Pulley.
48. Wrap the Low Cable (47) around a 3 1/2" Pulley
(38). Attach the Pulley and a pair of Pulley
Covers (92) to the Right Upright (6) with a 3/8" x
3 3/4" Bolt (84), two 3/8" Washers (75), and a 3/8"
Nylon Jamnut (50). Be sure the small tabs on
the Pulley Covers are on the side shown, and
the Cable is between the Pulley and the rod
on the Upright.
45 l iu
46
47
84 47
48
Small
/ -3c)
47 92
8 1
75
_-_150
18