3-8
Operation Section 3
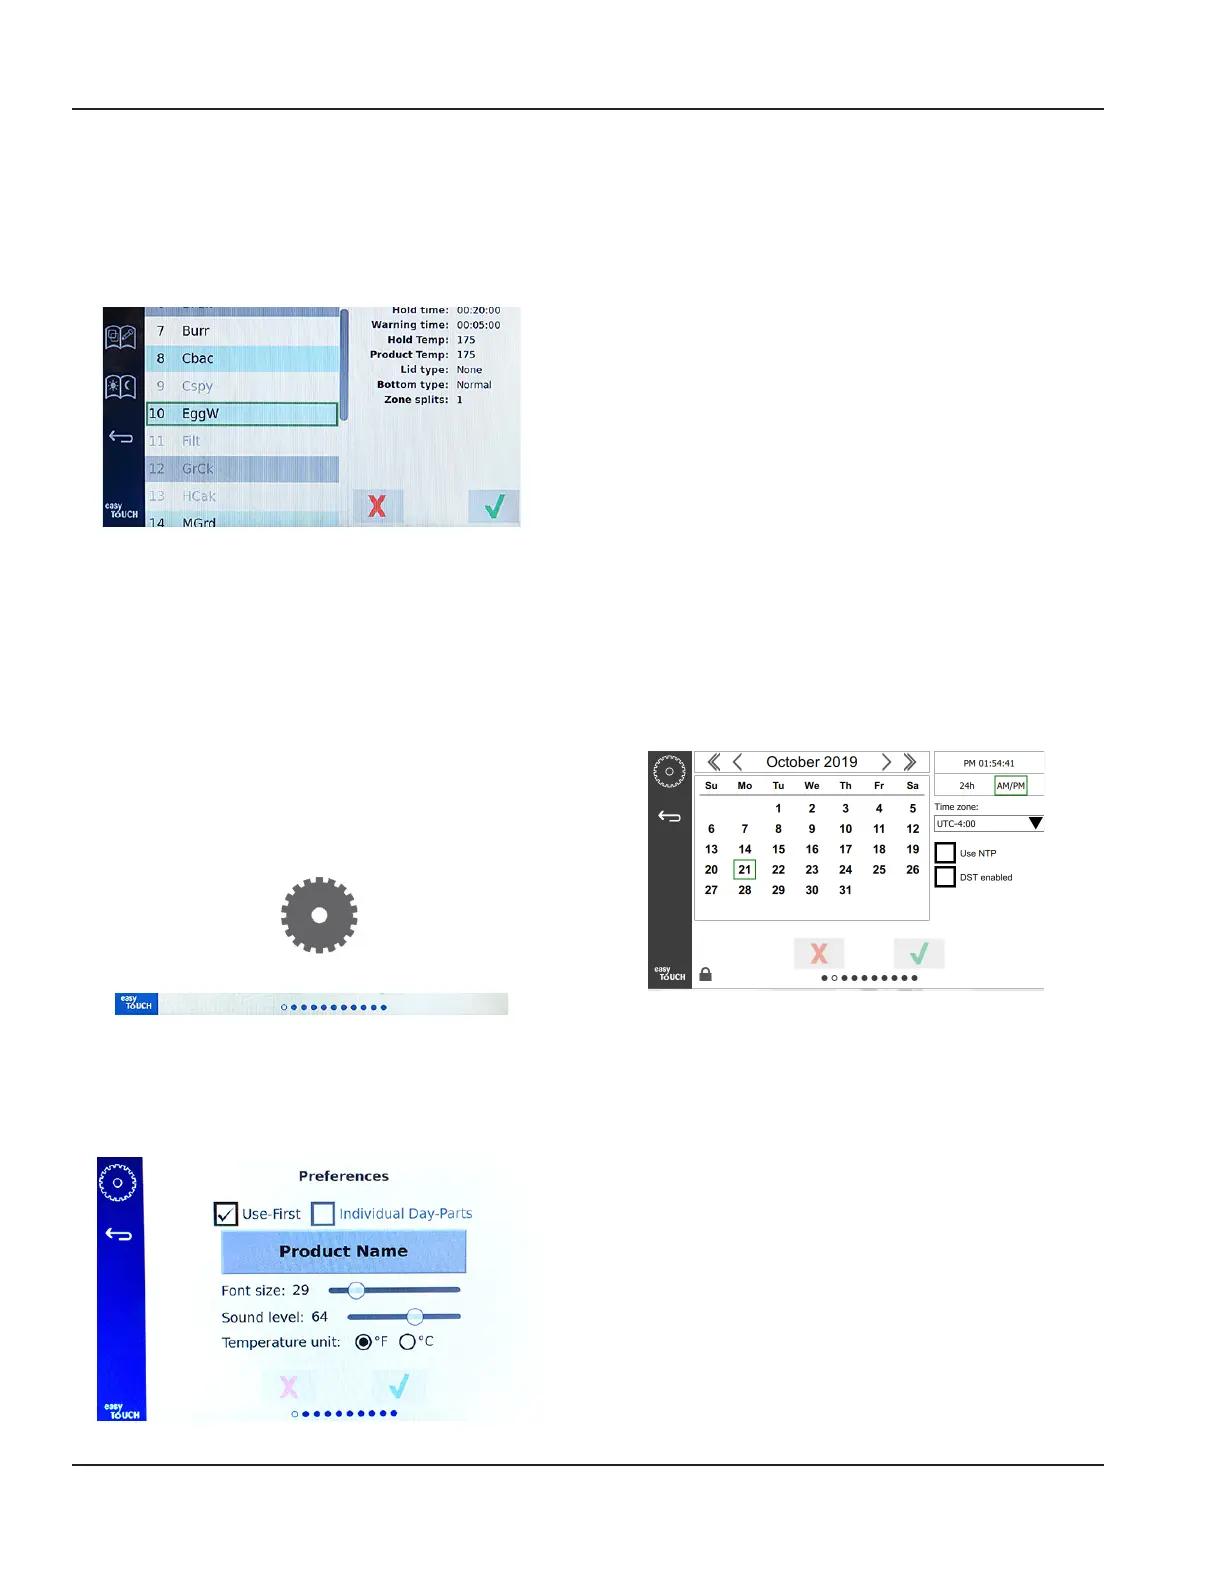
Select a hot holding zone by quickly pressing the empty
zone to add a product or change the product. From the
pop up window select the product to be added to the
zone. Groups can also be added. Zone split and zone
temperatures will eliminate certain products. Products not
available will be grayed out. Select the green check to save
and return.
Selecting A Product For Breakfast
SETTING SCREENS
From the home screen selecting the settings icon brings
up the preferences screen. This is the first of eleven setting
screens. There are eleven solid dots across the bottom
of the service screens, the empty circle represents the
current page. Touch the dots to bring up a menu. Select
and navigate to a specific screen from the menu. Navigate
between the screens by swiping the screen to the right or
left.
Settings Icon
Row of Dots
PREFERENCES SCREEN
• Use First – When checked the first tray of common
product will be highlighted in green, second tray will
be gray until the first tray is gone or time runs out.
Unchecked, both trays of the common product will be
green.
•
• Font size can be adjusted between 24-48.
• Volume can be adjusted between 10-100.
• Temperature unit - Select Fahrenheit or Celsius
• Select the green check to implement changes, red cross
to discard.
DATE & TIME SCREEN
To make changes on the this screen a passcode must be
entered. Select the lock on the bottom left of the screen.
Enter a passcode on the pop-up number pad. If the
passcode is accepted there will be a yellow ring around the
screen.
Date & Time Screen
• If the NTP box is checked and the UHCTHD unit is
connected to the internet , the date and time will be set
automatically. Be sure to set the UTC to the appropriate
setting (i.e. Eastern Standard time is UTC -5:00, Central
Time is UTC -6:00).
If the UHCTHD unit is not connected to the internet or
if the NTP box is unchecked the time and date will need
to be set manually.
• Top right of the screen provides the choice between a
24hr/military and AM/PM civilian time display.
• Select the month and year by the arrow heads and the
date via the calendar.
• If the DST enabled box is checked the time on the clock
will be moved ahead by 1 hour. If the box is checked
and then unchecked the time on the clock will move
back one hour. Proper use of this feature is to check
the box on the first day of daylight savings time and
uncheck the box on the day after daylight savings time
ends.