10
ASSEMBLY
TABLE INSTALLATION
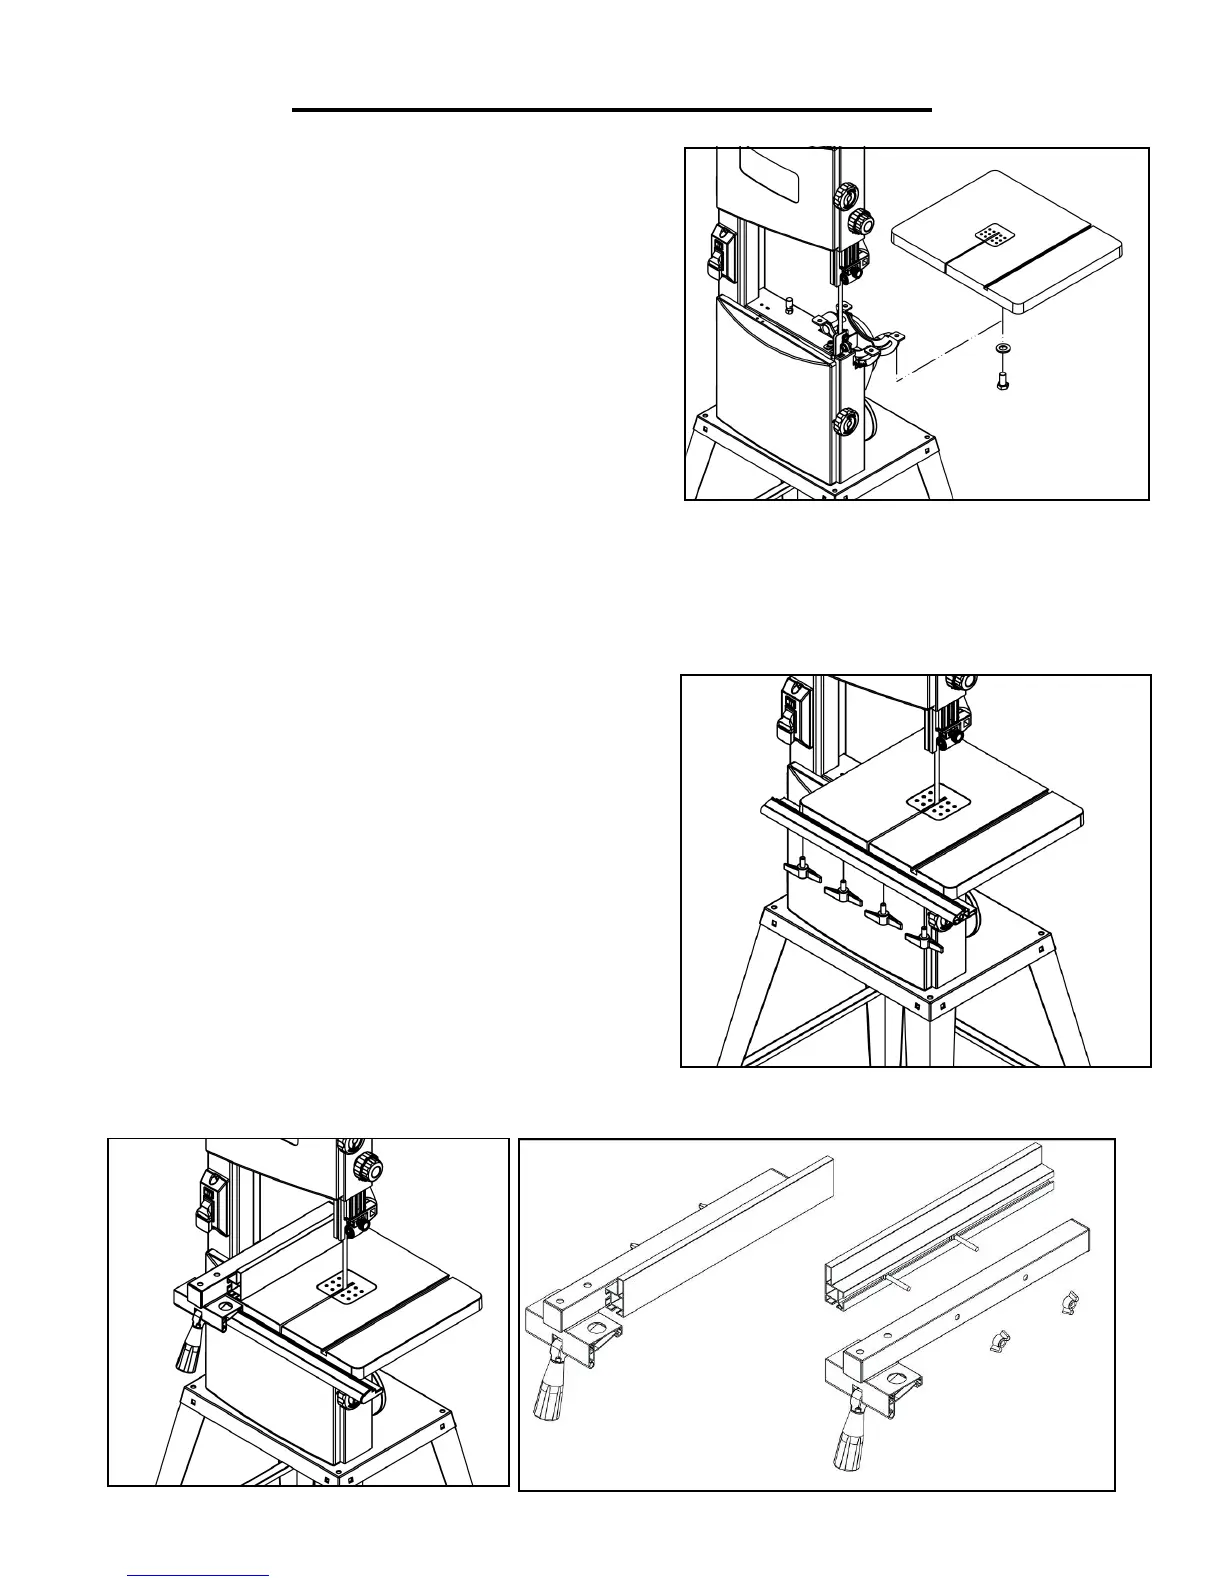
1. Be certain that the slot on the table is aligned with the posi-
tion of the saw blade. (Fig. C)
2. Attach the table to the saw body by using M6X10 hex bolts
and 6mm washers.
NOTE: It is best practice to attach the table in the 0° position
(perpendicular to the blade). If need be, the table can be then
be bevelled in order to better tighten the harder to reach bolts.
A level can be used to achieve maximum accuracy.
1. Secure the rail guide to the edge of the table (perpendicular to the saw’s path) using the rail guide lock knobs, as
shown. (Fig. D)
2. Upon the completion of step one, the rip fence should be able to attach to the table and rail guide without any
fastenings.
3. Attach the rip fence to the back side of the saw table adje-
cent to the rail guide, as shown below, by tightening the fasten-
ing clamp. (Fig. E)
4. The rip fence can be used on either side of the blade, but
the fence will have to be reversed in order to do this.
5. To reverse the rip fence, remove the fence from the rip
fence by loosening the four bolts holding it to the rip fence,
reversing the fence, and reattaching the bolts. (Fig. F)
6. For a wider and flatter fence for thin materials, remove the
fence from the rip fence and reattach it with the flat side facing
downwards.
RAIL GUIDE AND FENCE INSTALLATION
Fig. C
Fig. D
Fig. E Fig. F

 Loading...