88
ADJUSTMENTS
This band saw cuts miter angles anywhere from 0 to 60 de-
grees. To make an adjustment to the cutting angle:
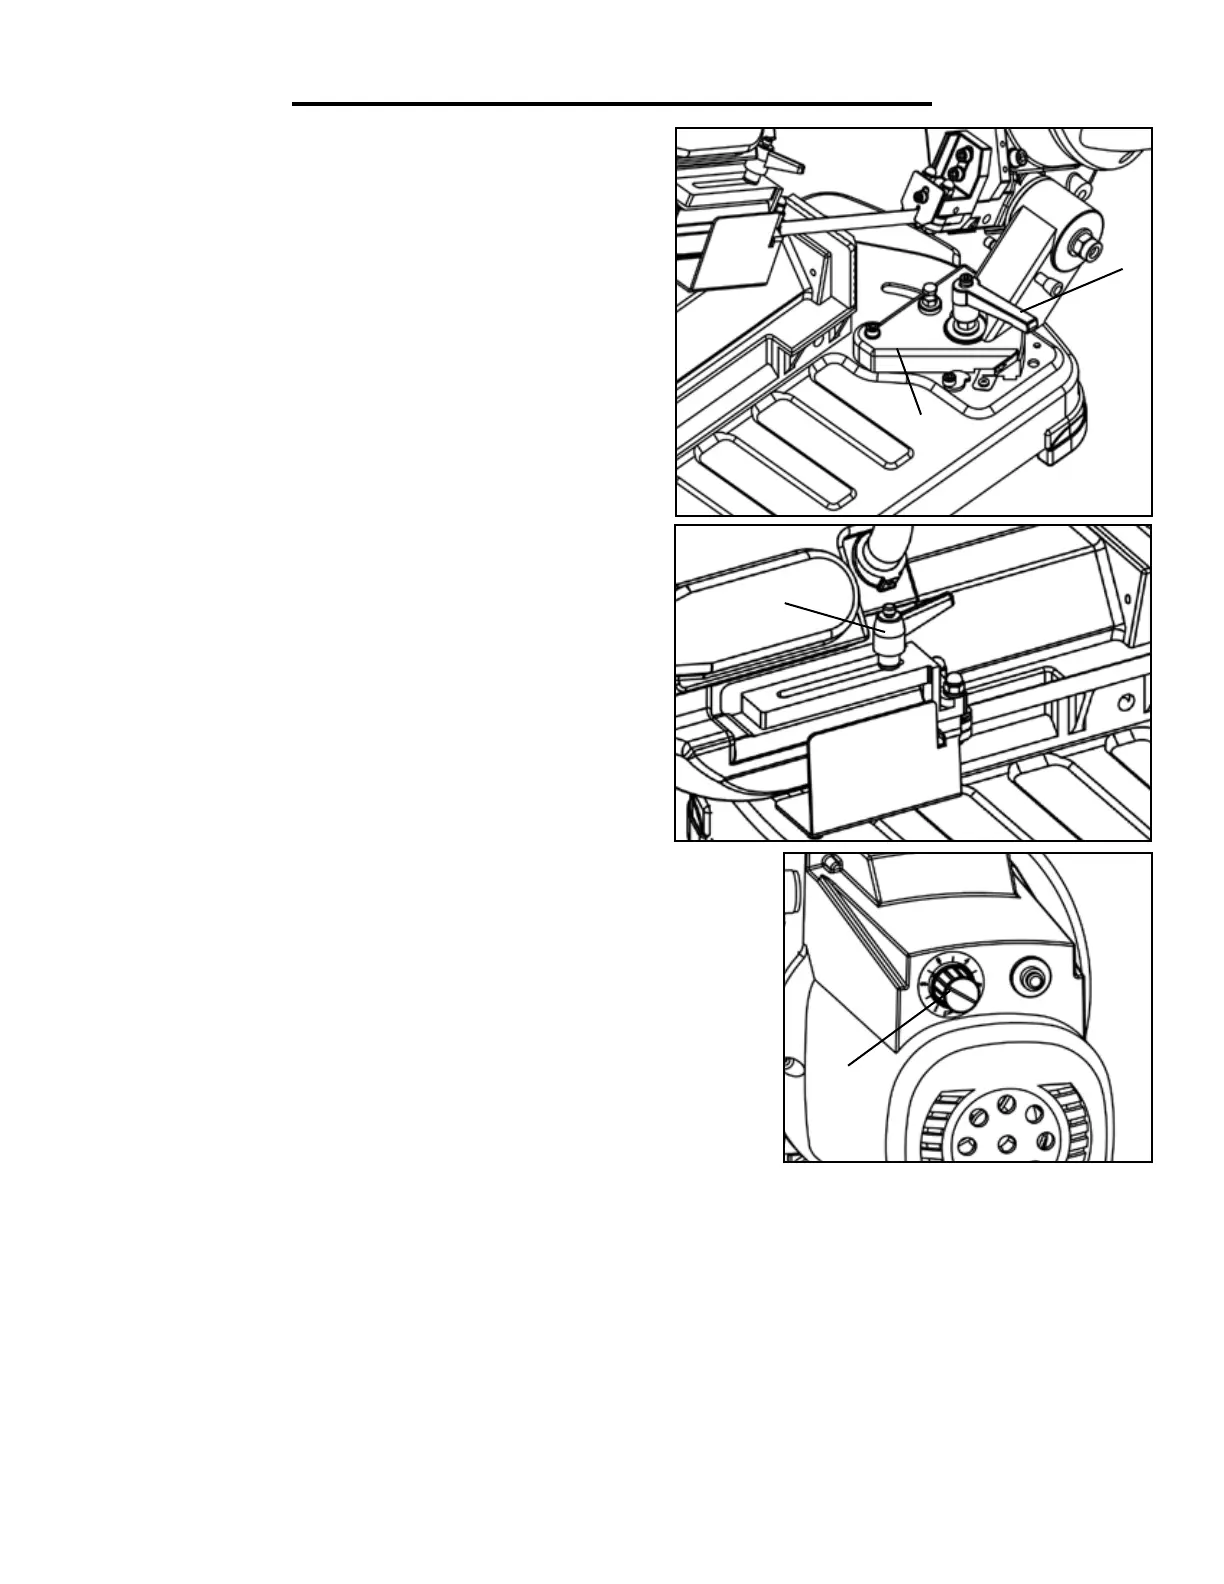
1. Loosen the angle lock handle (Fig. D - 1).
2. Turn the swivel support (Fig. D - 2) until the mark on the
support matches the desired angle on the scale.
3. Tighten the miter locking handle.
NOTE: your saw has 2 positive stops for quick adjustment.
To adjust the position of the positive stops, loosen the sock-
et head cap screw with a 5mm hex wrench, re-position the
stop, and tighten the screw.
Fig. D
1
2
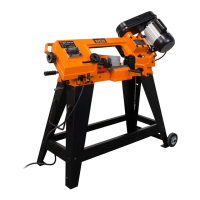
Fig. E
The blade guide must be adjusted before every cut on a workpiece. With-
out proper adjustment, the resulting cut may be unclean or jagged.
1. Loosen the blade guide locking handle (Fig. E - 1).
2. Slide the blade guide to move it closer to the workpiece. Position the
guide bearings as close to the workpiece as possible without interfering
with the cut. Tighten the blade guide locking handle.
1
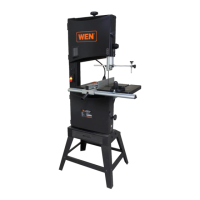
The cutting speed depends on the material being cut. Generally, use a lower speed for ferrous metals or
thicker workpieces, and a higher speed for non-ferrous metals or thinner workpieces. To adjust the speed,
turn the control knob (Fig. F - 1). The speed ranges from 125 to 260 FPM.
For common steel, use a speed between 125 and 180 FPM (settings 1 to 3).
For aluminum or alloy, use the maximum speed of 260 FPM (setting 6).
For pipes, use a speed between 220 and 260 FPM (settings 4 to 6).
1
Fig. F
When setting up your saw for the first time or after installing
a new blade, check to ensure that the stationary blade guide
assembly is properly adjusted.
1. Using a hex wrench, loosen the 2 socket head cap screws
(parts 3975-109 and 3975-110).
2. Adjust the position of the stationary blade guide assembly
so that its side lays flush with the body of the saw.
3. Tighten the screws.