9
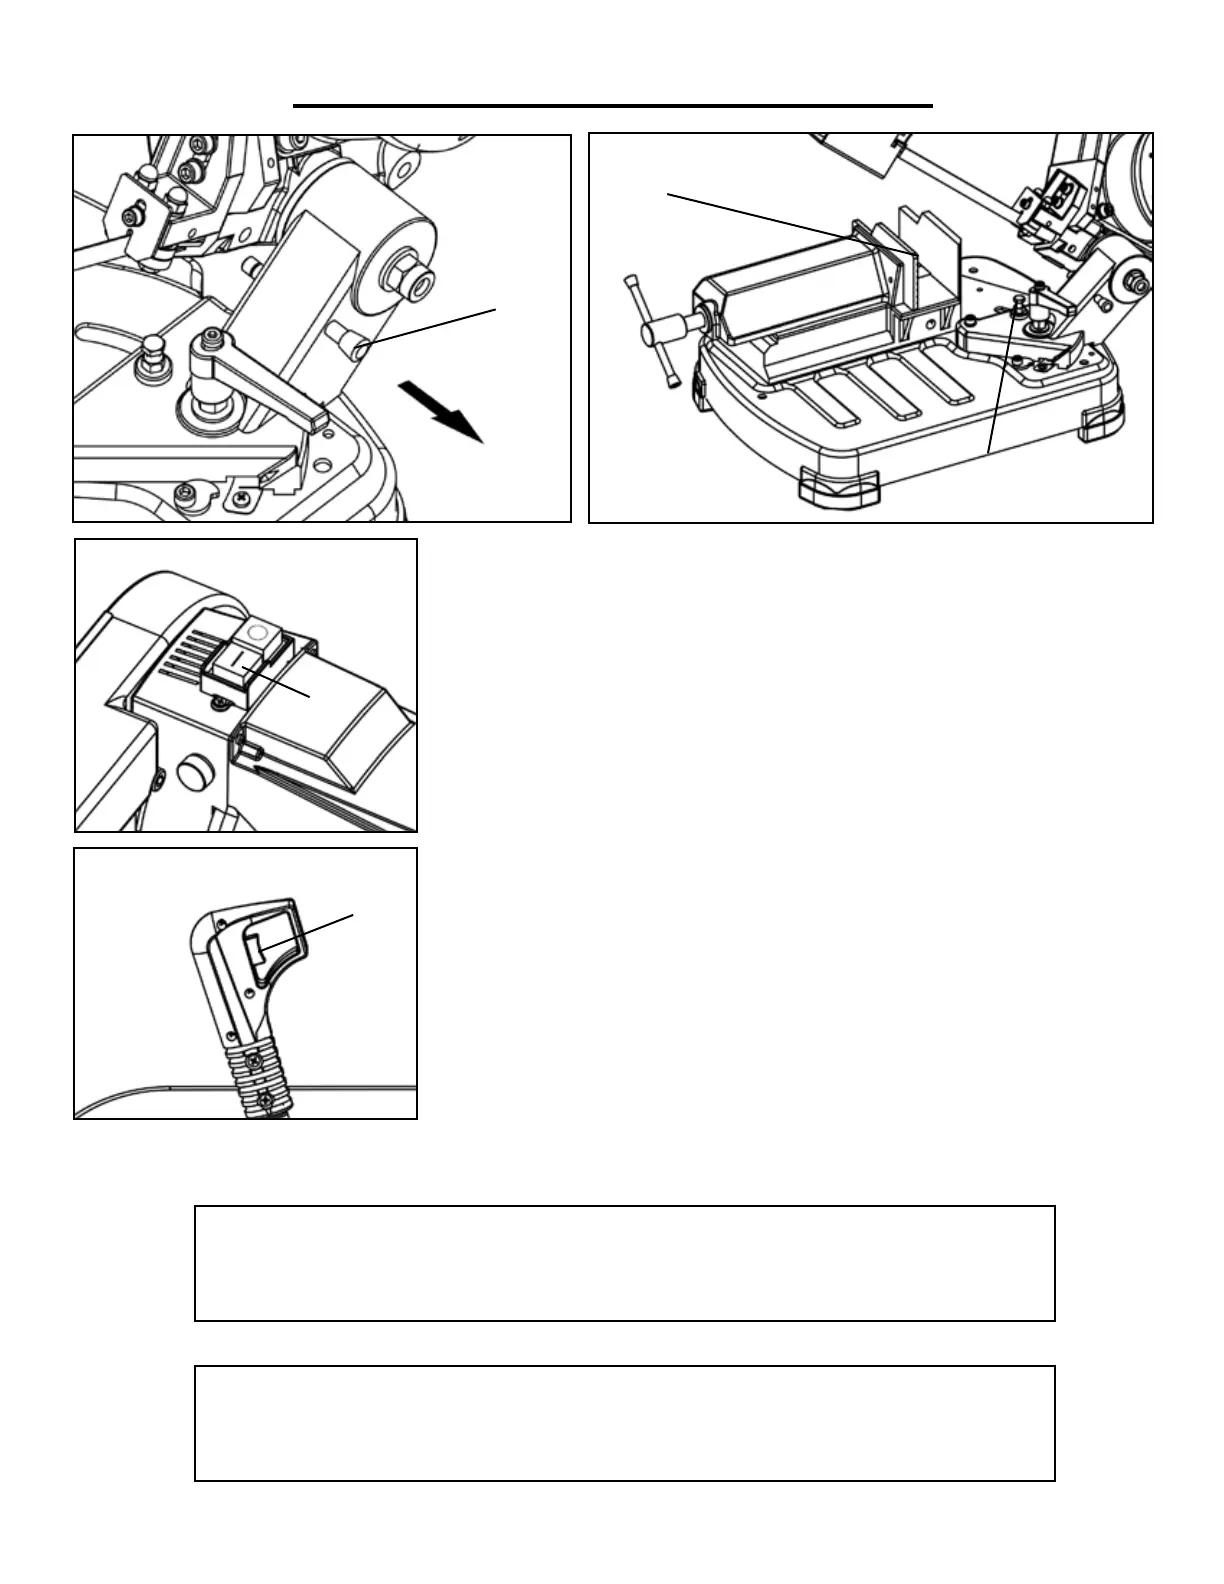
1. Pull out the pin (Fig. G - 1) from the hole in the saw’s body and tilt the
saw to its upper position. Set the blade stop to the desired position (Fig. H
- 2).
NOTE: never adjust the blade stop bolt so that the blade interferes with
any part of the saw. Always check to be sure that the blade will not cut any
part of the saw.
2. Use the vise to secure the workpiece in place (Fig. H - 1). Adjust the cut-
ting speed to the desired rate.
3. Push the green button to turn on the power of the saw (Fig. I - 1). The
power indicator light will turn on, but the blade will not start running yet.
Push the run button (Fig. J – 1) to start the blade running
4. Once the saw blade has come to full speed, gradually lower the ma-
chine’s body downwards until the blade comes into light contact with the
workpiece. Let the saw blade make a small groove along the workpiece to
help ensure a straight cut (particularly with curved or round workpieces).
5. Once initial contact and a groove have been made, apply a small amount
of additional pressure to continue the cut.
OPERATION
1
Fig. G Fig. H
Fig. I
Fig. J
1
1
1
NOTE: For optimal performance, cutting should only occur for 40% of the overall run
time. For example, for every 10 minutes the machine is running, only four of those min-
utes should be under load in order to maximize the performance of the machine
2
WARNING: when cutting magnesium, if using cutting oils, NEVER use water-soluble
cutting oils or emulsions (oil-water mix). The water will greatly intensify any accidental
magnesium chip fire and cause danger.