4-17
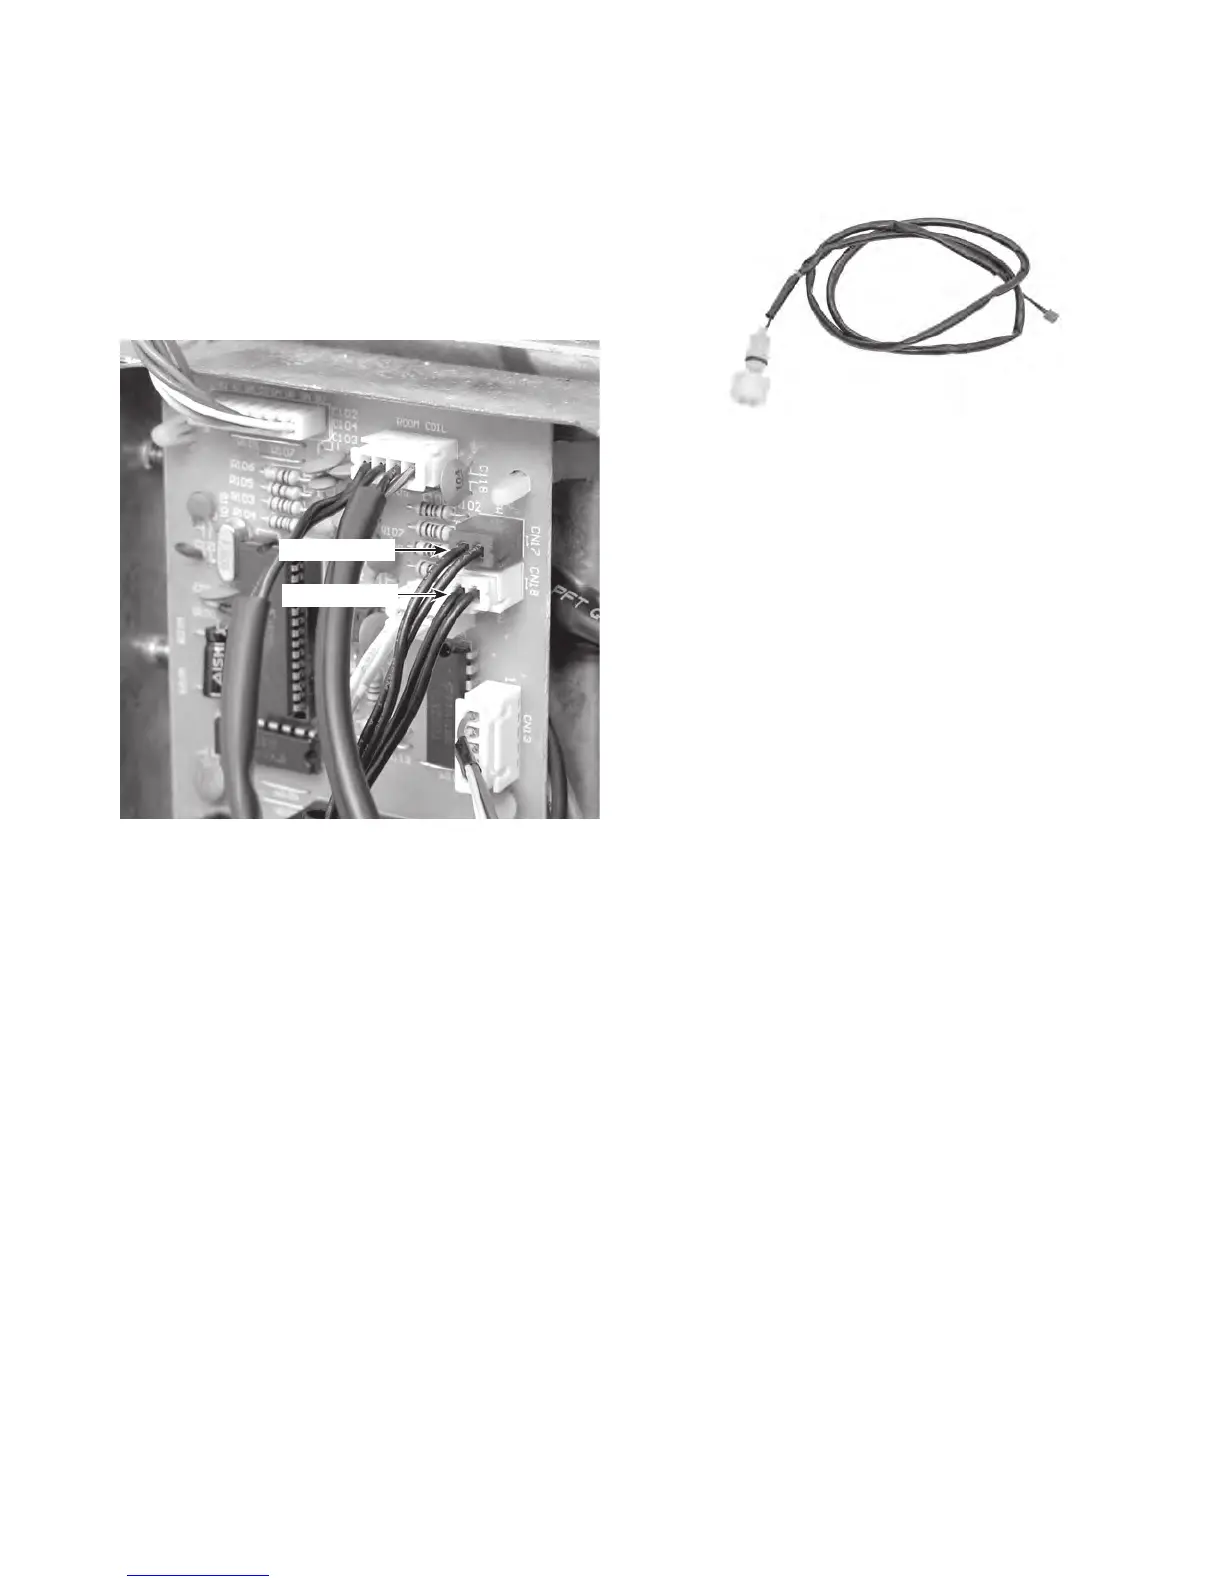
6. Cut the necessary wire ties to remove
the high and low water level switch wires
from the chassis.
7.
Disconnect the high water level switch
connector from the control board at
CN17 (red), or the low water level switch
at CN18 (white).
8.
Pull the water level switch wire through
the mounting plate and remove the
switch.
CN18 (Wht)
CN17 (Red)
Water Level Switch
REASSEMBLY NOTE: Be sure to replace all
of the wire ties that you removed with new
ties, (see page 4-13 for the locations), and
secure the wires neatly together.