4-21
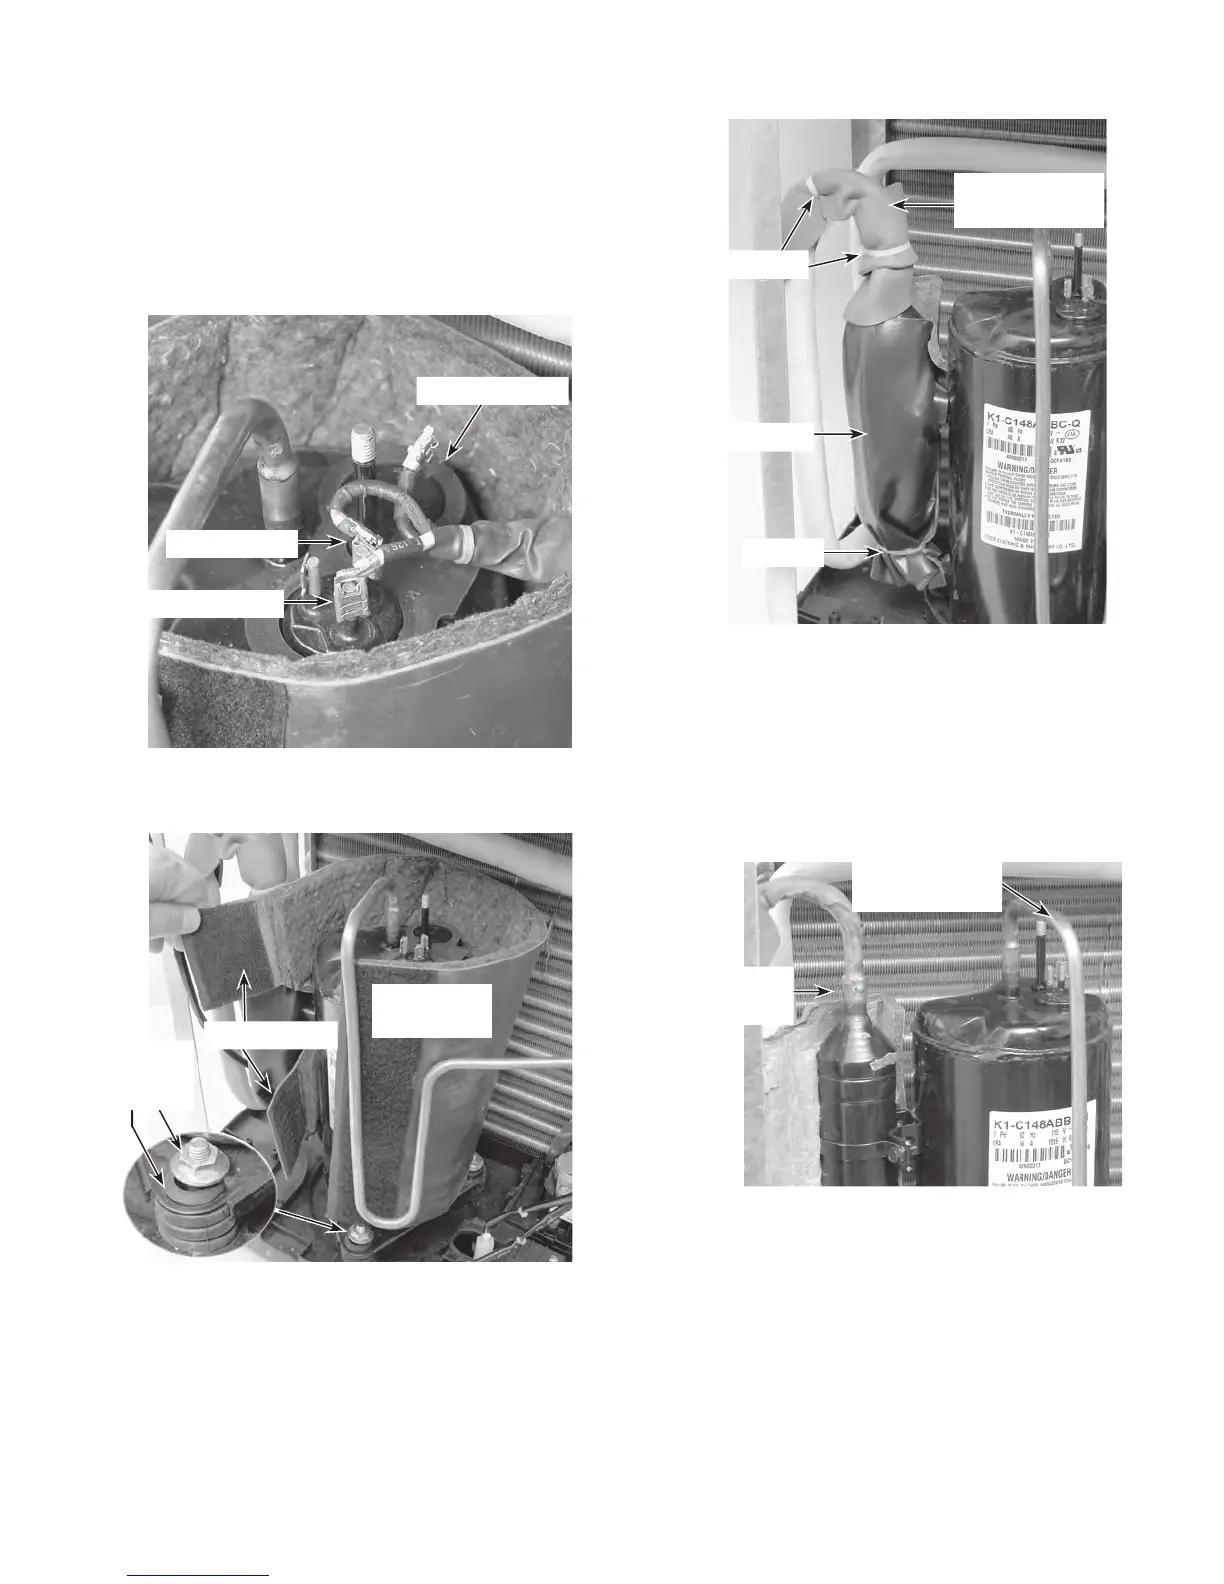
6. To remove the compressor:
a) Remove the overload protector (see
step 5).
b)
Disconnect the black (R) and red (S)
wires from the compressor terminals.
c)
Remove the rubber gasket.
d) Peel back the two Velcro
®
straps and re-
move the cover from the compressor.
g) Braze on an access valve and dis-
charge
the sealed system refrigerant
into an approved refrigerant recovery
system.
h)
Disconnect the high side line from the
compressor, and the suction line from
the accumulator.
i) Remove the three 1/2˝ hex nuts from
the base of the compressor (see the
small inset in the lower left photo).
j)
Lift the compressor off the unit and re-
move
the three rubber shock mounts
from the base.
Black Wire (R)
Red Wire (S)
Compressor
Cover
e) Cut the wire ties from the accumulator
covering, and from the covering on the
suction line to the accumulator (see
the top right photo).
f)
Carefully peel the adhesive covering
off the accumulator and the suction
line to the accumulator.
Wire Ties
Wire Tie
Accumulator
Suction Line
To Accumulator
Suction Line To
Accumulator
High Side Line
To Compressor
Nut &
Shock
Mount
Rubber Gasket
Velcro Straps
REASSEMBLY NOTE: Be sure to replace the
wire ties that you removed with new ties, and
secure the wires neatly together.