English
100 WILO SE 05/2015
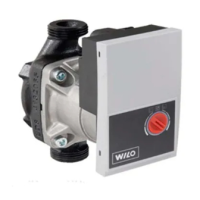
• Before reinstalling the electronic module, pull the new O-ring
between the electronic module and the motor (Fig. 6, Item 1) onto the
contacting chamber.
• Press the electronic module into the contacting of the new motor and
fasten with screws (Fig. 6, Item 7.4) and the tooth lock washers
(Fig. 6, Item 7.5).
NOTE:
The electronic module has to be pressed on as far as possible when it
is installed.
NOTE:
For the thread type, observe the specified screw tightening torque
(see list “Tab. 9: Screw tightening torques” on page 99).
NOTE:
Increased bearing noises and unusual vibrations indicate bearing
wear. Then the bearing has to be changed by Wilo customer service.
10.2.3 Replacing the electronic module DANGER! Risk of fatal injury!
There is a risk of fatal injury from electric shock when working on
electrical equipment.
• Check for absence of voltage and cover or cordon off adjacent live
parts.
• Carry out steps 1 to 5 to dismantle the electronic module in accord-
ance with chapter 10.2 “Maintenance work” on page 98.
• Remove the screws (Fig. 6, Item 7.4) and tooth lock washers (Fig, 6,
Item 7.5) and pull the electronic module off the motor.
• Before reinstalling the electronic module, pull the new O-ring
between the electronic module and the motor (Fig. 6, Item 1) onto the
contacting chamber.
• Press the electronic module into the contacting of the new motor and
fasten with screws (Fig. 6, Item 7.4) and the tooth lock washers
(Fig. 6, Item 7.5).
• Proceed further (restore pump to operational standby) as described in
chapter 10.2 “Maintenance work” on page 98 in reverse order
(steps 5 to 1).
NOTE:
The electronic module has to be pressed on as far as possible when it
is installed.
NOTE:
Observe the measures for commissioning (chapter 9 “Commission-
ing” on page 93).
11 Faults, causes and remedies Have faults remedied by qualified personnel only! Observe the
safety instructions in chapter 10 “Maintenance” on page 97.
• If the malfunction cannot be rectified, consult a specialist technician
or the nearest customer service centre or representative office.
Fault displays For faults, their causes and remedies, see the “Fault/warning mes-
sage” flow diagram in chapter 11.3 “Acknowledge fault” on page 104
and the following tables. The first column of the table lists the code
numbers displayed in the event of a fault.
NOTE:
If the cause of the fault no longer exists, some faults resolve them-
selves automatically.