Installation and operating instructions WILO Mather and Platt – VT pumps 27
8.3 Installing a partially assembled pump
Depending upon column length of the pump it may not be
possible to dispatch the pump in fully assembled condition
and pump needs to be assembled at site in sequential
manner. For installation and assembly purpose suitable
beams are required to be placed across the opening over the
sole plate
• Lower the pump assembly, comprising of suction bell mouth
with suction strainer, casing & diffuser and rising main pipe
(bottom) in the sump with the help of sling and EOT crane.
Support the assembly on Beams placed across the opening
over the soleplate, (If necessary supporting channels must be
held together with help of tie rods).
• Couple first intermediate shafts with pump shaft by solid
muff coupling and split collar arrangement. (Refer Fig: 18 Pg.
No. 12)
• Lift first intermediate rising main pipe and lower on to the top
flange of bottom rising main pipe. Ensure that the ‘O’ rings
have been placed between the flanges. Insert screws & nuts
to tighten them.
• Take first intermediate bearing bracket and lower it on to first
intermediate shaft till it is located in groove of top flange of
bottom rising main pipe. Ensure that 'O' rings are fitted on
both sides of bearing bracket.
Note:
For column size more than 250 NB, fabricated intermediate
bearing spider integrated with column pipe is provided
instead of casted one.
CAUTION:
When strainer is attached to suction side of the pump, care
should be taken so that it should not damage while raising
the assembly in vertical position. Do not allow the suction
end to drag or support the total weight of assembled
pump.
• Slowly raise the whole assembly slightly, comprising of the
bottom rising main pipe and pump assembly, remove
channels and lower the assembly further into the sump till
supporting flanges or lugs of bottom pipe are rested on
channels across the sole plate opening
• Assemble 2nd intermediate shaft to 1st intermediate shaft
through muff coupling
• Take 2nd rising main pipe & lower it slowly with the help
of slings and crane on the bottom rising main pipe. Ensure
that intermediate bearing bracket is located correctly
• Insert bolts and nuts and tighten them properly and
evenly
• Assemble remaining shaft tubes (if provided), rising main
pipes and intermediate shaft is done in same way as
explained in seq. earlier.
• Lift delivery bend and lower on to the top flange of rising
main pipe. Tighten the fasteners. Care must be taken to
have a ‘O’ ring between two flanges
• Raise entire assembly, remove temporary support beams
and lower down till bottom flange of delivery bend rests
on sole plate & fix it with soleplate. Lift delivery bend and
lower on to the top flange of rising main pipe. Tighten the
fasteners. Care must be taken to have a ‘O’ ring between
two flanges
• Raise entire assembly, remove temporary support beams
and lower down till bottom flange of delivery bend rests
on sole plate & fix it with soleplate
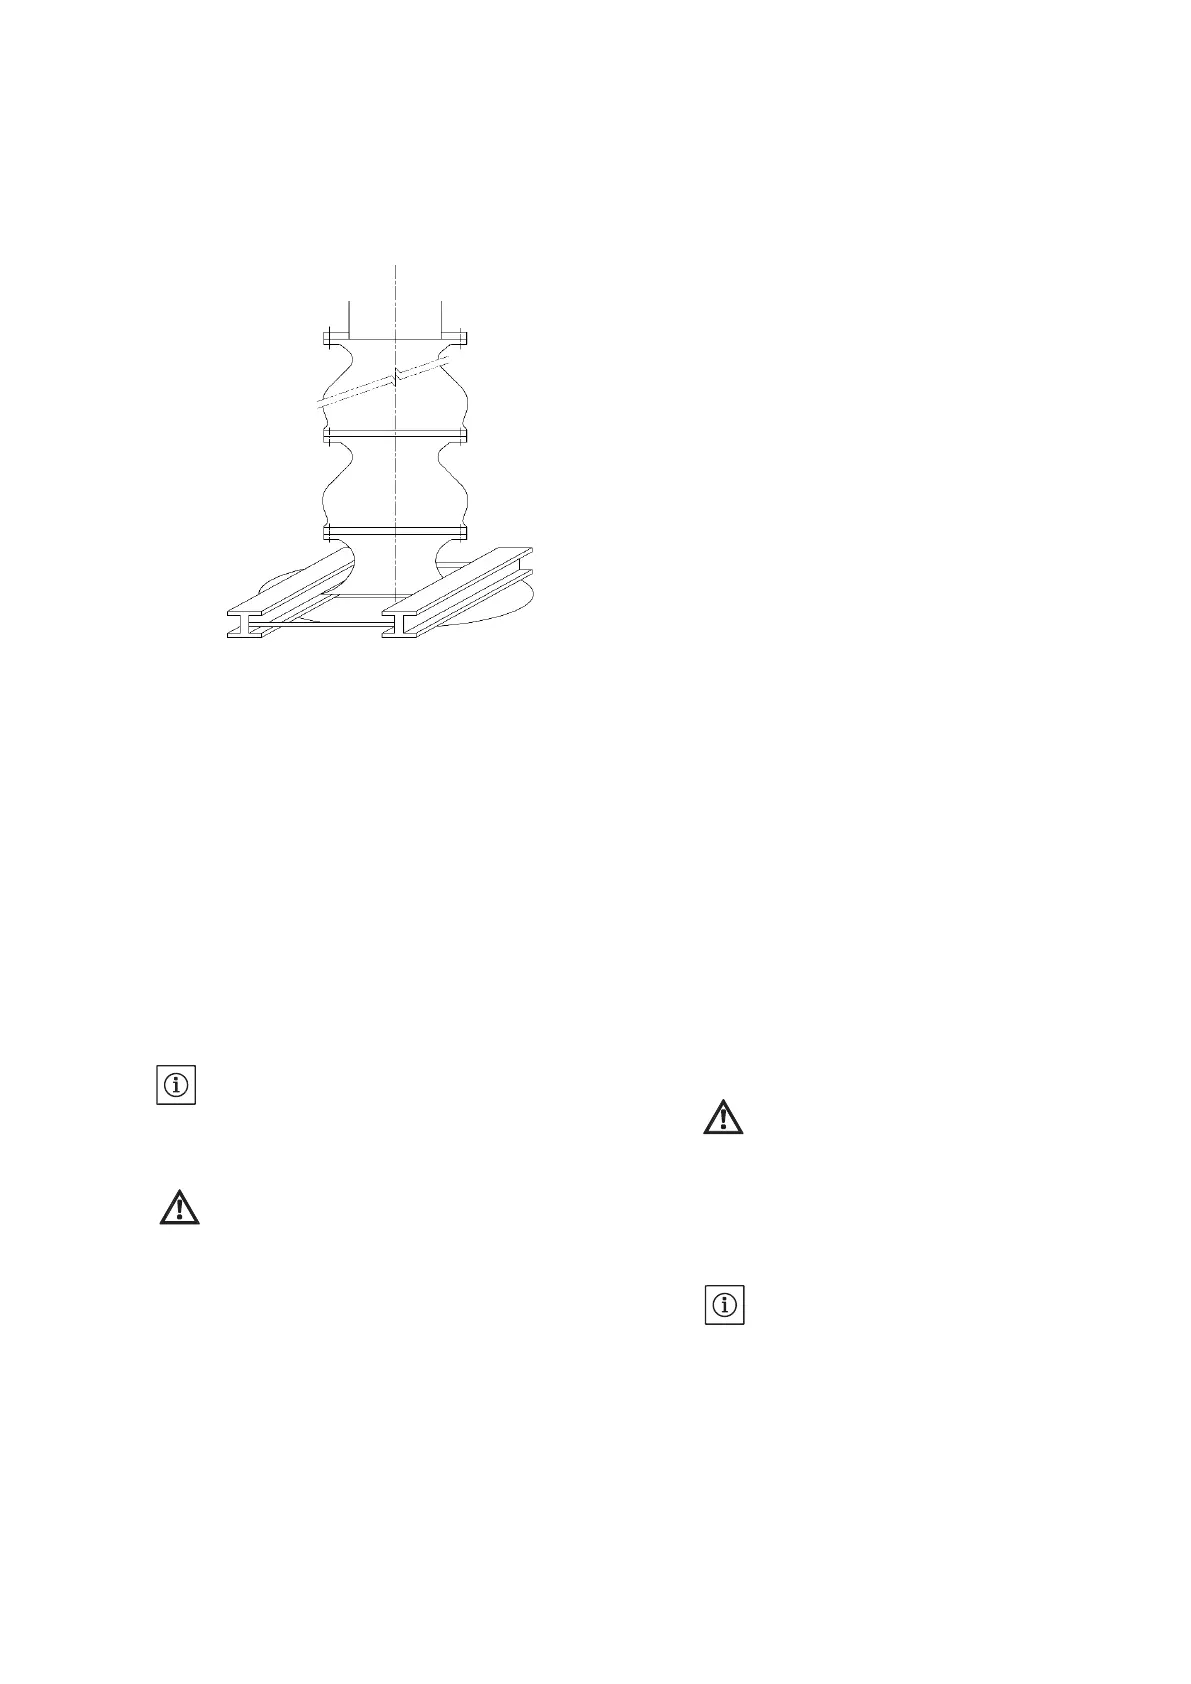
8.4 Stuffing Box Installation (Refer Fig. No.15
Pg. No. 11)
• The stuffing box and gland sleeve should be thoroughly
cleaned and full entry of gland/mechanical seal into
stuffing box must be checked
• Gland packing arrangement - Insert three rings of gland
packing into stuffing box. Check if each ring of packing
length passes round the shaft and meets end to end, the
ends being cut square
• Insert logging ring in the stuffing box. Insert remaining
three rings of gland packing into stuffing box. Each ring
should be pushed into position individually using the
gland. The joint of each ring must be positioned at 180°
from adjacent ring
• Fit gland square with stuffing box and gland nuts should
be screwed up to little more than finger tightness. While
re-packing, if packing is available in complete coil form or
rope form, then the quantity required for immediate use
only should be taken. Each ring of requisite length should
be cut so that it passes once round the shaft and meets
end to end, the ends being cut square.
CAUTION! Risk of material damage!
Packing should be handled with care and it should not
be allowed to pick-up dust or abrasive foreign matter
by coming into contact with floors or dirty benches. It
is bad practice to hammer packing to facilitate the
insertion.
Note:
For Mechanical Seal installation, refer seal
manufacturer’s instruction manual.