13| P a g e
11. Install the forward bow board and joiner (model specific).
If your CRRC was purchased with a forward bow section or if you ordered as a
separate the forward bow section as a separate accessory item, center and snuggly
seat the smallest joiner onto the widest edge of the forward bow board, and place
the combination forward into the boat.
12. Install the second (middle) bow board and joiner.
Center and snuggly seat the 2
nd
smallest joiner onto the widest edge of the second
bow board, center the board relative to bow board one, and press the combination
forward into the bow board one joiner.
13. Install the third bow board and joiner.
Center and snuggly seat the appropriate joiner onto the widest edge of the third
bow board (board with cutout for fill valves), and place the combination forward
into bow board two. Verify that the position of the keel fill valves fits in the
cutout of bow board three. Reposition as necessary.
14. Final install of bow boards to thrustboard.
Ensure all air is out of the keel. Ensure the main floorboard and thrustboard
assembly is pressed all the way to the stern, and minimal gaps between boards,
joiner and joiner gussets. Verify the forward bow board assembly (3 boards, 3
joiners) is centered and pressed forward. While kneeling to the rear of the
thrustboard, use the Floorboard Pry Levers (P5.8 CRRC only). The bow board
assembly and the rear joiner of bow board three should be resting on the
thrustboard. Slide the Pry Levers under the aluminum joiner (Pry Lever handle to
the stern) and slowly lift up and lever the handles towards the bow. Wing Tip: As this motion takes place, it helps to
have a partner gently step/press down on bow three board and slightly lift the forward edge of the thrustboard.
Caution: Excessive force should not be required if proper technique is used. Be careful with over torqueing the edges
of the levers against the floorboard edges. Included in the install kit are Pry Plates to protect the edges of the
floorboards, if needed.
15. Install Hardware (4 bolts & washers).
Place washer on top of attachment flap hole and insert threaded bolt into
thrustboard hole. Hand tighten only.
Inflating the Boat
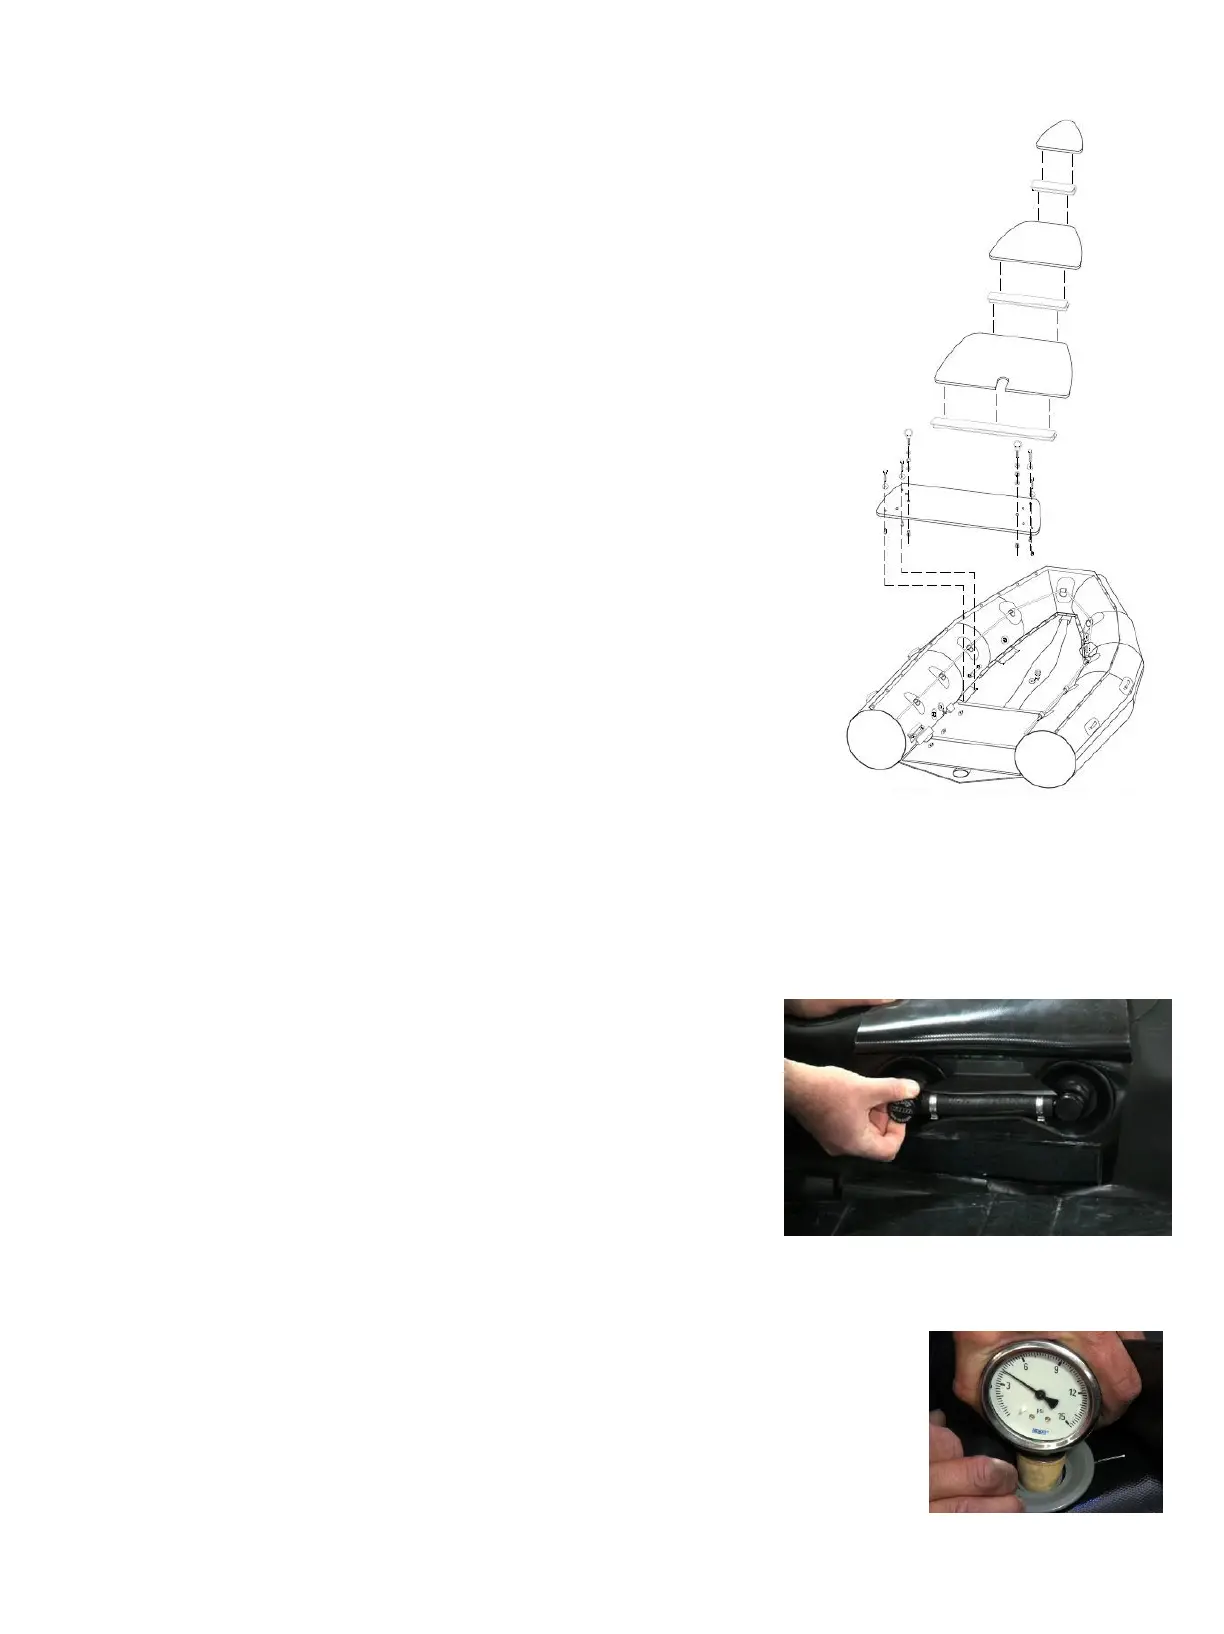
1. Open all cross-over valves, making sure that the “pin” sets into the
notch.
2. Insert inflation hose. Insert the inflation hose fitting into valve stem in stern chamber (either port or starboard).
3. Fully inflate the MBT chambers until PRVs release and reseat.
4. Inflate keel to 4.4 psi. When the MBT has been fully inflated, if the auto inflation hose is
connected to the keel, it too will inflate to the MBT pressure. The keel will be the last to
inflate, so it may need a few extra seconds to match the pressure of the MBT. KEEL DOES
NOT HAVE A PRV. If you independently inflate the keel and do not use the auto fill hose,
be careful not to overinflate the keel.
 Loading...