Component Access & Removal
4-15
RANGES && RRANGETOPS
Oven Door Components:
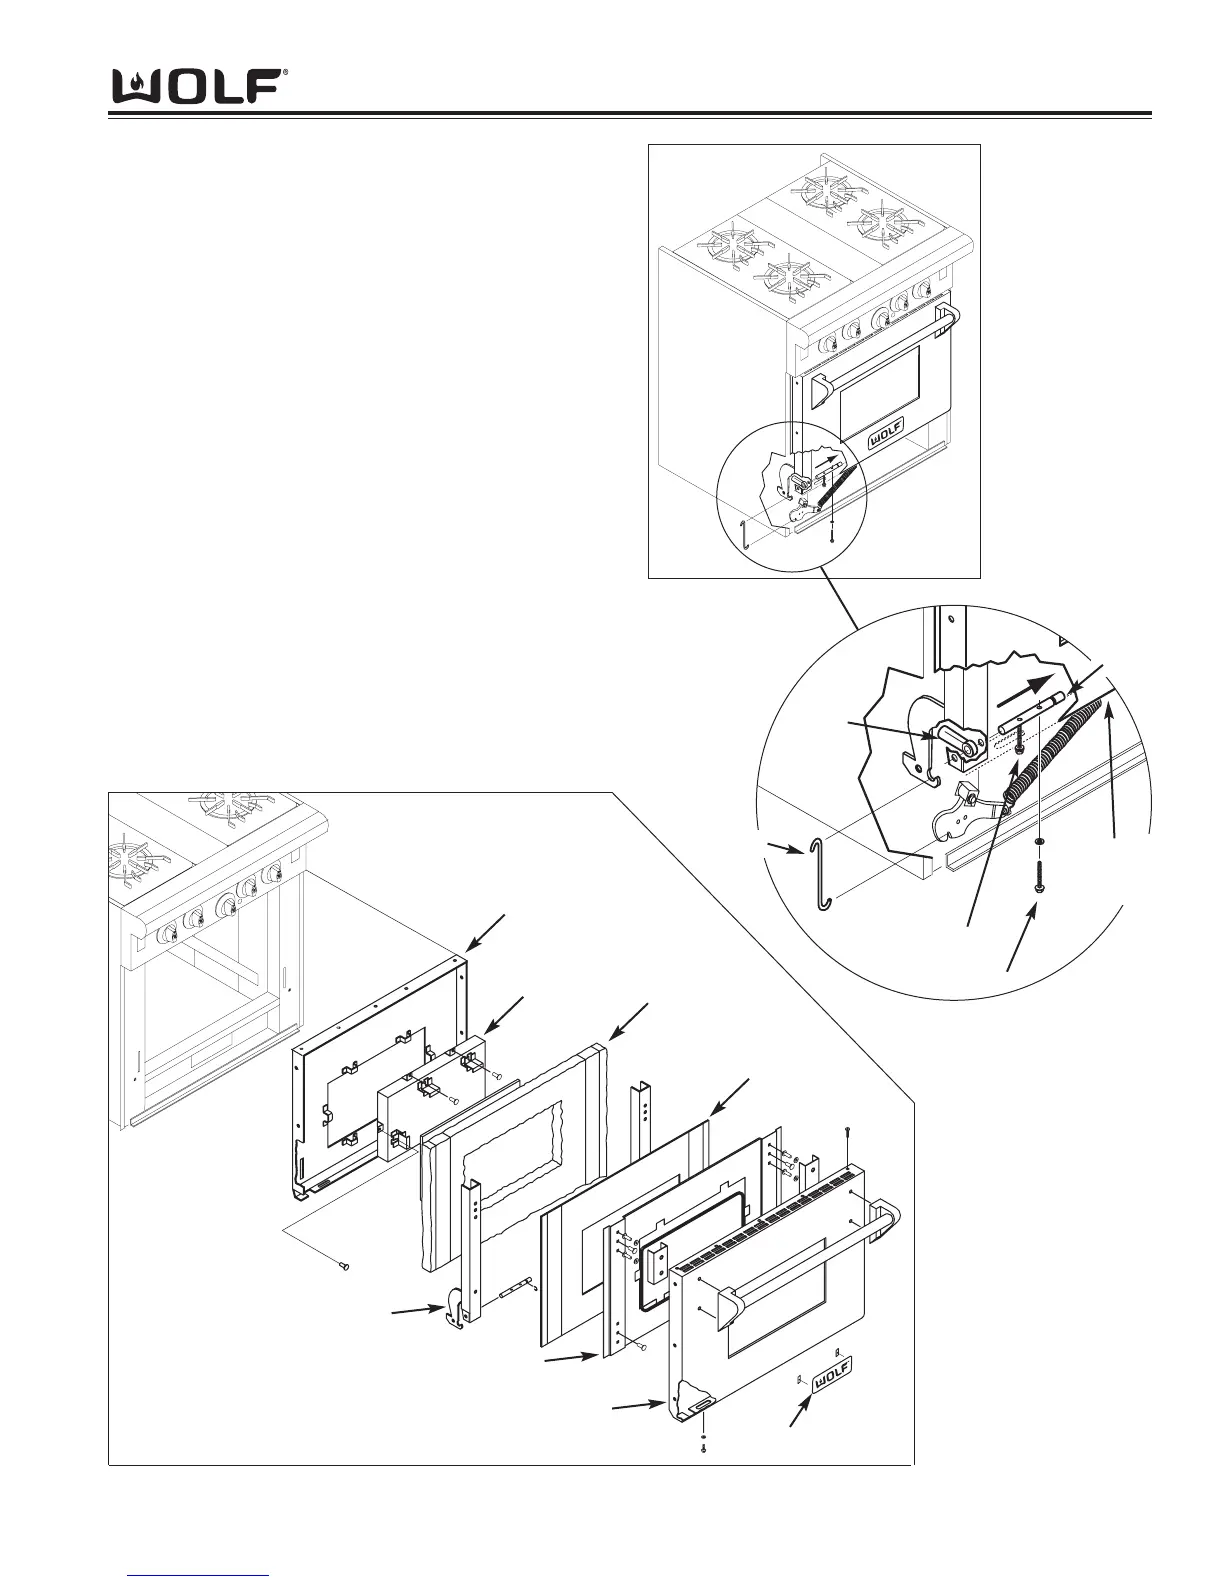
Oven Door Assembly Removal
To remove an oven door, first relieve the tension of the
door spring using a channel-lock wrench between the
eye-bolt and mounting bracket. Squeze the chanel-lock
wrench together and remove the nut from the eye-bolt.
Now, when the channel-lock wrench is released, the
spring tension will be relieved and the S-hook can be
removed from the rocker arm and the door hinge.
Then, extract the two inner hinge pin mounting screws
from the bottom of the door and loosen, but do not
remove the two outer hinge pin mounting screws. (See
Figure 3-35) After loosening the screws, disengage the
hinge pin from the trunion bolt using a nut-driver to slide
the two outer hinge pin mounting screws towards the
center of the door. Now, lift the door assembly off of
the unit. (See Figure 3-35)
Disassembling Oven Door
If it is necessary to access or remove any of the com-
ponents that make up the door assembly, extract all of
the screws around the edge of the door and pull the
door skin from the liner. This will allow removal of all
door assembly components. (See Figure 3-36)
Figure 3-35.
Door Assembly
Removal
Figure 3-36. Disassembling Oven Door
S-Hook
Trunion
Bolt
Inner Screw
Outer Screw
Liner
Window
Insulation
Hinge & Support
Spacer
Skin
Logo
Paper
Insulation