SETUP & OPERATION
Top cutter
3
3-5 EGdoc021023
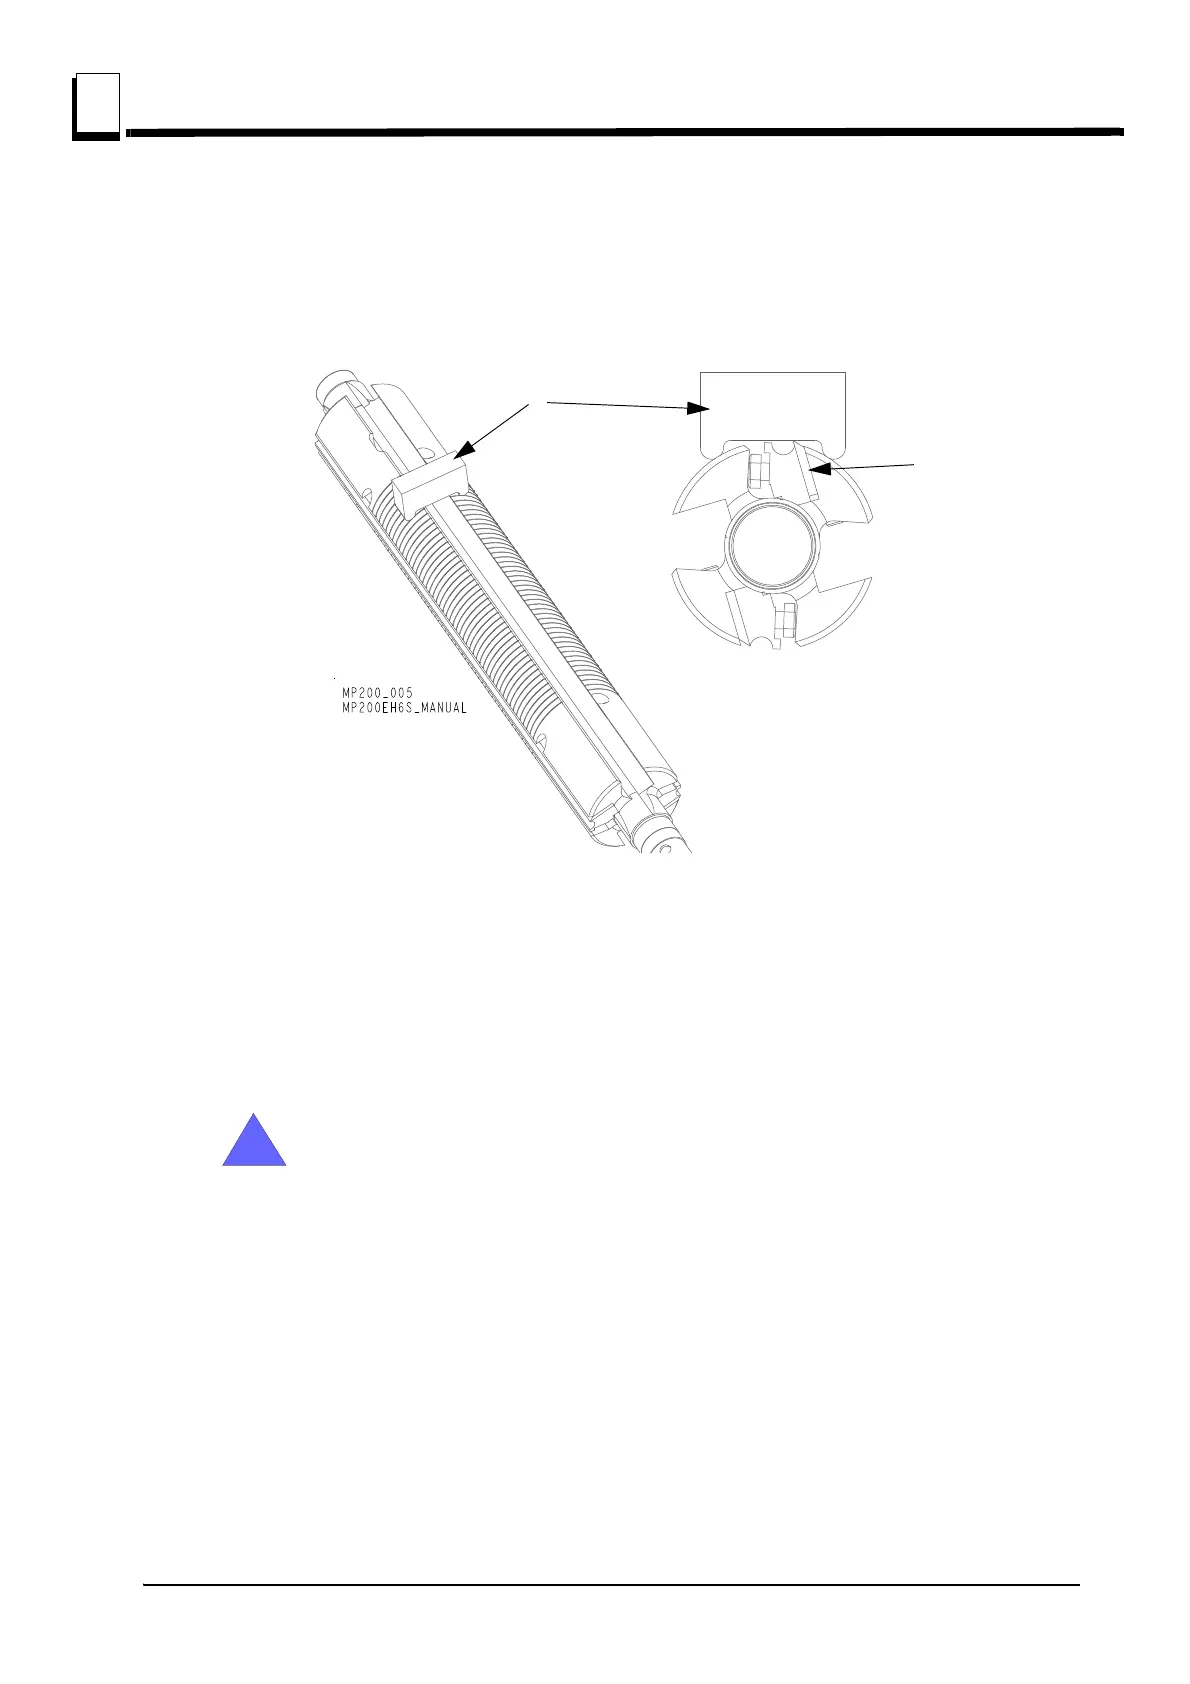
ADJUSTING THE PLANING KNIVES
Adjust planing knives (A) so they are on the same level and about 1 mm above the planer table. To
adjust knives use the aluminium block (B), delivered together with planer/moulder (it is in the part’s
bag on the planer table).
See figure 3-3.
Loosen the chip breaker's lock screws and place the adjustment block above the knife first on the left
side of the cutter and next on the right side. Adjust the knife up or down until the knife touches the
block. (It can be adjusted also with magnetic adjusting tool. See magnetic adjustment tool manual).
Tighten knife locking bolts counterclockwise. First tighten slightly bolts starting from outside of the
cutter, to the middle. Next tighten them.
IMPORTANT! After top cutter bushing cover adjustment or changing
planer thickness, scale indicator should be calibrated.
After adjusting or replacing planing knives:
Check that no tools have been left in the planer.
Check that all screws have been sufficiently tightened.
Check that the cutters can rotate freely before the safety cover is closed.
Review the safety instructions!
FIG. 3-3