SETUP & OPERATION
Top cutter
EGdoc021023 3-4
3
3.2.2 Top cutter
DANGER! Before you open the safety doors on the planer, ensure that
the power is switched off and that the cutters are not rotating.
WARNING! Use protective gloves, particularly when you need to
loosen screws that are tightly fastened, or when you are tightening
screws (see safety instructions).
WARNING! Beware of the planer knives. It is extremely easy to cut
yourself on these, even with the slightest touch.
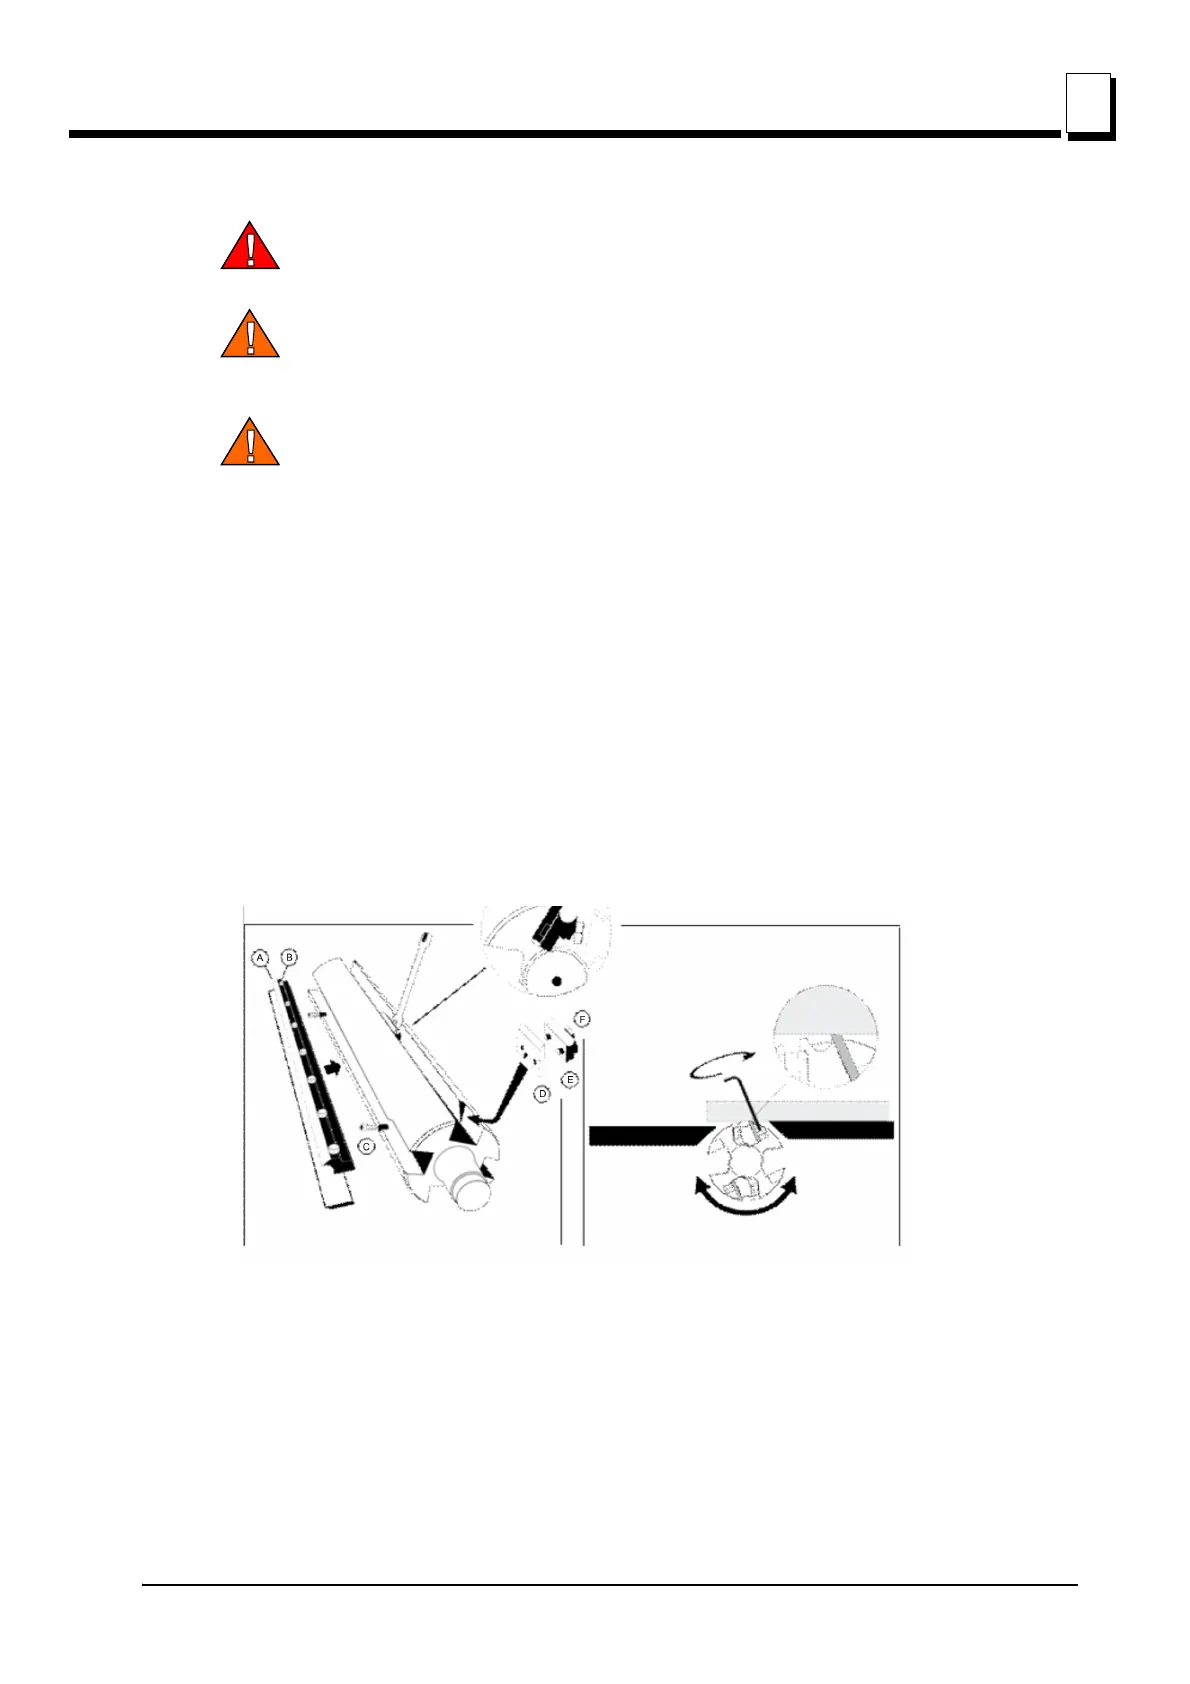
SETTING THE CUT OF THE TOP CUTTER
The planing thickness is adjusted with the planing table crank (189). The set thickness can be read
on the indicator (109) on the machine stand. The indicator must be calibrated. Plane some wood and adjust
the top cutter to the correct height. Loosen the cover. The ring above the indicator has a stop screw. Turn the
ring so that it shows desired planing height.
The top cutter is fixed to the cover and hung at both ends. Two planing knives are mounted in two
cutter sockets in the vertical cutter (planer knife 400 mm HSS).
Remaining two planing or moulding knives can be mounted in two other, empty cutter sockets.
DISASSEMBLING, ASSEMBLING AND GRINDING PLANING KNIVES
See figure 3-2.
The planing knife is disassembled by loosening the chip breaker's (A) lock screws (B) and then
unscrewing the planing knife with adjuster screws (C).
GRINDING THE PLANING KNIVES
Always grind the knives in pairs, so they are the same height, min. 15 mm, otherwise vibrations could
occur in the cutter. The grinding angle must be 38 degrees.
FIG. 3-2