Home
Woodward
Controller
EGCP-2
Installation Manual
Woodward EGCP-2 - Installation Manual
144 pages
Manual
Specs
Ask a question
To Next Page
To Next Page
Loading...
Installation (Set Builder) Manual
EGCP-2
Engine Generator Control Package
8406-115, 150–300 Vac PT Input, 9–32 Vdc
8406-116, 50–150 Vac PT Input, 9–32 Vdc
Manual 26076 (Revision F)
2
Table of Contents
Main Page
default chapter
3
Table of Contents
3
Regulatory Compliance
7
Electrostatic Discharge Awareness
8
Chapter 1. General Information
9
Introduction
9
Control Electrical Ratings
9
Chapter 2. Control Overview
10
Introduction
10
Figure 2-1. EGCP-2 Interface Connections
12
Operator Interface
13
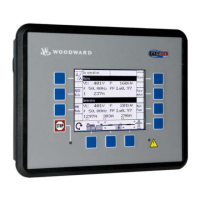
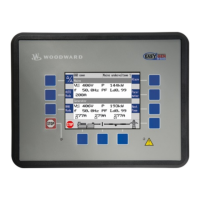
Figure 2-2. Operator Interface
13
Hardware
17
Environmental Specification
18
Physical Specification
18
Accessories
18
Figure 2-3. Physical Outline with Dimensions of EGCP-2
19
Chapter 3. Electrical Installation and Specifications
20
Electrical Connections
20
Figure 3-1. Cageclamp Termination Blocks (Example Photos)
20
Figure 3-2. Recommended Single Point Grounding Scheme
21
Figure 3-3. Wiring Diagram for EGCP-2
23
Input Power
24
Figure 3-4. Dip Switch Location
24
Potential Transformer (PT) Inputs
25
Figure 3-5. Three Wire Delta PT Connection for EGCP-2
25
Figure 3-6. Four Wire WYE PT Connection
26
Figure 3-7. Utility / Local Bus PT Wiring for Delta and Wye Configuration
27
Figure 3-8A. Utility/Local Bus Single PT Wiring for Delta and WYE Configuration (Two Relay)
28
Figure 3-8B. Utility/Local Bus Single PT Wiring for Delta and WYE Configuration (Single Relay)
28
Figure 3-9A. PT Wiring Relationships for Generator, Bus, and Utility Inputs
29
Figure 3-9B. PT Wiring Relationships for Generator, Bus, and Utility Inputs
30
Figure 3-10A. PT Wiring Relationships for Generator, Bus, and Utility Inputs
31
Figure 3-10B. PT Wiring Relationships for Generator, Bus, and Utility Inputs
32
Current Transformer (CT) Inputs
33
Figure 3-11. Current Transfer Wiring Diagram for EGCP-2
33
MPU (Speed) Input
34
Figure 3-12. Wiring Diagram for MPU Input
34
Process Import/Export Input
35
Figure 3-13A. Wiring Diagram for Process Import/Export Input
35
Figure 3-13B. Connecting a KW Transducer Signal to Multiple EGCP-2S
35
Coolant Temperature and Oil Pressure Inputs
36
Figure 3-14A. Wiring Diagram for Pressure Inputs
36
Figure 3-14B. Wiring Diagram for Temperature Inputs
37
Speed Bias and Voltage Bias Outputs
38
Discrete Inputs
39
Figure 3-15. Wiring Diagram for Speed Bias and Voltage Bias Outputs
39
Relay Outputs
41
Figure 3-16. Wiring Diagram for Typical Discrete I/O Connections
41
Figure 3-17. Example of the Mains Breaker no Output Connected to Close the Mains (Utility) Breaker (ENERGIZE to CLOSE)
42
Figure 3-18. Example Using the NC Output to Control the Mains (Utility) Contactor (ENERGIZE to OPEN)
43
Figure 3-19. Example of the Generator Breaker Close no Output Connected to Close the Generator Breaker (ENERGIZE to CLOSE)
44
Figure 3-20. Example Using the no Contacts to Control the Generator's Contactor (ENERGIZE to CLOSE)
44
Figure 3-21. Example Using the no Contacts to Control the Mains Breaker Trip (Open) Coil (ENERGIZE to OPEN)
47
Figure 3-22. Example Using the NC Contacts to Control the Generator Breakers Open Coil (DE-ENERGIZE to OPEN)
48
Figure 3-23. Generator Breaker and Contactor Close and Open Logic
48
AC Inputs
50
DC Inputs and Outputs
50
Discrete Inputs
51
Discrete Outputs
51
Communication Ports: RS-485 & RS-422 (1 Each)
52
Hardware Connections
52
Figure 3-24. RS-422 Communications
53
Inter-Control Communications (RS-485 Network)
54
Figure 3-25. RS-485 and RS-422 Termination Diagrams
54
Alarms and Shutdowns
55
Figure 3-26. RS-485 Inter-Control Communications
55
Chapter 4. Operational Description : Single N O Parallel
58
Figure 4-1. Single no Parallel Application
60
Figure 4-2A. Single no Parallel Overview Flow Diagram
62
Figure 4-2B. Single no Parallel Overview Flow Diagram
63
Figure 4-3. Single no Parallel Prime Power
64
Chapter 5. Operational Description : Single Unit Parallel
65
Figure 5-1. Single Unit Parallel Application
67
Figure 5-2A. Single Unit Parallel Overview Flow Diagram
69
Figure 5-2B. Single Unit Parallel Overview Flow Diagram
70
Figure 5-2C. Single Unit Parallel Overview Flow Diagram
71
Chapter 6. Operating Mode: Multiple no Parallel
72
Figure 6-1. Multiple Unit no Parallel Application
74
Figure 6-2A. Master Multiple Unit no Parallel Overview Flow Diagram
76
Figure 6-2B. Master Multiple Unit no Parallel Overview Flow Diagram
77
Figure 6-3A. Slave Multiple Unit no Parallel Overview Flow Diagram
78
Figure 6-3B. Slave Multiple Unit no Parallel Overview Flow Diagram
79
Figure 6-3C. Slave Multiple Unit no Parallel Overview Flow Diagram
80
Chapter 7. Operating Mode: Multiple Parallel
81
Figure 7-1. Multiple Unit no Parallel Prime Power Application
83
Figure 7-2. Multiple Unit Parallel Standby Power Application
84
Figure 7-3. Multiple Unit Parallel Peak Shaving Application
85
Figure 7-4A. Master Multiple Parallel Process Control Flow Diagram
87
Figure 7-4B. Master Multiple Parallel Process Control Flow Diagram
88
Figure 7-4C. Master Multiple Parallel Process Control Flow Diagram
89
Figure 7-4D. Master Multiple Parallel Process Control Flow Diagram
90
Figure 7-4E. Master Multiple Parallel Process Control Flow Diagram
91
Figure 7-4F. Master Multiple Parallel Process Control Flow Diagram
92
Figure 7-4G. Master Multiple Parallel Process Control Flow Diagram
93
Figure 7-4H. Master Multiple Parallel Process Control Flow Diagram
94
Figure 7-5A. Slave Multiple Parallel Process Control Flow Diagram
95
Figure 7-5B. Slave Multiple Parallel Process Control Flow Diagram
96
Figure 7-5C. Slave Multiple Parallel Process Control Flow Diagram
97
Figure 7-5D. Slave Multiple Parallel Process Control Flow Diagram
98
Figure 7-5E. Slave Multiple Parallel Process Control Flow Diagram
99
Figure 7-5F. Slave Multiple Parallel Process Control Flow Diagram
100
Figure 7-5G. Slave Multiple Parallel Process Control Flow Diagram
101
Figure 7-5H. Slave Multiple Parallel Process Control Flow Diagram
102
Figure 7-5J. Slave Multiple Parallel Process Control Flow Diagram
103
Figure 7-5K. Slave Multiple Parallel Process Control Flow Diagram
104
Figure 7-5L. Slave Multiple Parallel Process Control Flow Diagram
105
Figure 7-5M. Slave Multiple Parallel Process Control Flow Diagram
106
Figure 7-6. Generator Start Sequence
107
Figure 7-7. Generator Stop Sequence
108
Figure 7-8. Generator Breaker Close Sequence
109
Figure 7-9. Generator Breaker Close Sequence
110
Figure 7-10. Generator Breaker Close Sequence
111
Figure 7-11. Main Breaker Open Sequence
112
Figure 7-12. Mains Breaker Close Sequence
113
Figure 7-13. Mains Breaker Reclose Sequence
114
Figure 7-14. Mains Breaker Reclose Sequence
115
Figure 7-15. Speed Raise/Lower Switch Based Logic
116
Figure 7-16. Voltage Raise/Lower Switch Based Logic
116
Chapter 8. Manual Operation
117
Egcp-2 Communications
120
Overview
120
Modbus RTU Communications for the EGCP-2 Panel
121
Chapter 10. Service Options
129
Product Service Options
129
Woodward Factory Servicing Options
130
Returning Equipment for Repair
131
Replacement Parts
131
Engineering Services
132
How to Contact Woodward
132
Technical Assistance
133
Appendix A. Connector Information
134
Appendix B. Speed Bias Connections
136
Egcp-2 Control Specifications
143
Other manuals for Woodward EGCP-2
Installation And Operation Manual
234 pages
Operation Manual
152 pages
Communications Manual
64 pages
Related product manuals
Woodward PG-EG
37 pages
Woodward EG-3P
38 pages
Woodward EG-6P
42 pages
Woodward EGB-1P
68 pages
Woodward EG-10P
42 pages
Woodward EGB-2P
68 pages
Woodward PGA-EG 200
14 pages
Woodward PGG-EG 200
14 pages
Woodward EPG 524
36 pages
Woodward easYgen-3000
51 pages
Woodward easYgen-2500
32 pages
Woodward easYgen-3400 P1
844 pages