SERVICING AND SPARES
6 720 806 548 (2013/02) 33
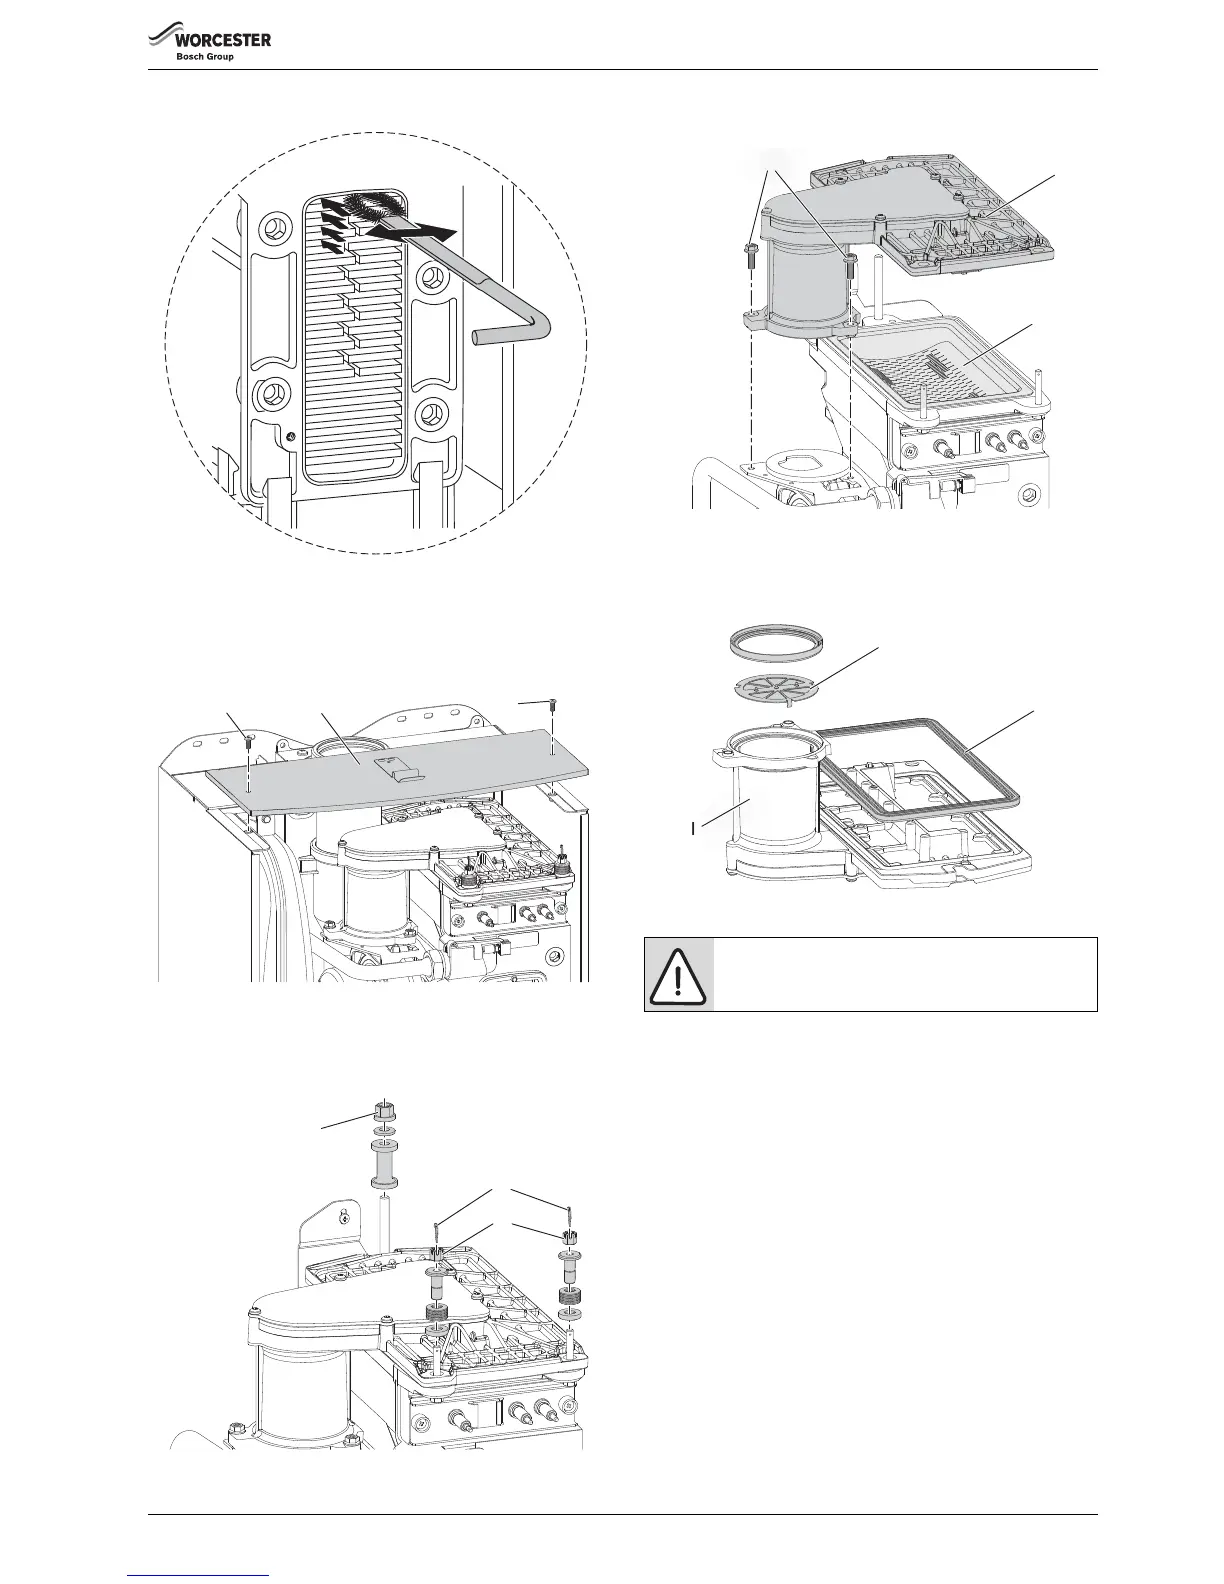
3. Clean the heat exchanger from top to bottom using the brush.
▶ Refit the clean out cover plates in reverse order using a new seal (C)
and tighten screws.
6.1.3 TO CLEAN THE BURNER
1. Remove cover panel (A) by removing the screws (B).
▶ Check that the boiler is completely isolated from the gas supply.
2. Remove the clips (C) and unscrew the two bolts (D).
▶ Unscrew and remove the two hexagon screws (E) securing the fan.
▶ Slacken fully the rear securing bolt (F).
▶ Remove the burner cover plate (G).
Fig. 54 Burner cover securing detail
3. Remove the burner (H) and clean components. Do not use a wire
brush.
6.1.4 TO CHECK THE DIAPHRAGM IN BURNER COVER
4. Carefully withdraw diaphragm (J) from fan intake tube and check for
soiling and splits.
▶ Refit diaphragm (J) the correct way round into the fan intake tube
6.1.5 RE-ASSEMBLY OF THE BURNER COVER
▶ Re-assemble the burner in the reverse order using a new seal (K)
▶ Insert the burner cover under the rear securing bolt and tighten down
▶ Assemble the washer, spring, spacer and castellated nut (D), refer to
figure 54, onto the screws securing the burner cover to the heat
exchanger.
▶ Using a 10mm spanner, tighten the castellated nuts (D), securing the
burner cover (G) to the heat exchanger, until the spacers “bottom out”
on the heat exchanger body. The nut will stop turning at this point, do
not overtighten.
▶ If necessary, back the nuts off slightly until the hole for the clip (C) is
visible
▶ Insert the clips (C) and secure
▶ After re-assembly, check the air/gas ratio and adjust if necessary.
Refer to section 6.2 “Setting the air/gas ratio”
6.1.6 TO CLEAN THE CONDENSATE TRAP
1. Pull condensate pipe out of the adaptor
2. Remove the trap from boiler
▶ Clean the trap and check that the connection to the heat exchanger is
clear