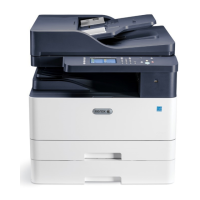
Changing the Default Copy Settings
The printer uses the default copy settings on all copy jobs unless you change them for an individual
job. You can modify the default copy settings.
1. In Xerox
®
CentreWare
®
Internet Services, click Properties→Services.
2. Click Copy.
3. For Defaults, click the Pencil icon.
4. Select the appropriate tab:
• To modify copy settings, select the Copy Settings tab.
• To modify the input settings, select the Input Settings tab.
• To modify the output settings, select the Output Settings tab.
5. In the Default column, click Edit.
6. Modify the settings as needed.
7. Click Save.
SSeettttiinngg DDeeffaauullttss ffoorr CCoovveerrss aatt tthhee CCoonnttrrooll PPaanneell
Note: If the paper supply is set to Auto Select, the Covers options are unavailable.
To set the defaults for covers:
1. At the control panel, press the Machine Status button.
2. Select Copy Defaults.
3. If a login prompt appears, to enter the system administrator password, use the alphanumeric
keypad.
4. Select Covers.
5. Select an option, then press OK.
CChhaannggiinngg tthhee AAuuttoo TTrraayy SSwwiittcchh PPoolliiccyy aatt tthhee CCoonnttrrooll
PPaanneell
If Auto Tray Switch is set to On, the printer selects the most appropriate size paper tray when there is
no exact match for the copy job. If Auto Tray Switch is set to Off, the printer hides the Auto option for
the Paper Select feature. For details, refer to Selecting the Default Paper Tray at the Control Panel.
The printer sets the default paper selection to Tray 1.
To set the Auto Tray Switch policy:
1. At the control panel, press the Machine Status button.
2. Select System Setup.
74
Xerox
®
B1022 Multifunction Printer
System Administrator Guide
Copying
Specifying Default Copy Settings in Xerox
®
CentreWare
®
Internet Services

 Loading...