
M
melissa19Sep 12, 2025
What to do if Tray 5 (Bypass) printing failed on Xerox Printer?
- SStephanie JohnsonSep 12, 2025
If printing from Tray 5 (Bypass) fails, follow the displayed instructions to load the correct paper size and try printing again.


What to do if Tray 5 (Bypass) printing failed on Xerox Printer?
If printing from Tray 5 (Bypass) fails, follow the displayed instructions to load the correct paper size and try printing again.
What to do if Xerox D125 Printer documents jam often?
To prevent frequent document jams, ensure the document feeder is properly loaded with acceptable media. Remove any sticky labels, paper clips, or tape from the documents. Properly set the document guides and check for any paper pieces inside the document feeder cover. If you're using mixed-size originals, set the Mixed Size Originals option to ON. When loading A5-size documents, load them vertically.
How to turn on Xerox Printer if power is not switched on?
If the power is not on, first, ensure the power switch is turned on. If it still doesn't power on, turn the power switch off, then firmly plug in the power cord before turning the power switch back on. Also, confirm that the power supply is within the range of 200-240 V and 15 A, and that the power capacity is compatible with the printer's maximum power consumption of 2.8-3.1 KVA.
What to do if a corner of the Xerox Copier document is folded?
If a corner of your document is folded when using the Xerox Copier, flatten out the curl and load the document again.
What to do if I cannot open or close trays on my Xerox Printer?
If you cannot open or close the trays, turn the power off without trying to open or close the tray. Wait a few seconds, then turn the power back on. Ensure the machine is online and ready to receive data before attempting to open or close the tray.
What to do if a corner of the document is folded in my Xerox Copier?
If a corner of the document is folded when using your Xerox Copier, flatten out the curl and load the document again.
What to do if my Xerox Copier shows an error message after loading paper in Tray 5 (Bypass)?
If you receive an error message after loading paper in Tray 5 (Bypass) and pressing Start, ensure that the paper guides are set to the correct positions.
What to do if my Xerox Printer has malfunction and rebooted? (xxx-yyy)
If your Xerox printer has rebooted due to an auto-recoverable internal error, select the Close button on the display. The printer should now be operating normally. If the error continues to occur, contact the Customer Support Center.
Why is my Xerox Copier display dark?
If your Xerox Copier display is dark, first press the Power Saver button on the Control Panel to exit Power Saver mode. If the display is still dark, adjust the display brightness using the Brightness dial.
Why do documents jam often in my Xerox Copier?
If documents jam often in your Xerox Copier, make sure the document feeder is loaded properly with acceptable media. Remove any sticky labels, paper clips, or tape from the documents. Properly set the document guides. Open the document feeder cover and check for pieces of paper. Set Mixed Size Originals to ON. Load the A5-size document vertically.
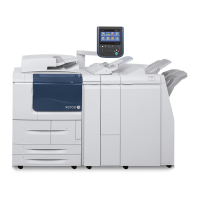
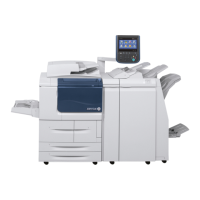
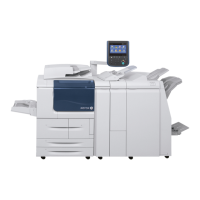
Details the various physical parts and components of the Xerox copier/printer.
Explains the document feeder operation and the functions of the User Interface (UI) and control panel.
Covers machine power options, including Power On/Off and Energy Saver modes.
Introduces optional devices like High Capacity Feeders, Interface Modules, and various finishers.
Information on accessing user guides via CD/DVD and online resources.
Details on accessing print server documentation and Xerox support via the web.
Instructions for loading paper, tab stock, and transparencies into machine trays.
Guidance for loading media into optional feeding devices.
Instructions for loading media into optional finishing devices.
Step-by-step instructions for making basic copies using the document feeder or glass.
Details on features available within the Copy tab, like Reduce/Enlarge and Paper Supply.
Options for enhancing image quality, including Original Type, Lighten/Darken, and Sharpness.
Features for adjusting layout, such as Book Copying, Edge Erase, and Image Rotation.
Covers options like Booklet Creation, Covers, Page Layout, Poster, Annotations, Watermark.
Basic steps for loading documents, selecting features, scanning, and storing.
Details on scan settings like Resolution, Color, 2-Sided Scanning, and File Format.
Instructions for scanning documents and sending them as e-mail attachments.
Covers Network Scanning, Scan to PC, and related protocols and settings.
Methods for saving scanned data to folders, USB devices, or Web Services for Devices (WSD).
Explains how to select and manage files stored in folders for Copy & Print Jobs or Scan & Other Jobs.
Covers checking, deleting, copying, moving, and editing files within folders.
Instructions for merging multiple files and performing batch printing operations.
Details on options like Separators, Covers, Watermark, Annotations, and Secure Watermark.
Overview of Job Flow functionality and its processing types.
Steps for creating a Job Flow Sheet and linking it to a mailbox.
Procedures for manually starting, filtering, confirming, and changing Job Flows.
Instructions on how to store, delete, name, and assign icons to stored programs.
Steps to recall and use stored programs for copy jobs or build jobs.
Describes the Media Print feature, supported file formats, and usage notes.
Steps for inserting USB devices, setting print options, and performing index prints.
Details on printing via PS and PCL drivers, and network tab printing.
Instructions for printing via e-mail and importing scanned data.
Configuration of display methods and import methods for network scans.
Explains how to check active, pending, and completed jobs.
Details on Secure Print, Sample Set, Delayed Print, and Charge Print features.
Accessing machine status, configuration, serial number, software version, and reports.
Information on fault codes, consumable supplies, and billing meters/usage counters.
Access to Stored Programming, Address Book, and Paper Tray Attributes.
Guidelines for cleaning the exterior, document glass, feeder rollers, and stripper fingers.
Instructions for ordering, checking status, and replacing toner cartridge and waste container.
Detailed steps to clear paper jams in various locations within the machine and feeders.
Lists common fault codes, their causes, and recommended remedies.
Covers basic troubleshooting, image quality issues, and copy/print/scan problems.
Technical details for D95 model copy functions, including resolution and paper size.
Technical details for D110/D125 models' copy functions, including speed and paper capacity.
Technical details for D136 model's copy functions, including paper size and magnification.
Details on print resolution, emulation, memory, and scan capabilities.
Specifications for the DADF, including document size, paper capacity, and speed.
Instructions for loading paper into Trays 6 and 7 of the High Capacity Feeder.
Guidance for clearing paper jams and understanding HCF fault codes.
Details on media sizes, paper weight, and tray capacity for HCF Trays 6/7.
Instructions for installing and using the postcard bracket for smaller media.
Steps for loading paper, tabs, and transparencies into the OHCF trays.
Guidance for clearing OHCF jams, adjusting skew, and understanding fault codes.
Details on paper sizes, weights, and capacity for the OHCF.
Explains the function of Interface and Interface Cooling Modules and their main components.
Details on the control panel functions and the paper path through the module.
Information on preset and manual decurler settings to control paper curl.
Guidance for clearing jams and understanding fault codes related to the module.
Introduction to the HCS, its purpose, and identification of its main components.
Details on the HCS control panel indicators, buttons, and Top Tray functionality.
Procedure for safely unloading stacked paper from the Stacker Tray.
Guidance for clearing jams in different HCS areas and understanding fault codes.
Introduction to the Perfect Binder, its binding process, and available operating modes.
Details on external and internal components, control panel, and binding paths.
Covers binder power control, power saver modes, and loading cover media.
Procedures for cleaning, emptying waste trays, and resolving binder jams/faults.
Technical specifications including paper size, trim recommendations, and binding details.
Introduction to the finisher and identification of its main components.
Details on manual decurling, folding options, and available fold types.
Instructions for loading paper and tabs into the Post-Process Inserter tray.
Procedures for replacing staple cartridges, waste containers, and punch waste.
Guidance for clearing paper jams in various finisher areas and resolving stapler faults.
Lists common fault codes for the finisher module and its components.
Details on tray types, paper sizes, weights, stapling, hole punching, and folding.
Introduction to the SquareFold Trimmer Module and identification of its main components.
Description of the booklet's path through the module and its control panel.
Details on accessing and configuring Square Fold and Trimmer options.
Provides advice for achieving desired booklet output, especially with full-page images and trimming.
Guidance for clearing jams and faults within the SquareFold Trimmer Module.
Lists common fault codes for the SquareFold Trimmer Module and related finisher faults.
Provides technical specifications for paper size, trim capacity, and paper weights.
Introduction to the Standard Finisher Plus and its Finisher Module and Finishing Transport.
Details the main components within the Finisher Module.
Information on the Finishing Transport's function, status indicators, and paper jams.
Procedures for replacing staple cartridges and waste containers.
Guidance for clearing paper jams in various finisher areas and resolving stapler faults.
Lists common fault codes for the Finisher Module and Finishing Transport.
Details on tray types, paper sizes, weights, stapling, and hole punching.
| Print Speed | Up to 125 ppm |
|---|---|
| Print Resolution | 2400 x 2400 dpi |
| Standard Paper Capacity | 4, 050 sheets |
| Maximum Paper Capacity | 8, 050 sheets |
| Connectivity | Ethernet, USB |
| Duplex Printing | Standard |