Windows Printing
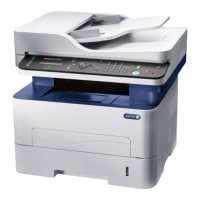
Xerox WorkCentre 3315DN/3325DN/3325DNI
System Administrator Guide
63
USB Printing
Information Checklist
Before starting please ensure that the following items are available and/or the tasks have been
performed:
• A standard USB peripheral cable.
• A workstation or laptop that supports USB connectivity.
Procedure
1. Connect the USB cable from your computer to the USB port at the back of the machine.
2. Insert the supplied Software and Documentation CD into your CD-ROM drive.
The Software and Documentation CD runs automatically and the installation window displays.
a. If the installation window does not appear:
• Select Start and then Run.
•Type X:\Setup.exe, replacing “X” with the letter which represents your drive. Select OK.
•If you use Windows Vista, Windows 7 or Windows 2008 Server R2 select Start >All
programs > Accessories > Run.
Type X:\Setup.exe replacing “X” with the letter which represents your drive and select
OK.
b. If the AutoPlay window appears in Windows Vista, Windows 7 or Windows 2008 Server R2,
select Run Setup.exe in the Install or run program field.
c. In the User Account Control window, select Continue or Yes.
3. If necessary, from the Select a language from the list below drop-down menu, select a preferred
language and select Next.
4. In the Select Installation Type window, select Typical installation for a local printer and select
Next. The program will search the network for your machine.
• Select your machine in the Printer Name list and click Next.
• The program will install the printer driver files. The Setup Completed message displays
with the I’d like to print a test page checkbox. If you choose to print a test page, select
the checkbox.
• Select Finish.
5. Verify the test page prints at your machine.
 Loading...


