Qdesys Sensorless Field Oriented Control Quick Start Guide
© Copyright 2012 Xilinx
13
Motor Demo Hardware Requirements
All hardware required to run the motor demonstration and tutorials is provided with the Spartan-6 FPGA
Motor Control Development Kit.
Motor Demo Setup Instructions
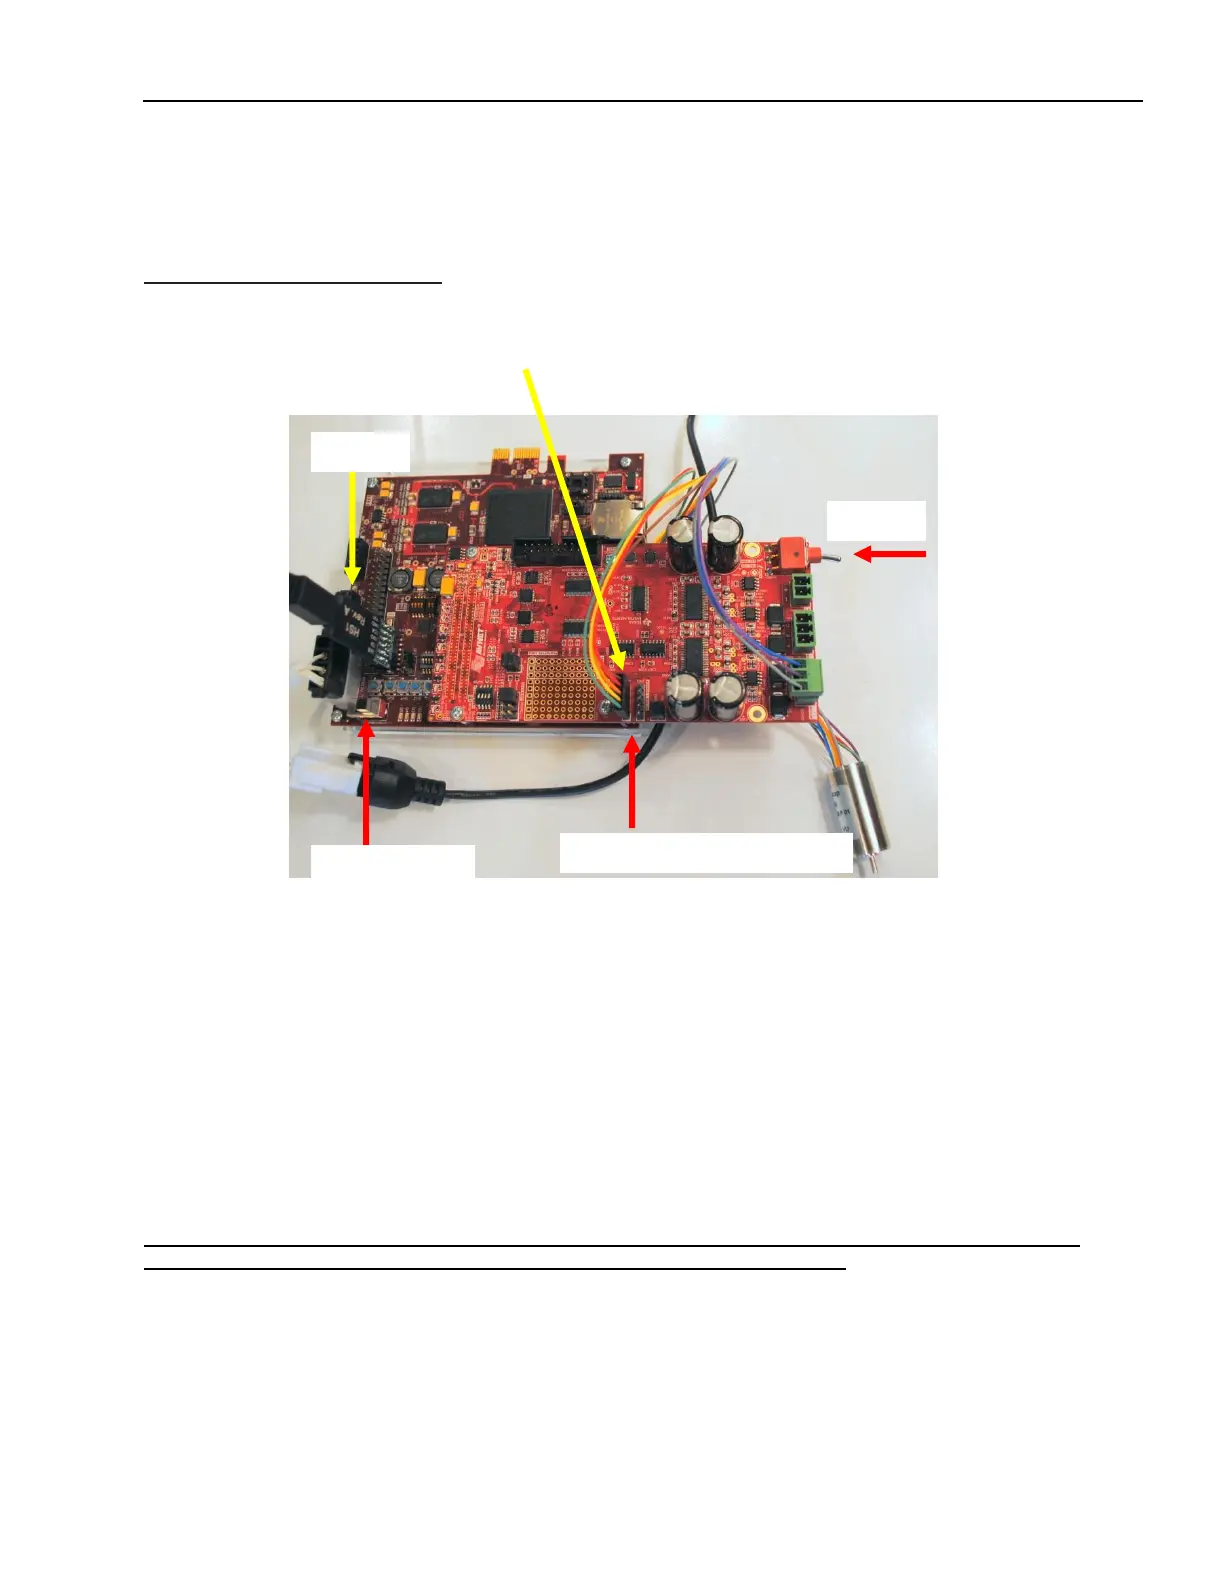
1. Connect the Portescap 16BHS Brushless DC (BLDC) motor to the Motor FMC module ports –
MOTOR_1_SENSOR and MOTOR_1 (Leave motor 5-pin (black) sensor connector disconnected, as
this is a “sensorless” demo)..
Figure 2
2. Move SW800 on the Motor FMC module to the FMC_12V power position as shown in Figure 2.
3. Connect 6-pin baseboard power adapter.
4. Connect the Cat-5 Ethernet cable to the S6LX75T baseboard and your laptop.
5. Attach the HS1 JTAG USB Programming cable to the baseboard at connector J1.
6. Attach the 12V wall power supply to baseboard 6-pin connector J2 using the provided adapter cable.
7. Power up the board by turning the baseboard slider power switch ON.
The Qdesys demonstration bitstream must be loaded into the S6LX75T baseboard flash in order
to configure the FPGA. That process is covered in the following sections.
 Loading...