Do you have a question about the Yale Assure Lever YRL216 and is the answer not in the manual?
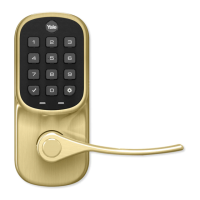
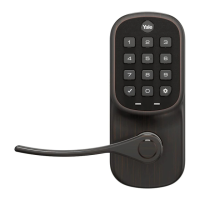
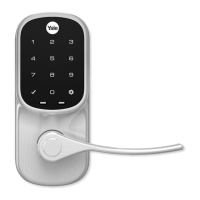
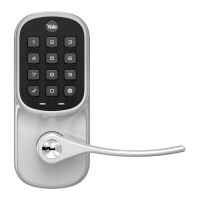
Lists all components included in the Yale Assure Lever package, such as the keypad, cylinders, and accessories.
Details the screws, latch, and strike plate provided for installation.
Instructions for removing the existing door knob or lever.
A note to not discard old lock hardware until the new lock is successfully installed.
Utilizes the door checker to verify door measurements and make adjustments.
Instructions for using the marking template to prepare a new door.
Guides the installation of the latch and strike plate, including backset adjustments.
Ensures correct keypad orientation and verifies the door hole diameter.
Details installing the inside mounting plate and routing the internal cable.
Covers connecting the internal cable, ensuring proper routing and security.
Instructions for hooking and securing the inside lock mechanism.
Guides the installation of the YRL216 cylinder, ensuring proper tailpiece insertion.
Details installing the YRL236 key-free cylinder, orienting the bar correctly.
Provides instructions for installing the outside lever, including pin press technique.
Provides instructions for installing the inside lever, including pin press technique.
Tests the thumbturn's function in both locked and unlocked positions with the door open.
Verifies the functionality of the key operation for the YRL216 model.
Instructions for installing the Smart Module, including battery timing considerations.
Guides the installation of batteries and the battery cover to complete the lock setup.
Emphasizes creating a Master Entry Code as a prerequisite for testing keypad functionality.
Step-by-step instructions for resetting the lock to factory default settings.
Addresses common problems with the tailpiece and spindle not mating correctly.
Solutions for the thumbturn not rotating electronically or physically.
Troubleshooting alerts and jam alarms during lock operation.
Addresses scenarios where the lock buttons produce no sound.
Explains normal thumbturn noise and checks for installation issues causing excessive noise.
Resolves problems with locking pins not retracting during lever installation.
References installation steps for removing the outside lever handle and cylinder.
Details installing a new cylinder and testing its operation with the key.
Explains the purpose and role of the Master Entry Code in lock programming.
Defines the feature that restricts access to all entry codes except the Master.
Describes the configuration options for the lock's audio feedback.
Explains the automatic re-locking feature and its customizable duration.
Defines the function of the indicator light on the inside of the lock.
Clarifies the One Touch Locking feature for extending the latch.
Explains the lock's shutdown period after multiple incorrect code entries.
Details the limit on incorrect entries before the lock enters shutdown mode.
How to activate the keypad and perform unlock operations.
Identifies key indicators like low battery and explains the speaker function.
Describes the procedure for using a 9V battery for emergency access.
How to enter the Master Entry Code to access the lock's settings menu.
Detailed steps for creating a Master Entry Code for programming and lock control.
Guide for adding new user entry codes after the Master Entry Code is set.
Method for exiting the entry code programming mode using the checkmark icon.
Instructions for deleting one specific entry code from the lock's memory.
Procedure to remove all entry codes, excluding the Master Entry Code.
Steps to unlock the door using a valid, previously programmed entry code.
A template for logging and managing entry codes for homeowners and users.
Guide to navigate the settings menu for customizing lock features.
Setting the duration for the Auto Re-lock feature.
Enabling or disabling the Inside Indicator Light.
Adjusting the One Touch Locking feature for easier latch extension.
Configuring the lock's audio feedback for entry code verification.
Enabling or disabling the All Code Lockout feature.
Options for network module configuration, if applicable.
Solutions for lock malfunctions when the door is open or locked.
Troubleshooting steps for dimming lights or no reaction from the lock.
Resolving issues where the lock indicates acceptance but the door remains locked.
Addresses problems where the lock does not automatically re-lock.
Solutions for preventing the addition of new entry codes.
Interpreting error indications like beeps and red flashes during unlock attempts.
Resolving issues where the lock operates without sound.
Understanding the Yale logo flashing RED as a battery replacement indicator.
Guidance on correctly re-entering codes when input is incomplete or wrong.
Information regarding the equipment's compliance with FCC regulations for digital devices.
Details the apparatus's adherence to Canadian Interference Causing Equipment Regulations.
Provides phone and email details for dedicated 24/7 customer support.
A template for marking new doors, detailing backset and bore hole dimensions.
Instructions for drilling door holes, including diameter, depth, and preventing splitting.
A guide to check door dimensions for compatibility with the Yale Assure Lever.
How to measure backset, face bore, cross bore, and strike pocket for installation.
Provides phone and email details for dedicated 24/7 customer support.
Information on registering the product to receive a 20% off discount.
Explains the referral program for earning credit on future purchases.
| Model Number | YRL216 |
|---|---|
| Keypad | Yes |
| Power Source | 4 AA Batteries |
| Key Override | Yes |
| Users | 25 |
| Operating Temperature | -4°F to 140°F |
| Auto-Lock | Yes |
| Backlit Keypad | Yes |
| Voice Guidance | Yes |
| Backup Key | Yes |
| Weather Resistant | Yes |
| Connectivity | Z-Wave |
| Finish | Satin Nickel |
| Backset | 2-3/8" or 2-3/4" |
| Door Thickness | 1.375 to 2.25 inches |
| Battery Life | Up to 1 year |
| Compatibility | Z-Wave compatible hubs |