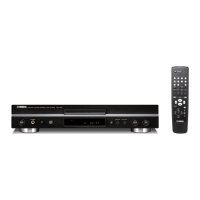
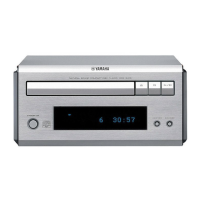
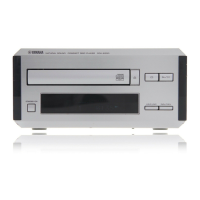
EasyManua.ls Logo

Yamaha CDX-396 - User Manual

Yamaha CDX-396
38 pages
Print Icon
To Next Page IconTo Next Page
Loading...
CDX-396/496
CDX-396/496
100707
DISPLAY DATA ........................................................... 12
IC DATA .................................................................. 13-16
BLOCK DIAGRAM ....................................................... 17
PRINTED CIRCUIT BOARD ................................... 18-21
IC BLOCK .................................................................... 22
WAVEFORMS .............................................................. 23
SCHEMATIC DIAGRAM .............................................. 24
PARTS LIST ............................................................ 25-37
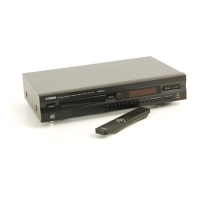
REMOTE CONTROL TRANSMITTER......................... 38
CONTENTS
TO SERVICE PERSONNEL ....................................... 1-2
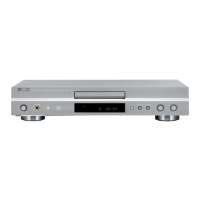
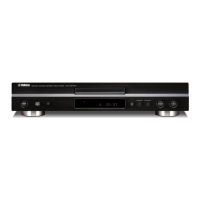
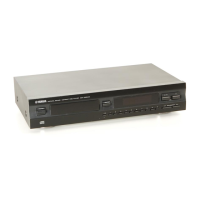
FRONT PANELS ............................................................ 3
REAR PANELS .............................................................. 4
SPECIFICATIONS .......................................................... 5
INTERNAL VIEW ........................................................... 5
DISASSEMBLY PROCEDURES ............................... 6, 7
STANDARD OPERATION CHART ........................... 7, 8
TEST MODE ............................................................... 8, 9
ERROR MESSAGE ................................................ 10, 11
IMPORTANT NOTICE
This manual has been provided for the use of authorized YAMAHA Retailers and their service personnel.
It has been assumed that basic service procedures inherant to the industry, and more specifically YAMAHA Products, are already
known and understood by the users, and have therefore not been restated.
WARNING: Failure to follow appropriate service and safety procedures when servicing this product may result in personal
injury, destruction of expensive components and failure of the product to perform as specified. For these reasons,
we advise all YAMAHA product owners that all service required should be performed by an authorized
YAMAHA Retailer or the appointed service representative.
IMPORTANT: The presentation or sale of this manual to any individual or firm does not constitute authorization, certification or
recognition of any applicable technical capabilities, or establish a principle-agent relationship of any form.
The data provided is believed to be accurate and applicable to the unit(s) indicated on the cover. The research, engineering, and
service departments of YAMAHA are continually striving to improve YAMAHA products. Modifications are, therefore, inevitable
and specifications are subject to change without notice or obligation to retrofit. Should any discrepancy appear to exist, please contact
the distributor's Service Division.
WARNING: Static discharges can destroy expensive components. Discharge any static electricity your body may have accumu-
lated by grounding yourself to the ground buss in the unit (heavy gauge black wires connect to this buss).
IMPORTANT: Turn the unit OFF during disassembly and parts replacement. Recheck all work before you apply power to the unit.
COMPACT DISC PLAYER
CDX-396/496

Other manuals for Yamaha CDX-396

Questions and Answers

  • C
    cartercynthiaAug 18, 2025
    How to reduce noise from tuner in Yamaha CDX-396?
    • J
      Jessica HunterAug 18, 2025
      If you're experiencing noise from a nearby tuner affecting your Yamaha CD Player, the tuner might be too close to the unit. Try moving the tuner and the main unit farther apart.
  • W
    Wendy JohnsonAug 20, 2025
    How to fix Yamaha CDX-396 CD Player that won't turn on?
    • E
      emillerAug 20, 2025
      If your Yamaha CD Player isn't powering on, make sure the power cord is securely connected to both the unit and the power outlet. If it's loose, firmly plug it in.
  • B
    Brent FisherAug 22, 2025
    Why is there no sound coming from my Yamaha CDX-396 CD Player?
    • L
      ldavisAug 22, 2025
      If you're not getting any sound from your Yamaha CD Player, there might be a few reasons. First, check the output cable connections to ensure they are properly connected; a defective cable may also be the cause. Next, verify that your amplifier is set to the correct input selection. Also, if you have a CDX-596 or CDX-496 model, check that the – OUTPUT LEVEL + buttons are not set at the minimum; adjust the volume using these buttons.
  • T
    Teresa FischerAug 26, 2025
    What to do if Yamaha CDX-396 CD Player remote control is not working?
    • V
      vnelsonAug 26, 2025
      If your Yamaha CD Player remote control isn't working, first, try replacing the batteries with new ones. If that doesn't work, make sure you're within a 6-meter range and 60° radius of the unit. Also, check if direct sunlight or strong lighting is interfering with the remote sensor on the main unit; if so, reposition the main unit.
  • S
    stephenmillerAug 27, 2025
    Why does my Yamaha CD Player sound skip?
    • N
      Nicholas ZavalaAug 27, 2025
      If the sound on your Yamaha CD Player is skipping, it could be due to a couple of things. First, check if the unit is experiencing any vibrations or impacts; if so, relocate it to a more stable surface. Also, the disc might be dirty, so try cleaning it.
  • B
    Brittany PetersAug 30, 2025
    What to do if my Yamaha CD Player won't start playing?
    • J
      Joshua SmithAug 30, 2025
      If your Yamaha CD Player isn't starting playback, several factors could be at play. Ensure the disc isn't damaged and replace it if necessary. If there's moisture on the laser pickup, wait 20 to 30 minutes after turning the unit on before attempting to play the disc. Check that the disc is loaded with the label side up and clean the disc if it's dirty. If you're using a CD-RW, ensure it's correctly recorded and playable with the unit; otherwise, replace it.
  • J
    joseph65Sep 1, 2025
    How to fix Yamaha CDX-396 CD Player disc tray that won't close?
    • B
      Brandon JohnsonSep 1, 2025
      If the disc tray on your Yamaha CD Player isn't closing completely, there might be something obstructing it. Carefully inspect the tray and remove any foreign objects that you find.
  • N
    nzimmermanSep 4, 2025
    Why does my Yamaha CD Player delay playing or start at the wrong place?
    • A
      Anthony Jones MDSep 4, 2025
      If your Yamaha CD Player is delaying playback or starting at the wrong spot, the disc might be scratched or damaged. Carefully inspect the disc and replace it if needed.
  • A
    Allen MillerSep 6, 2025
    Why does my Yamaha CDX-396 hum?
    • H
      heathernelsonSep 7, 2025
      If your Yamaha CD Player is producing a humming sound, check the audio cable connections to ensure they are securely connected. If the problem continues, the cables might be defective.
  • C
    cindyandersonSep 9, 2025
    Why is my TV acting strange when I use the Yamaha CDX-396 remote?
    • C
      Cheryl GuerraSep 9, 2025
      If your TV is acting strangely when you use the Yamaha CD Player remote control, it's possible that the remote is interfering with the TV's remote control sensor. Try relocating the main unit away from the TV, or cover the TV's remote control sensor.

Summary

IMPORTANT NOTICE

TO SERVICE PERSONNEL

Critical Components Information

Details on critical components requiring exact specification replacements.

Leakage Current Measurement

Procedure for measuring leakage current to ensure safety during servicing.

Laser Beam Protection

Safety guidelines for preventing eye injury from laser radiation during servicing.

Chemical Content Warning

Notice regarding hazardous chemical content in product materials and safe handling.

FRONT PANELS OVERVIEW

REAR PANELS OVERVIEW

PRODUCT SPECIFICATIONS

DIMENSION AND WEIGHT

Physical dimensions and weight of the product.

INTERNAL VIEW

MAIN P.C.B. COMPONENT IDENTIFICATION

Identification of main printed circuit board components and their locations.

DISASSEMBLY PROCEDURES

Removal of Top Cover

Steps to remove the top cover of the unit.

Removal of Front Panel

Steps to remove the front panel assembly.

Removal of CD Mechanism Unit

Steps to remove the CD mechanism unit.

Removal of Tray Unit

Steps to remove the disc tray unit.

Removal of Pick-up Head

Steps to remove the optical pick-up head assembly.

STANDARD OPERATION CHART

TEST MODE OPERATION

Entering Test Mode

Procedure to enter and activate the test mode for diagnostics.

TEST MODE FUNCTIONS

Panel Key Functions in Test Mode

Functions of the front panel keys when the unit is in test mode.

Remote Control Functions in Test Mode

Functions of the remote control transmitter keys in test mode.

ERROR MESSAGE HANDLING

Error Codes and Descriptions

List of error codes and their corresponding descriptions.

Troubleshooting Error Codes

Troubleshooting guides for specific error codes.

SYSTEM MALFUNCTION TROUBLESHOOTING

Tray Operation Malfunctions

Troubleshooting steps for tray operation issues.

Audio Playback Issues

Troubleshooting for audio playback problems.

No Disc Detected Issues

Troubleshooting steps when the unit acts like no disc is present.

Sound Skipping Issues

Troubleshooting for audio skipping or playback interruptions.

Search Function Malfunctions

Troubleshooting when search functions do not work correctly.

DISPLAY DATA DETAILS

Display Pin Connections

Pin assignments for display components.

Display Grid Assignments

Grid layout and assignments for display segments.

Display Anode Connections

Anode connection details for display elements.

INTEGRATED CIRCUIT (IC) DATA

IC3: MN35511 AL Details

Detailed data and pinout for IC3, the Signal Processor Controller.

IC300 SYSTEM CONTROL IC

IC300 System Control Overview

Overview of the system control functions of IC300.

SYSTEM BLOCK DIAGRAM

PRINTED CIRCUIT BOARD LAYOUT

MAIN P.C.B.(1) Layout

Component layout for the main printed circuit board (foil side).

MAIN P.C.B. LAYOUTS

MAIN P.C.B.(2) Layout

Component layout for the main printed circuit board (foil side).

MAIN P.C.B.(3) Layout

Component layout for the main printed circuit board (foil side).

MAIN P.C.B.(4) Layout

Component layout for the main printed circuit board (foil side).

MAIN P.C.B.(5) Layout

Component layout for the main printed circuit board (foil side).

MAIN P.C.B.(6) Layout

Component layout for the main printed circuit board (foil side).

INTEGRATED CIRCUIT (IC) BLOCK DIAGRAMS

IC1: AN8882 SB Block Diagram

Block diagram and details for the digital servo head amplifier IC.

IC2: AN8785 SB Block Diagram

Block diagram and details for the PU driver IC.

IC101;102 NJM2068 D-D Block Diagram

Block diagram and details for dual op-amp ICs.

IC105 BA15218 Block Diagram

Block diagram and details for dual op-amp IC.

IC200 M5290 P Block Diagram

Block diagram and details for the constant-voltage tracking supply IC.

IC301 S-24001 ADP Block Diagram

Block diagram and details for the EEPROM IC.

SIGNAL WAVEFORM ANALYSIS

Key Waveform Measurements

Analysis of critical signal waveforms at various test points.

SCHEMATIC DIAGRAM

PARTS LIST - GENERAL

Electrical Parts List

List of electrical components with part numbers and descriptions.

CDX-396 Main PCB Parts

CDX-496 Main PCB Parts

CDX-396 EXPLODED VIEW

MECHANICAL PARTS - CDX-396

CDX-496 EXPLODED VIEW

MECHANICAL PARTS - CDX-496

CD MECHANISM UNIT EXPLODED VIEW

CD MECHANISM UNIT PARTS LIST

DRIVE UNIT EXPLODED VIEW

REMOTE CONTROL TRANSMITTER

Remote Control Transmitter Schematic

Schematic diagram of the remote control transmitter.

CARBON RESISTOR PARTS LIST

Yamaha CDX-396 Specifications

General IconGeneral
TypeCD Player
Disc formatsCD, CD-R, CD-RW
Frequency Response2 Hz - 20 kHz
Dynamic Range100 dB
Output Level / Voltage2.0 V
Power Consumption15 W
Digital OutputsOptical

Related product manuals