P-85/P-85S
8
<Bottom view>
Upper case assembly
[30E]
(上ケース Assy)
Keyboard assembly
(鍵盤 Assy)
[31] [31][31]
[30E]
[30E]
Fig. 3
(図 3)
[30]:BindHeadTappingScrew-B(Bタイト+BIND)3.0X8MFZN2W3(WE774300)
[31]:BindHeadTappingScrew-B(Bタイト+BIND)3.0X25MFZN2W3(WF473400)
8. PN1 シート
(所要時間:14 分)
8-1 コントロールパネル面より、スライドツマミを紐状
のものでひっかけるようにして外します。(図 4)
8-2 下ケース Assy を外します。(1 項参照)
8-3 鍵盤 Assy を外します。(7 項参照)
8-4 [30F] のネジ 8 本を外し、PN1 シートを外します。
(図 5)
Slide knob(スライドツマミ)
<Top view>
Slide knob(スライドツマミ)
Fig. 4
(図 4)
8. PN1 Circuit Board
(Time required: About 14 minutes)
8-1 Tie a string or the like to the slide knob and pull
the string to remove the slide knob from the control
panel side. (Fig. 4)
8-2
Remove the lower case assembly. (See procedure 1.)
8-3 Remove the keyboard assembly. (See procedure 7.)
8-4 Remove the eight (8) screws marked [30F]. The
PN1 circuit board can then be removed. (Fig. 5)
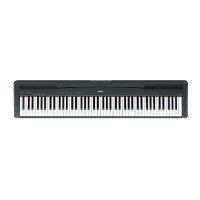
7. Keyboard Assembly
(Time required: About 13 minutes)
7-1
Remove the lower case assembly. (See procedure 1.)
7-2 Remove the eight (8) screws marked [30E] and
eight (8) screws marked [31]. The keyboard
assembly can then be removed. (Fig. 3)
7. 鍵盤 Assy
(所要時間:13 分)
7-1 下ケース Assy を外します。(1 項参照)
7-2 [30E] のネジ 8 本と [31] のネジ 8 本を外し、鍵盤
Assy を外します。(図 3)

 Loading...