1. Introduction
1.1. Purpose of this Document
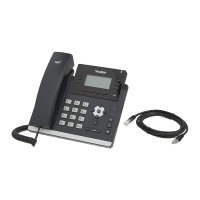
This guide is to show you how to install and use your Yealink T41P or T42G phone
which you will use in conjunction with your portal website (www.telephony-
cloud.com), therefore the functionality and features described are an appropriate
subset of those available. Full details of the phone’s capabilities can be found in
the Yealink SIP-T42G or SIP T41P User Guides which can be obtained from the
Yealink web site. However, always use the facilities and features offered by the
portal website in configuring your phone in preference to any local capabilities.
1.2. Related Documents
The Setup and User Guide provides guidance for the ordinary user on the facilities
and features of your phone system. It should be used in conjunction with this
guide.
The System Administrators Guide provides instruction for the Company
Administrator in setting up the system and configuring the features and
functionality available to each user.
For Gold product Administrators there is an additional Gold Subscribers Guide for
the Auto Attendant, Call Recording and Call Queueing Capabilities.
These guides can be downloaded from the Support Menu on the portal website or
accessed via the Help menu.
1.3. Yealink Phone On-line Customisation
Certain features of the Yealink phone operation can be customised via a web
browser. These are restricted to setting up the appropriate network connections,
changing the ring tones and security password and, if desired creating a local
phone directory, although this is discouraged as your portal website is the natural
place for personal and company phone directories. All other features and settings
relevant to phone usage are handled by your portal website.
To Access the Yealink web user interface press the Menu soft key on your phone
followed by selecting the Status option and pressing the Enter soft key. This will
display your phone details. Note down the IP address and enter that into your web
browser. This will bring up the Yealink web user interface requesting your
Username and Password to login. The default for both is ‘User’. These may be
changed via the Security tab.
The Network tab allows you to specify what sort of network connection you wish
to make IP4 or IP6, DHCP or Static IP.

 Loading...


