YL9170 RI Detector
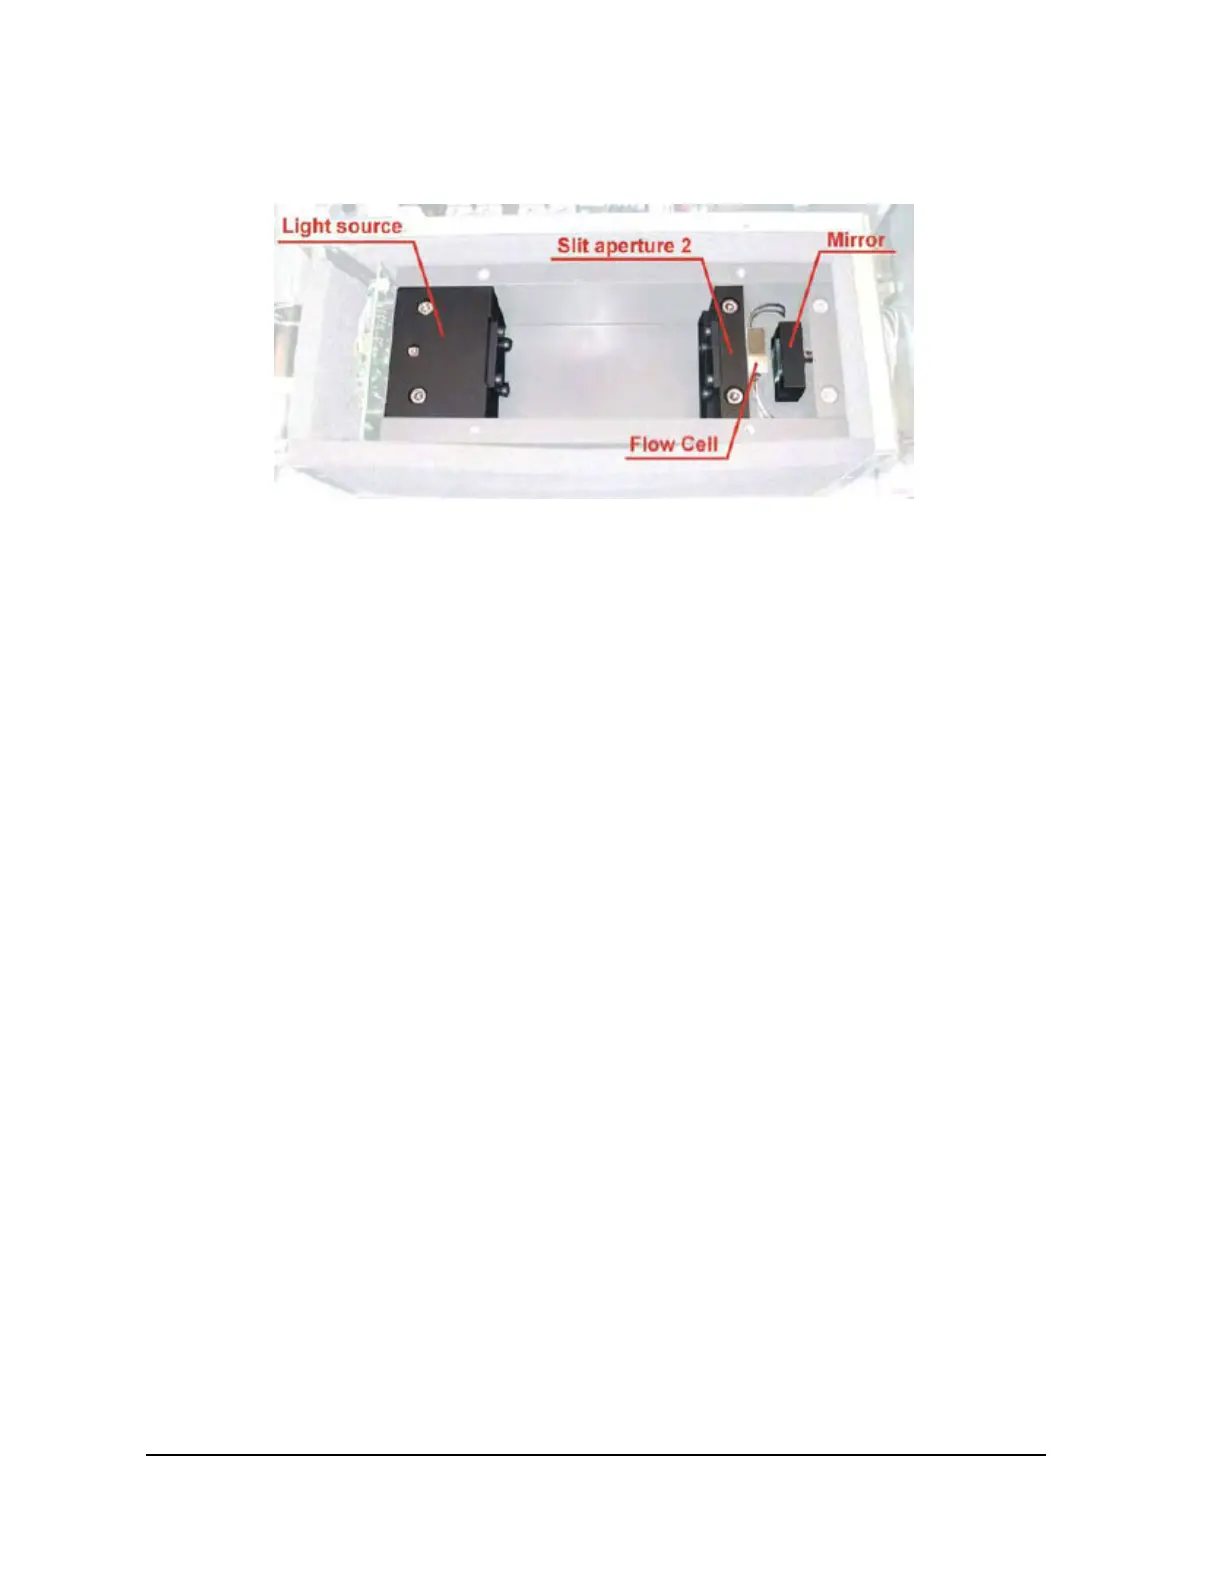
[Inside of optical bench]
3) Loosen the holding screw of the light source and remove the lamp
4) Loosen the screw connector of the lamp’s power suply at the pre-amplifier board
5) Place a new lamp in the holder and tighten the holding screw
6) Connect the power wires of the lamp with the screw connector on the pre-amplifier board
7) Connect the main cable to the detector and switch on the instrument
NOTE
The following steps need to be performed on the running instrument. There is the danger of
electrical shock when touching electrical components.
Use a voltmeter to check the lamp voltage at the test points on the circuit board. The label of this test
point depends on the version of this board.(lampe and GND or LampeULmp and GND) The lamp voltage
should be 3.3 ± 0.3V. If needed you can adjust this voltage by turning the potentiometer R19 at the main
board.
In the following two steps the light bulb is positioned for optimal operation.
Step 1 : Place the lamp in the holder resulting in a sharp picture of the illuminated area at the slit aperture
2. Usually the metal cover of the light bulb ends with the holder, sometimes the metal cover stands about
1 or 2mm out of the metal block.
Step 2 : Turn the light bulb that the picture of the filament is parallel to the slit of the second slit aperture.
12
 Loading...