3-9
IM 701510-01E
Before Starting Observation and Measurement of Waveforms
3
3.8 Setting the Date and Time
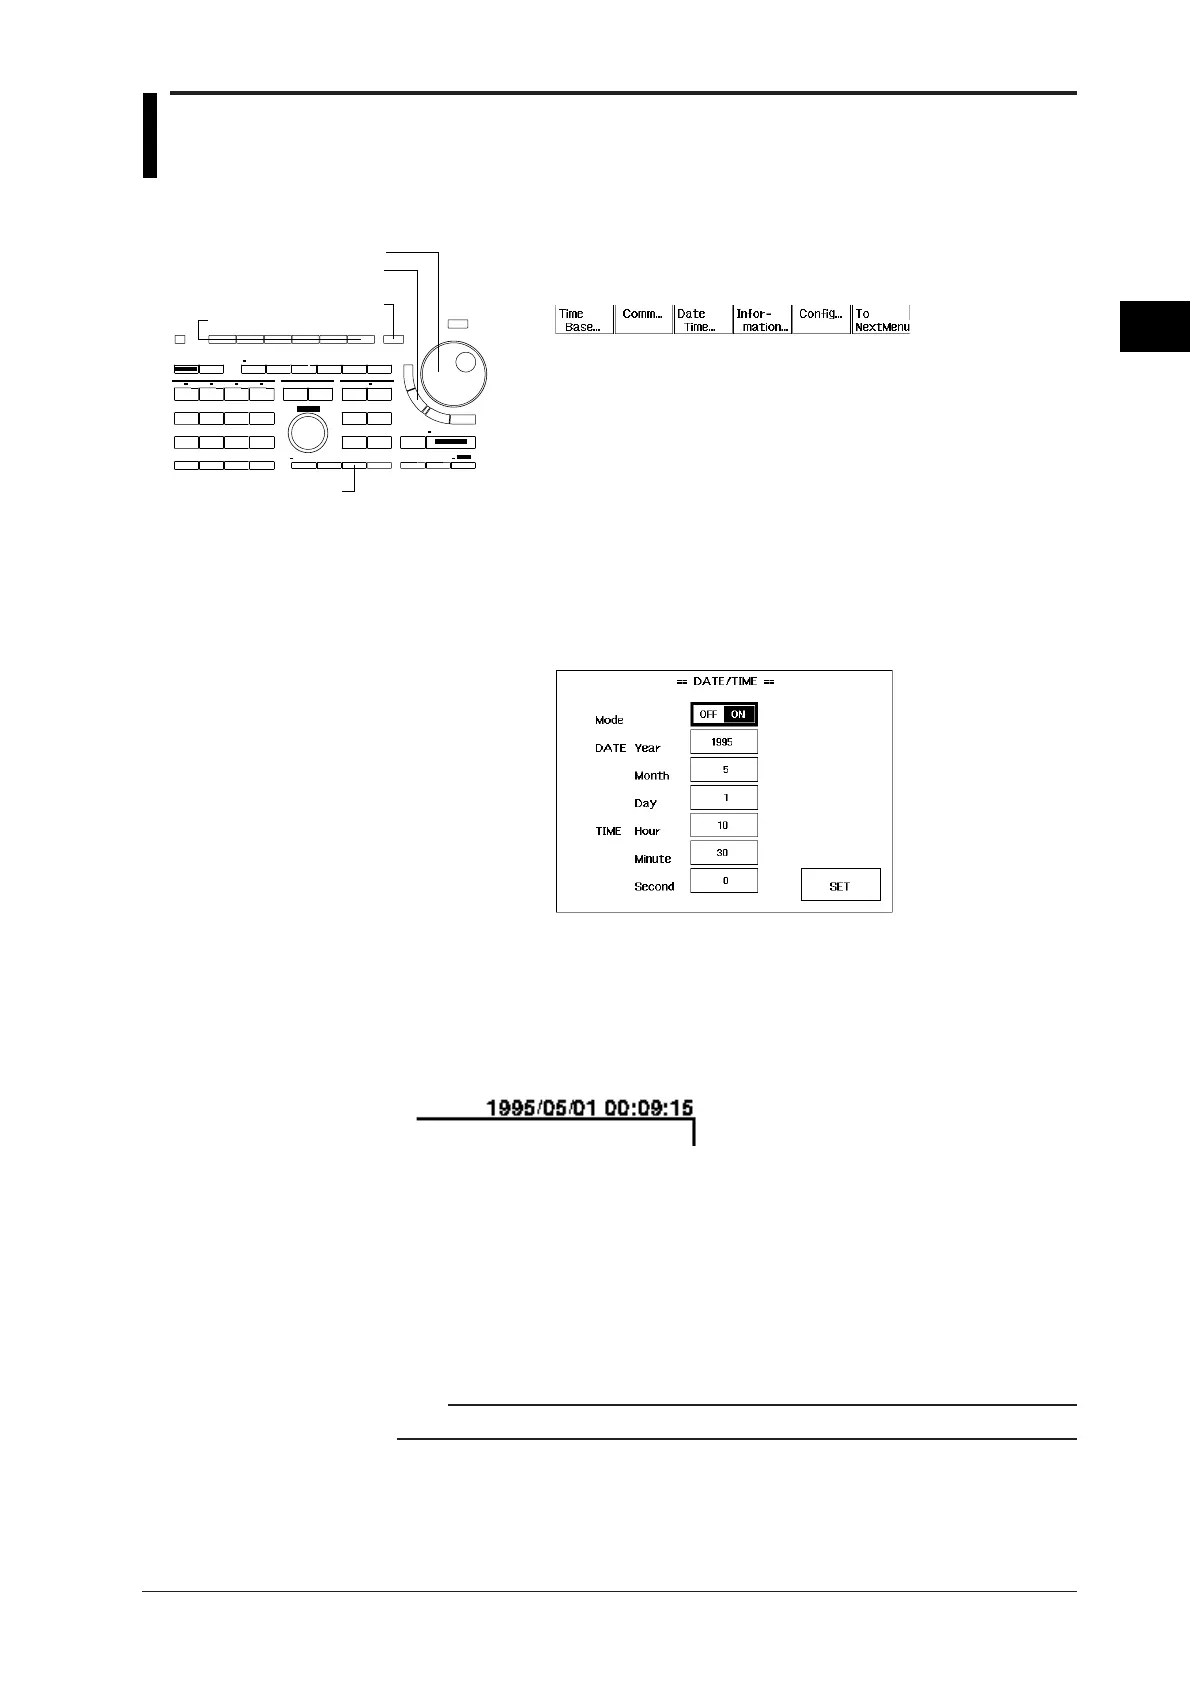
1. Press the MISC key to display the MISC menu.
2. Press the “Date/Time” soft key to display the DATE/TIME setting
menu.
Turning the Date/Time ON/OFF
3. Turn the rotary knob to select “Mode”, and select “ON” or “OFF”
using the SELECT key.
Setting the Date/Time
4. Turn the rotary knob to select “Year”, “Month”, “Day”, “Hour”,
“Minute” or “Second”. Press the SELECT key to display the
setting screen.
5. Set the required value using the rotary knob.
6. Press the SELECT key or the ESC key to close the setting screen.
7. Repeat steps 4 to 6 until all necessary items are set.
8. Turn the rotary knob to select “SET” and press the SELECT key to
confirm the settings.
9. Press the ESC key to close the menu.
Explanation
Setting the Date/Time ON or OFF
When you set the mode to ON, the date and time will appear in the upper right corner of the
screen. And when making a hard copy of the screen (to the built-in printer or external
plotter) the date and time will be printed together with the waveform.
The current date and time are saved together with the waveform data or set-up data when
the data is saved to a floppy disk.
Setting values of Date/Time
DATE TIME
Year : 1980 to 2079 Hour : 00 to 23
Month : 1 to 12 Minute : 00 to 59
Day : 1 to 31 Second: 00 to 59
Note
The date and time are backed up by the built-in lithium battery. Leap years are provided.
Keys and Procedure
MISC key
Rotary knob
Soft keys
SELECT key
ESC key
 Loading...