EasyManua.ls Logo

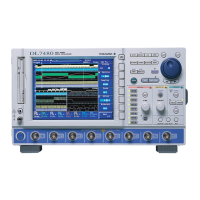
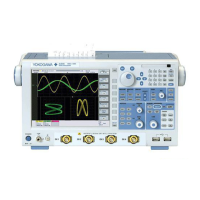
YOKOGAWA DL7440 User Manual

YOKOGAWA DL7440
501 pages
To Next Page IconTo Next Page
Page #1 background imageLoading...
Page #1 background image
Digital Oscilloscope
IM 701450-01E
5th Edition
DL7440/DL7480

Table of Contents

Other manuals for YOKOGAWA DL7440

Questions and Answers:

YOKOGAWA DL7440 Specifications

General IconGeneral
BrandYOKOGAWA
ModelDL7440
CategoryTest Equipment
LanguageEnglish

Summary

Product Registration

Checking the Contents of the Package

Model and Suffix Codes

Details model numbers and suffix codes for DL7440/DL7480.

Standard Accessories

Lists accessories supplied with the instrument.

Optional Accessories (Sold Separately)

Lists accessories available for separate purchase.

Safety Precautions

Conventions Used in This Manual

Safety Markings

Explains safety symbols used in the manual and on the instrument.

Notations Used on Pages Describing Operating Procedures

Explains notations for procedures and explanations in operating sections.

Notations Used in the Procedures

Details panel keys and soft keys, and unit notations.

Flow of Operation

Chapter 1 Names and Functions of Parts

1.1 Front Panel, Rear Panel, and Top Panel

Describes the physical layout and connectors of the instrument.

1.2 Panel Keys and Knobs

Explains the function of various keys and knobs on the instrument.

1.3 Display

Details the normal display screen layout and elements.

Chapter 2 Explanation of Functions

2.1 System Configuration and Block Diagram

Explains the instrument's system configuration and internal block diagram.

2.2 Vertical and Horizontal Axes

Details settings for vertical sensitivity, position, coupling, and horizontal axis.

2.3 Trigger

Explains trigger sources, slope, level, types, and modes.

2.4 Waveform Acquisition and Display Conditions

Covers record length, interleave mode, sampling mode, and acquisition modes.

2.5 Waveform Computation

Details operations like addition, subtraction, multiplication, and FFT.

2.6 Analyzing and Searching Waveforms

Explains history waveforms, zone search, parameter search, and edge search.

2.7 Communication

Covers communication using commands, network drives, and printers.

2.8 Other Useful Functions

Explains USB keyboard/mouse use, initialization, and auto setup.

Chapter 3 Making Preparations for Measurements

3.1 Handling Precautions

Provides safety and general handling precautions for the instrument.

3.2 Installing the Instrument

Details installation conditions like surface, ventilation, and temperature.

3.3 Connecting the Power Supply and Turning ON/OFF the Power Switch

Guides on connecting power cords and operating the power switch.

3.4 Connecting the Probe

Explains connecting probes to signal input terminals and precautions.

3.5 Compensating the Probe (Phase Correction)

Details the procedure for phase correction of probes.

3.6 Connecting Logic Probes (Optional)

Explains how to connect logic probes and their specifications.

3.7 Setting the Date and Time

Covers manual and automatic date/time setting.

Chapter 4 Common Operations

4.1 Operations and Functions of Keys and the Jog Shuttle

Explains basic key operations, setup menus, and jog shuttle usage.

4.2 Entering Values and Strings

Details how to enter values and character strings using the jog shuttle and keyboard.

4.3 Operating the DL7400 Using a USB Keyboard or a USB Mouse

Explains connecting and using USB keyboards and mice.

4.4 Initializing Settings

Guides on restoring factory default settings or canceling initialization.

4.5 Performing Auto Setup

Explains how the auto setup function adjusts settings for input signals.

4.6 Performing Calibration

Details the calibration process for ensuring measurement accuracy.

4.7 Correcting the Delay Time of the Input Signals

Explains the deskew function to minimize signal delay effects.

4.8 Using the Help Function

Describes how to access and use the instrument's help system.

Chapter 5 Vertical and Horizontal Axes

5.1 Turning Channels ON/OFF

Explains how to enable or disable channel displays and logic input.

5.2 Setting V/div

Details adjusting vertical sensitivity using the V/DIV knob or variable soft key.

5.3 Setting the Vertical Position of the Waveform

Explains how to adjust the vertical position of waveforms for better viewing.

5.4 Setting the Input Coupling

Covers selecting input coupling methods like AC, DC, or GND.

5.5 Selecting the Probe Attenuation/Current-to Voltage Conversion Ratio

Guides on setting probe attenuation or current-to-voltage conversion ratios.

5.6 Setting the Offset Voltage

Explains how to apply an offset voltage to eliminate DC components.

5.7 Using the Preset Function

Details how to automatically set optimum values for signals or probes.

5.8 Setting Bandwidth Limits

Explains how to set bandwidth limits for channels to reduce noise.

5.9 Using the Linear Scaling Function

Describes how to scale waveform data to display values in scaled units.

5.10 Turning ON/OFF the Logic Input and Setting the Threshold Level

Covers enabling logic input and setting threshold levels for bits.

5.11 Selecting the Time Base

Explains selecting internal or external clock signals for timing reference.

5.12 Setting T/div

Details adjusting the horizontal axis scale (time per division).

Chapter 6 Triggers

6.1 Selecting the Trigger Mode

Explains trigger modes like Auto, Normal, Single, and Single(N).

6.2 Setting the Trigger Position

Guides on adjusting the trigger position on the screen to change pre-data/post-data ratio.

6.3 Setting the Trigger Delay

Explains how to display waveforms after a fixed time delay from the trigger point.

6.4 Setting the Hold Off Time

Details temporarily stopping trigger detection after a trigger is activated.

6.5 Setting the Edge Trigger (SIMPLE)

Explains setting triggers based on rising or falling edges of a single source.

6.6 Setting the External Trigger (SIMPLE)

Guides on activating triggers using external signals applied to the EXT TRIG IN terminal.

6.7 Activating Triggers on the Commercial Power Supply (SIMPLE)

Explains triggering on the rising edge of the commercial power supply.

6.8 Setting the A->B(N) Trigger (ENHANCED)

Details triggering when condition B becomes true nth time after condition A.

6.9 Setting the A Delay B Trigger (ENHANCED)

Explains triggering when condition B becomes true after condition A and a delay time.

6.10 Setting the Pattern Trigger (ENHANCED)

Covers triggering based on status patterns of multiple signals.

6.11 Setting the Width (Pulse<Time, Pulse>Time, T1<Pulse<T2, and Time Out) Trigger (ENHANCED)

Explains triggering based on pulse width relative to a specified time.

6.12 Setting the OR Trigger (ENHANCED)

Details triggering when any edge or window condition on specified channels is met.

6.13 Setting the Window Trigger (ENHANCED)

Explains triggering when a signal enters or exits a specified voltage range.

6.14 Setting the TV Trigger (ENHANCED)

Covers triggering for video signals, supporting various broadcast types.

6.15 Setting the Logic Trigger (ENHANCED, Optional)

Explains triggering based on logic signal patterns and clock synchronization.

6.16 Setting the Action-on-Trigger

Details actions like buzzer, saving data, or sending email when a trigger occurs.

6.17 Setting the Trigger Gate

Explains controlling trigger activation timing using an external signal.

Chapter 7 Waveform Acquisition

7.1 Starting/Stopping Waveform Acquisition

Guides on starting and stopping the waveform acquisition process.

7.2 Setting the Record Length

Explains how to set the number of data points stored in the acquisition memory.

7.3 Using Interleave Mode

Details how interleave mode doubles memory and increases sampling rate.

7.4 Turning ON/OFF Repetitive Sampling Mode

Explains enabling/disabling repetitive sampling mode and its effects.

7.5 Setting the Acquisition Mode

Covers acquisition modes like Normal, Envelope, Averaging, and Box Average.

7.6 Performing Sequential Store (SINGLE(N) Mode)

Explains using sequential store for capturing multiple waveforms over time.

Chapter 8 Waveform Display and Information Display

8.1 Setting the Display Format

Details splitting the screen into multiple windows and waveform mapping.

8.2 Performing Display Interpolation

Explains methods for interpolating between data points to display continuous waveforms.

8.3 Accumulating Waveforms

Covers persistent and color grade modes for displaying waveform history.

8.4 Zooming the Waveform

Explains expanding waveforms along the time axis and setting zoom positions.

8.5 Displaying X-Y Waveforms

Guides on observing relationships between two input signals using X-Y display.

8.6 Taking Snapshots and Clearing Traces

Explains temporarily holding waveforms and clearing displayed traces.

8.7 Changing the Graticule

Allows changing the graticule display type to suit needs.

8.8 Turning ON/OFF the Scale Display

Covers displaying or hiding the upper and lower limits of axes.

8.9 Setting Waveform Labels and Turning ON/OFF the Display

Explains assigning arbitrary labels to waveforms and controlling their display.

8.10 Turning ON/OFF the Translucent Display

Allows making dialog boxes translucent to see underlying content.

Chapter 9 Waveform Computation

9.1 Entering Normal Computation Mode, Displaying Computed Waveforms, and Assigning Labels to Computed Waveforms

Guides on entering normal computation mode and assigning labels to computed waveforms.

9.2 Adding, Subtracting, and Multiplying Waveforms

Details performing basic arithmetic operations on waveforms.

9.3 Performing Binary Computation

Explains converting waveforms to digital values based on threshold levels.

9.4 Inverting Waveforms

Covers inverting waveform data vertically by multiplying by -1.

9.5 Differentiating and Integrating Waveforms

Explains computing first and second order derivatives and integrals.

9.6 Performing Power Spectrum Computation (FFT)

Details computing power spectrum using Fast Fourier Transform.

9.7 Smoothing Waveforms

Explains smoothing waveforms using weighted moving average.

9.8 Shifting the Phase

Guides on shifting waveform phase and displaying the result.

9.9 Performing User-Defined Computation (Optional)

Explains defining custom computation equations using operators.

Chapter 10 Analyzing and Searching Waveforms

10.1 Displaying History Waveforms

Explains displaying and searching past waveforms stored in memory.

10.2 Searching the History Waveforms Using Zones (History Search)

Guides on searching history waveforms based on specified zones.

10.3 Searching History Waveforms Using Waveform Parameters (History Search)

Explains searching history waveforms based on measured parameter conditions.

10.4 Searching Waveforms Using the Search and Zoom Function

Covers edge, serial, parallel, pulse width, auto scroll, and SPI searches.

10.5 Making Cursor Measurements

Details using horizontal, vertical, marker, and angle cursors for measurements.

10.6 Automated Measurement of Waveform Parameters

Explains performing automated measurements of parameters like P-P, Max, Min.

10.7 Performing Statistical Processing of the Measured Values of Waveform Parameters

Covers normal, per cycle, and history statistical processing.

10.8 Performing Automated Measurements of Waveform Parameters on Dual Areas

Explains measuring parameters on two areas simultaneously or performing computations.

10.9 Performing GO/NO-GO Determination Using Zones

Guides on setting determination zones and performing GO/NO-GO checks.

10.10 Performing GO/NO-GO Determination Using Measured Waveform Parameters

Explains GO/NO-GO determination based on measured parameter values.

10.11 Analyzing and Searching SPI Signals

Details analyzing SPI bus signals and searching for patterns.

Chapter 11 Printing Screen Images

11.1 Installing the Roll Paper into the Built-in Printer (Optional)

Guides on installing roll paper into the optional built-in printer.

11.2 Printing Using the Built-in Printer (Optional)

Explains how to print screen images using the built-in printer.

11.3 Printing Using a USB Printer

Details connecting and printing to a USB printer.

11.4 Printing Using a Network Printer (Optional)

Explains printing screen images to a network printer via Ethernet.

Chapter 12 Saving and Loading Data

12.1 Storing and Recalling Setup Data

Guides on saving and recalling instrument setup configurations.

12.2 Floppy Disk, Zip Disk, and PC Cards

Describes types of built-in storage and handling precautions.

12.3 Connecting MO Disk Drives or Hard Disks to the SCSI

Explains connecting external SCSI devices.

12.4 Changing the SCSI ID Number

Guides on setting the SCSI ID number for connected devices.

12.5 Connecting USB Storage to the USB PERIPHERAL Interface

Explains connecting USB storage devices.

12.6 Formatting the Storage Medium

Details formatting floppy disks, Zip disks, PC cards, and SCSI devices.

12.7 Saving/Loading the Setup Data

Guides on saving and loading setup data to/from various media.

12.8 Saving/Loading the Waveform Data

Explains saving and loading waveform data in Binary, ASCII, or Float formats.

12.9 Saving/Loading the Snapshot Waveforms

Covers saving and loading snapshot waveforms.

12.11 Saving the Detailed Analysis List of SPI Signals

Guides on saving SPI signal analysis results to ASCII format.

12.12 Saving Screen Image Data

Details saving screen images in various formats like TIFF, BMP, PNG, JPEG.

12.13 Displaying Thumbnails of the Saved Screen Image Data

Explains how to view thumbnails of saved screen images.

12.14 Changing the File Attributes and Deleting Files

Guides on changing file attributes and deleting files.

12.15 Copying Files

Explains how to copy files between storage media.

12.16 Changing the Directory or File Name of the Storage Medium and Creating Directories

Covers renaming files/directories and creating new directories.

Chapter 13 Ethernet Communications (Optional)

13.1 Connecting the DL7400 to the Network

Explains connecting the instrument to a network via Ethernet.

13.2 Setting Up TCP/IP

Guides on configuring TCP/IP settings including IP address and DNS.

13.3 Saving and Loading Waveform/Setup/Image Data on a Network Drive (FTP Client Function)

Details saving/loading data to/from network drives using FTP.

13.4 Entering Settings for Printing Screen Images on the Network Printer (LPR Client Function)

Explains configuring settings for printing to network printers via LPR.

13.5 Sending Periodic or Action Mail (SMTP Client Function)

Guides on sending periodic or action emails via SMTP.

13.6 Accessing the DL7400 from a PC or Workstation (FTP Server Function)

Explains accessing instrument files via FTP from a PC.

13.7 Using the Web Server Function

Covers using the Web server for remote control, data capture, and display.

13.8 Setting the Time Difference from GMT (Greenwich Mean Time)

Explains setting the time difference from GMT for accurate timekeeping.

13.9 Checking the Presence of the Ethernet Interface (Optional) and the MAC Address

Guides on checking Ethernet interface installation and MAC address.

13.10 Setting the FTP Passive Mode and LPR/SMTP Timeout

Details setting FTP passive mode and timeout values for LPR/SMTP.

13.11 Using the Storage Medium as a Windows Network Drive (Firmware Version 1.30 or Later)

Explains mapping storage media as a network drive on Windows XP.

Chapter 14 Rear Panel Auxiliary I/O Section

14.1 External Trigger Input, External Clock Input, and Trigger Gate Input

Describes the specifications and usage of external trigger, clock, and gate input terminals.

14.2 Trigger Output

Explains the TTL level trigger output signal.

14.3 Video Signal Output (VIDEO OUT (VGA))

Details the VGA compatible video output connector and connection.

Chapter 15 Other Operations

15.1 Changing the Message Language and Turning ON/OFF the Click Sound

Covers changing message language and enabling/disabling click sounds.

15.2 Changing the USB Keyboard Language and Checking the Connected USB Keyboard

Explains selecting USB keyboard language and checking connected devices.

15.3 Measuring the Offset Voltage and Applying the Offset Voltage to the Computed Results

Details setting and applying offset voltage to computations and measurements.

15.4 Setting the Screen Color and Intensity

Covers adjusting screen colors and intensity levels.

15.5 Turning OFF the Backlight and Setting the Brightness of the Backlight

Explains turning off the backlight and adjusting its brightness.

Chapter 16 Troubleshooting, Maintenance, and Inspection

16.1 Troubleshooting

Provides a table of probable causes and corrective actions for common issues.

16.2 Messages and Corrective Actions

Lists error codes, their meanings, and corrective actions.

16.3 Performing a Self-Test

Guides on executing self-tests for memory, drives, printer, and keys.

16.4 Checking the System Conditions (Overview)

Explains how to check firmware version, model, and installed options.

16.5 Recommended Replacement Parts

Lists recommended replacement parts and their periods.

Chapter 17 Specifications

17.1 Input Section

Details specifications for input channels, coupling, impedance, and voltage.

17.2 Logic Input Section (Optional)

Provides specifications for optional logic probes.

17.3 Trigger Section

Lists trigger modes, sources, coupling, hysteresis, and delay specifications.

17.4 Time Axis

Details specifications for time axis range, accuracy, and external clock input.

17.5 Display

Provides specifications for the LCD monitor and display resolution.

17.6 Function

Lists supported acquisition modes, record length, display formats, and analysis functions.

17.7 Built-in Printer (Optional)

Provides specifications for the optional built-in printer.

17.8 Storage

Details specifications for floppy disk, Zip disk, SCSI, PC card, and USB storage.

17.9 USB Peripheral Interface

Lists specifications for USB peripheral interface and supported devices.

17.10 Auxiliary I/O Section

Describes external trigger, clock, gate inputs, trigger output, and video signal output.

17.11 Computer Interface

Details specifications for GP-IB, USB, and Ethernet computer interfaces.

17.12 General Specifications

Covers operating conditions, power, dimensions, weight, and accessories.

17.13 External Dimensions

Provides physical dimensions of the instrument.

Appendix

Appendix 1 Relationship between the Time Axis Setting, Sample Rate and Record Length

Explains the relationship between time axis, sample rate, and record length.

Appendix 2 How to Calculate the Area of a Waveform

Details methods for calculating waveform area using Int1TY, Int2TY, Int1XY, Int2XY.

Appendix 3 ASCII Header File Format

Explains the format of ASCII header files used for waveform data.

Appendix 4 User-Defined Computation

Covers digital filters, Hilbert transform, phase function, and FFT.

Appendix 5 List of Default Settings

Lists the default settings for various instrument functions.

Appendix 6 Key Assignments of the USB Keyboard

Maps USB keyboard keys to instrument functions and soft keys.

Related product manuals