13-11
IM 701450-01E
13
Ethernet Communications (Optional)
13.4 Entering Settings for Printing Screen Images
on the Network Printer (LPR Client Function)
Procedure
X-Y
PHASE
MENU MENU
SETUP FILE
MISC
RESET
SELECT
MATH
SHIFT
GO/NOGO
CURSOR
MEASURE
HISTORY
PRINT
ACQ
START/STOP
IMAGE SAVE
DISPLAY
• To exit the menu during operation, press ESC located
above the soft keys.
• In the procedural explanation below, the term
jog shuttle & SELECT refers to the operation of
selecting/setting items and entering values using the
jog shuttle and SELECT and RESET keys. For details
on this operation, see sections 4.1 or 4.2.
• For a description of the operation using a USB keyboard
or a USB mouse, see section 4.3.
Setting the Network Printer
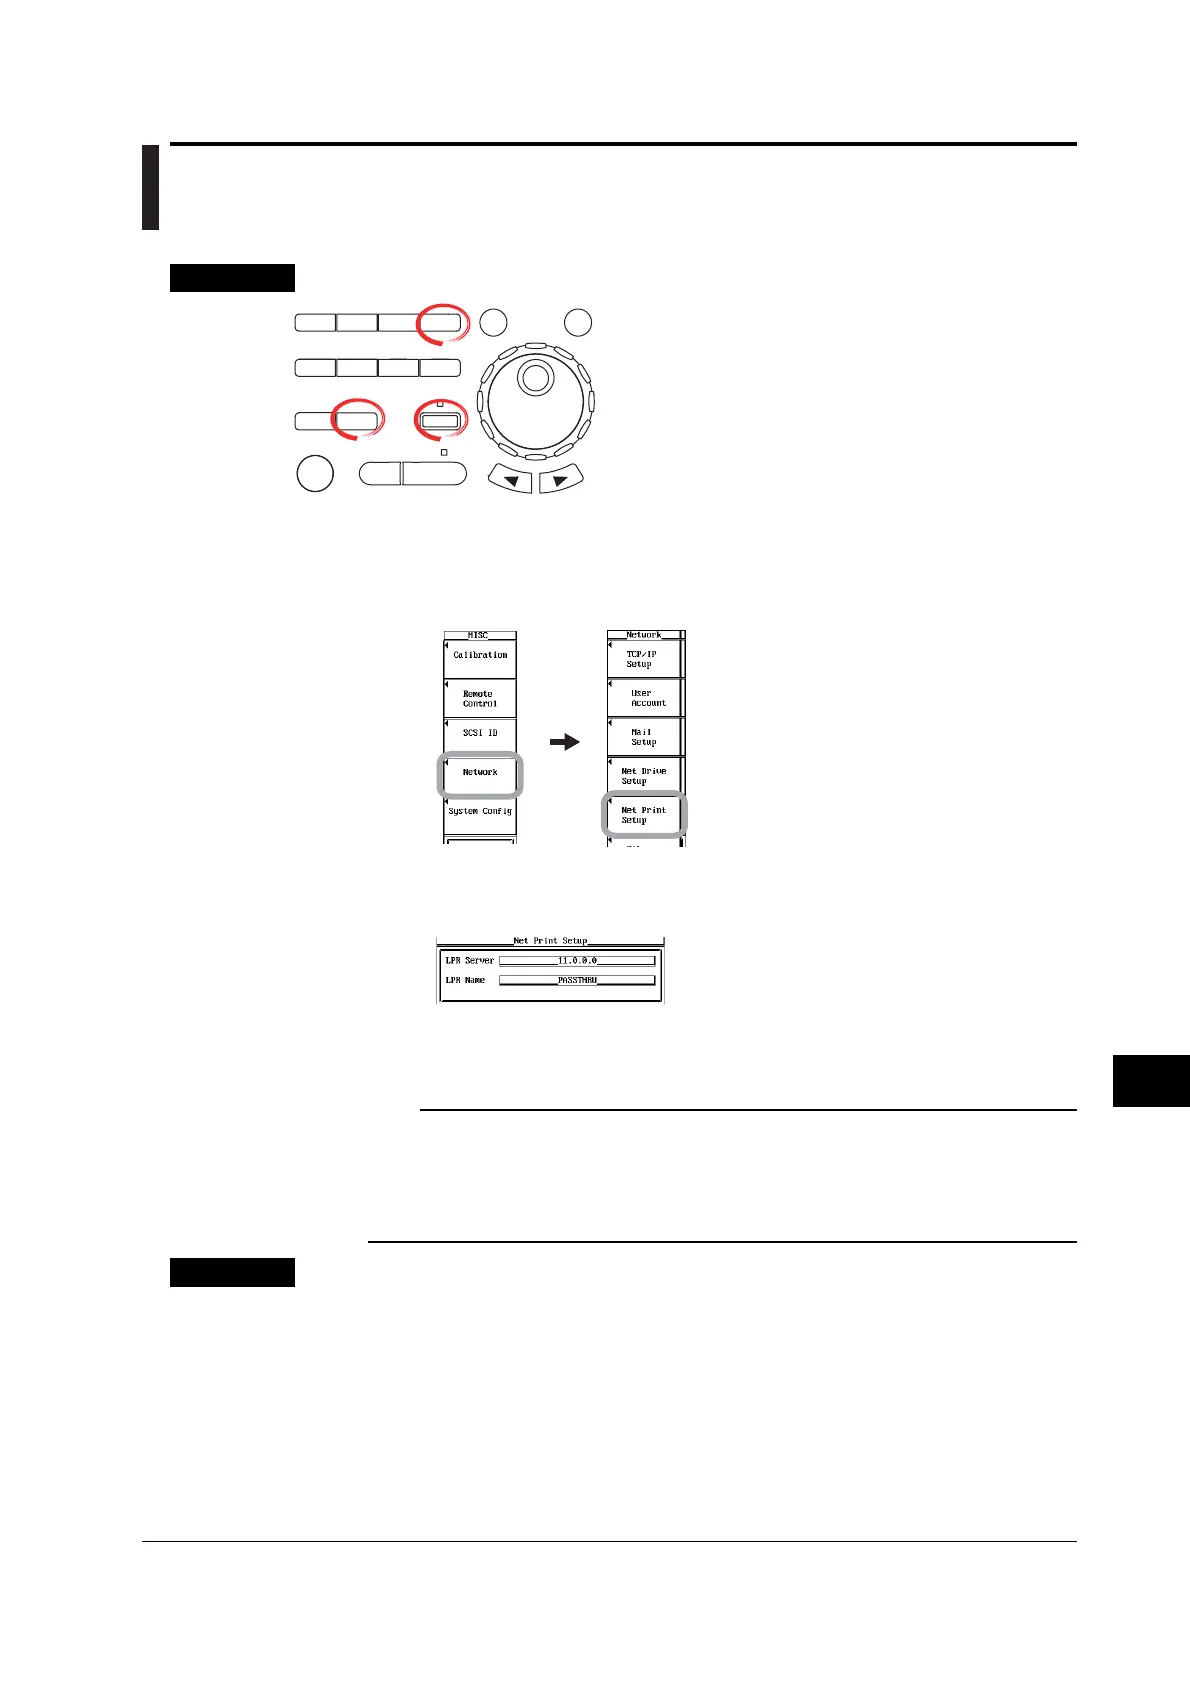
1. Press MISC. The MISC menu appears.
2. Press the Network soft key. The Network menu appears.
3. Press the Net Print Setup soft key. The Net Print Setup dialog box opens.
3. Use jog shuttle & SELECT to enter the LPR Server (IP address of the printer
server). If you are using DNS, you can specify the server by name.
4. Use jog shuttle & SELECT to enter the LPR Name (printer name).
Printing Screen Images
5. Print screen images according to the procedures given in section 11.4.
Note
• To use this function, you must configure TCP/IP according to the procedure given in section
13.2.
• Printing is possible on printers that support the TCP/IP protocol.
• This function cannot be used when using the FTP server function or Web server function or
when performing file operations.
Explanation
As with the built-in printer (optional), you can print the screen image on a network printer
via the Ethernet network.
Network Printer
LPR Server
You can specify the IP address of the network printer server. On networks supporting
DNS, you can specify the host and domain by name instead of the IP address.
Printer Name (LPR Name)
You can specify the name of the printer on which screen images will be printed.

 Loading...