EasyManua.ls Logo

YOKOGAWA DLM3024 - User Manual

YOKOGAWA DLM3024
284 pages
Print Icon
To Next Page IconTo Next Page
Loading...
IM DLM3054-01EN
1st Edition
Features Guide
Mixed Signal Oscilloscope
DLM3024, DLM3034, DLM3054
Digital Oscilloscope
DLM3022, DLM3032, DLM3052
nbn Austria GmbH

Table of Contents

Questions and Answers

  • K
    Kelly MurphyAug 14, 2025
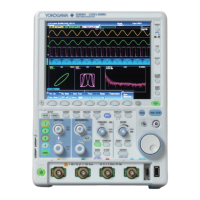
    Why are the measured values not correct on my YOKOGAWA DLM3024 Test Equipment?
    • J
      James PowellAug 14, 2025
      Incorrect measured values on your YOKOGAWA Test Equipment can stem from several causes. First, ensure the instrument warms up for 30 minutes after powering on. Then, calibrate the instrument. Also, verify that the probe's phase has been corrected properly and the probe attenuation is set to an appropriate value. Finally, confirm that the offset voltage is set to 0 V. If problems persist, recalibrate the instrument; further issues may require servicing.
  • J
    Julia WashingtonAug 17, 2025
    What to do if my YOKOGAWA DLM3024 is not triggering?
    • P
      Pamela SheaAug 17, 2025
      If triggering is not working on your YOKOGAWA Test Equipment, the trigger settings may not be appropriate. Ensure you set the trigger conditions correctly.
  • R
    Robert MartinezAug 21, 2025
    What to do if my YOKOGAWA DLM3024 does not turn on?
    • J
      justin77Aug 21, 2025
      If your YOKOGAWA Test Equipment does not turn on, it might be due to using a power supply outside the specified ratings. Make sure to use a correct power supply.
  • W
    Whitney WuAug 25, 2025
    What to do if I cannot save to the specified storage device with my YOKOGAWA DLM3024 Test Equipment?
    • L
      Lisa SmithAug 25, 2025
      If you cannot save to the specified storage device with your YOKOGAWA Test Equipment, it could be due to the storage device not being formatted. In this case, format the storage device. Alternatively, the storage device might be full. Try deleting unneeded files or using another storage device.
  • D
    Dorothy MasseyAug 27, 2025
    What to do if nothing is displayed on my YOKOGAWA DLM3024?
    • M
      mjacksonAug 27, 2025
      If nothing is displayed on your YOKOGAWA Test Equipment, first check if the backlight is turned off. If it is, press any key. If the screen displays inappropriate colors, turn the power off, and then turn the power on again while pressing RESET.
  • M
    Michael CannonAug 31, 2025
    How to fix odd display on YOKOGAWA Test Equipment?
    • C
      Charles ReynoldsAug 31, 2025
      If the display on your YOKOGAWA Test Equipment appears odd, it could indicate that the system is not operating properly. Try turning off the instrument and then turning it back on.
  • L
    Laura JamesSep 3, 2025
    Why I am unable to configure or control the YOKOGAWA Test Equipment through the communication interface?
    • D
      Dr. Marc Juarez Jr.Sep 3, 2025
      If you are unable to configure or control the YOKOGAWA Test Equipment through the communication interface, the instrument’s address used by the program may be different from the specified address. Match the address used in the program to the instrument’s address. Also, the interface may not be used in a way that conforms to the electrical or mechanical specifications. Use the interface in a way that conforms to the specifications.
  • F
    Fernando MorenoSep 6, 2025
    What to do if keys do not work on YOKOGAWA Test Equipment?
    • R
      Rebecca CochranSep 6, 2025
      If the keys on your YOKOGAWA Test Equipment do not work, perform a key test. If the test fails, servicing is required.
  • U
    umcdonaldSep 9, 2025
    Why I cannot print to the built-in printer on my YOKOGAWA Test Equipment?
    • F
      fdixonSep 10, 2025
      If you cannot print to the built-in printer on your YOKOGAWA Test Equipment, the printer head may be damaged or worn out, requiring servicing.

Summary

Vertical Axis (Analog Signal)

Vertical Scale (SCALE knob)

Adjusts waveform amplitude per grid division for signal viewing.

Vertical Axis (Logic Signal)

Horizontal Axis (Time Axis)

Time Scale (TIME;DIV knob)

Sets the time scale per grid division, determining the displayed time range.

Triggering

Trigger mode (Trigger Mode)

Determines waveform update conditions with five available trigger modes.

Trigger Type (Type)

Lists available trigger types, including Edge, Enhanced, Serial, and TV triggers.

Basic Trigger Settings

Defines fundamental trigger parameters like source, slope, level, position, and delay.

Edge Trigger [EDGE]

Triggers on the rising or falling edges of a single trigger source.

Pattern Trigger [ENHANCED]

Triggers on pattern matches, mismatches, or durations, with optional clock source.

Serial Bus Trigger [ENHANCED]

Captures trigger conditions for ten types of serial bus signals.

Trigger B [B TRIG]

Triggers based on combinations of trigger A and trigger B conditions.

Executing Actions

Action Mode (Mode)

Selects the action mode: on trigger, GO/NO-GO AND, or GO/NO-GO OR.

Action to Execute When Conditions Are Met (Action)

Specifies actions like Buzzer, Print, Save Waveform, or Send Mail.

GO;NO-GO Determination (Go;Nogo AND, Go;Nogo OR)

Determines if waveforms meet reference conditions, executing actions on no-go results.

Creating a Rectangular Zone (RectZone)

Defines rectangular zones for GO/NO-GO determination or history search.

Creating a Polygonal Zone (PolygonZone)

Creates polygonal zones using external Mask Editor Software for determination.

Waveform Acquisition

Record length (Record Length)

Sets the number of data points stored in acquisition memory for each channel.

Acquisition mode (Mode)

Selects acquisition modes: Normal, Envelope, or Averaging.

Sampling Mode (Sampling Mode)

Selects sampling modes: Real-time, Interpolation, or Repetitive sampling.

Waveform Acquisition (RUN;STOP)

Starts, stops, and manages waveform acquisition processes.

Display

Types of Windows

Describes available display windows: VT, XY, FFT, and Trend/Histogram.

Accumulation (Accumulate)

Acquires and displays waveforms over time, showing frequency via intensity or color.

Displaying XY Waveforms

X-Axis and Y-Axis Source Waveforms (X Trace;Y Trace)

Selects waveforms for the X and Y axes of XY displays.

Cursor Measurement (Cursor)

Allows measurement using cursors on the X and Y axes simultaneously.

Computed and Reference Waveforms

Computation Mode (Mode)

Selects display modes for computed or reference waveforms: OFF, Math, or Ref.

Computation Source Waveforms (Source1;Source2)

Selects source waveforms for computed math functions based on channel availability.

Operators (Operation)

Lists operators for defining expressions, including basic, trigonometric, and filter functions.

User-Defined Computation (User Define, Option)

Defines custom computation expressions using source waveforms and operators.

FFT

FFT Conditions (FFT Setup)

Configures time window, display mode, and spectrum analysis type for FFT.

Cursor Measurement (Measure Setup)

Enables analysis of FFT waveforms using marker or peak cursors.

Peak Cursors (Peak)

Detects peaks based on threshold and excursion values for frequency and level.

Cursor Measurement

Cursor Mode (Type)

Selects cursor modes: ΔT, ΔV, ΔT&ΔV, Marker, or Angle cursors.

Measurement Source Waveform (Trace)

Selects the source waveform for cursor measurements.

ΔT Cursors (ΔT)

Measures time values using two cursors perpendicular to the time axis.

Automated Measurement of Waveform Parameters

Measurement Items (Item Setup)

Sets measurement items for each source waveform (voltage, time, logic).

Statistics (Statistics)

Displays statistics (Max, Min, Mean, Std Dev, Count) for measured waveform parameters.

Zooming in on Waveforms

Searching Waveforms

Analyzing and Searching Serial Bus Signals

Serial Bus Signal Type (Type)

Selects the serial bus type for analysis (FlexRay, CAN, CAN FD, LIN, CXPI, SENT, UART, I2C, SPI, User Define).

Decoded Display (Decode)

Decodes serial bus field values and displays results with different colors.

Waveform Histogram Display

Measurement (Measure Setup)

Enables measurement of parameters on histograms using cursors.

Power Supply Analysis Feature (Power Analysis and Power Measurement, Option)

Power Measurement (Power Measurement)

Measures voltage, current, and power for up to two circuits simultaneously.

Safe Operating Area Analysis (SOA)

Plots operating range characteristics by plotting voltage vs. current to evaluate device safety.

Harmonic Analysis (Harmonics)

Measures and analyzes harmonics of input signals according to IEC standards.

Measuring Inrush Current by Computing the Joule Integral (I2 t)

Measures Joule integral (I2t) of inrush current for evaluating fuses and components.

Displaying and Searching History Waveforms

Printing and Saving Screen Captures

Saving Screen Captures to Files (File)

Saves screen captures as files in PNG, BMP, or JPEG formats.

Saving and Loading Data

Saving Data (Save)

Saves waveform, setup, and other data to specified storage devices.

Saving Waveform Data (Waveform)

Saves measured waveform data to files in binary or ASCII format.

Saving Setup Data (Setup)

Saves instrument setup data to files or internal memory locations.

Loading Data (Load)

Loads saved data (waveform, setup, zones, snapshots, symbols) into the instrument.

Ethernet Communication (Network)

Other Features

Appendix 2 User-Defined Computation

Appendix 5 How Power Measurement Items Are Determined

YOKOGAWA DLM3024 Specifications

General IconGeneral
BrandYOKOGAWA
ModelDLM3024
CategoryTest Equipment
LanguageEnglish

Related product manuals