3-13
IM 701450-01E
Making Preparations for Measurements
3
3.7 Setting the Date and Time
Procedure
X-Y
PHASE
MENU MENU
SETUP FILE
MISC
RESET
SELECT
MATH
SHIFT
GO/NOGO
CURSOR
MEASURE
HISTORY
PRINT
ACQ
START/STOP
IMAGE SAVE
DISPLAY
• To exit the menu during operation, press ESC located
above the soft keys.
• In the procedural explanation below, the term
jog shuttle & SELECT refers to the operation of
selecting/setting items and entering values using the
jog shuttle, SELECT and RESET keys. For details
on this operation, see sections 4.1 or 4.2.
• For a description of the operation using a USB keyboard
or a USB mouse, see section 4.3.
There are two ways of setting the date and time. One is to enter the date/time manually.
The other is to automatically set the time using the Internet Time Server (NTP Server or
SNTP Server). To use the NTP server or SNTP server, the DL7400 must be connected
to the network and set up so that a connection can be established with the NTP server or
SNTP server. For details, see section 13.2, “Setting Up TCP/IP” and section 13.8,
“Setting the Time Difference from GMT (Greenwich Mean Time)/Setting SNTP.”
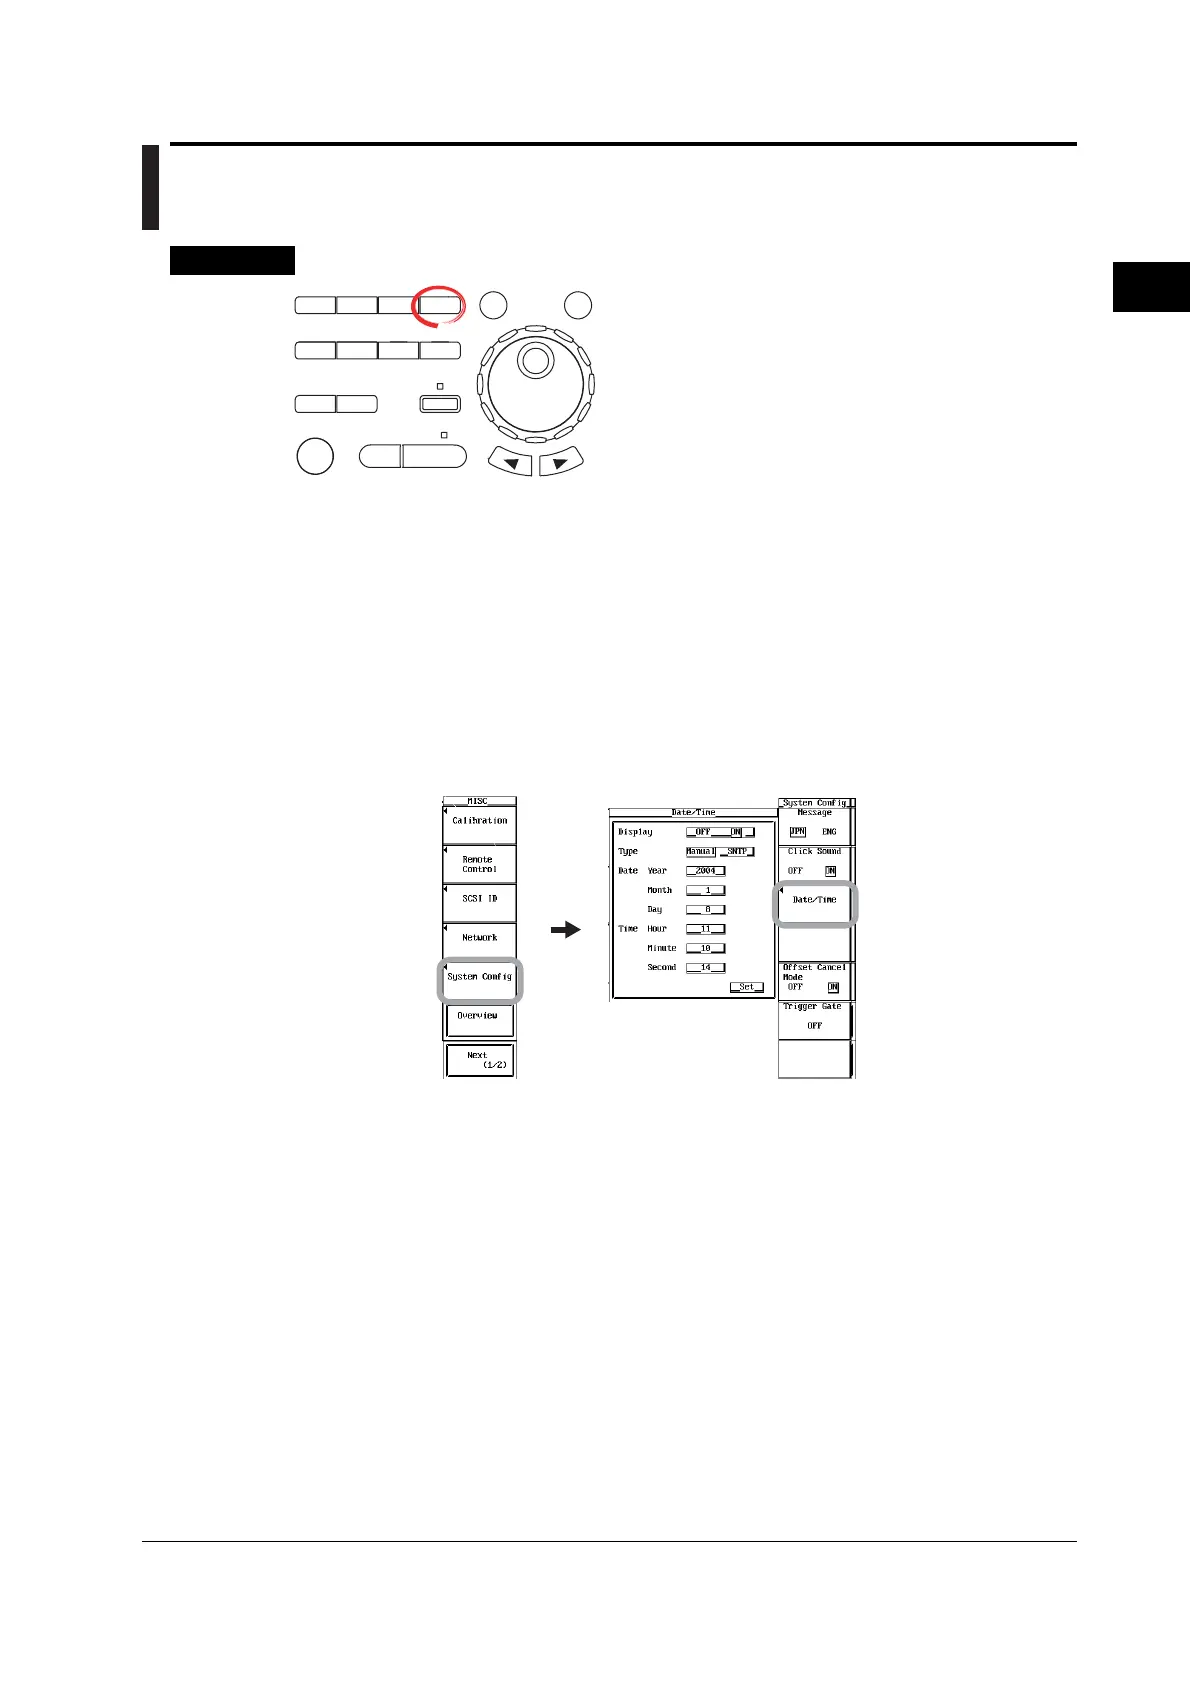
Displaying the Date/Time Setup Dialog Box
1. Press MISC.
2. Press the System Config soft key. The System Config menu appears.
3. Press the Date/Time soft key. The Date/Time setup dialog box appears.
Turning ON/OFF the Date/Time Display
4. Use jog shuttle & SELECT to set Display to ON or OFF.
Entering the Date/Time
5. Turn the jog shuttle to move the cursor to Type, and press SELECT to select
Manual.
6. Use jog shuttle & SELECT to set the Year.
7. Likewise, set the Month, Day, Hour, Minute, and Second.
8. Turn the jog shuttle to move the cursor to Set and press SELECT to enter the
date/time.

 Loading...