Page 13
3 CONSOLE MENU
3.1 PROGRAMMING WITH THE CONSOLE
The Zapi console can be used to program various 4Q chopper functions. It is therefore
possible to adapt the truck performance to suit the client’s requirements.
The console can be left connected to the controller when it is in use and the parameters
can be modified in real time. In this case, if you wish to save the new data entries, get
into rest mode and save the data in the controller memory (E
2
prom) before turning the
key off.
This section describes the functions of the Zapi console.
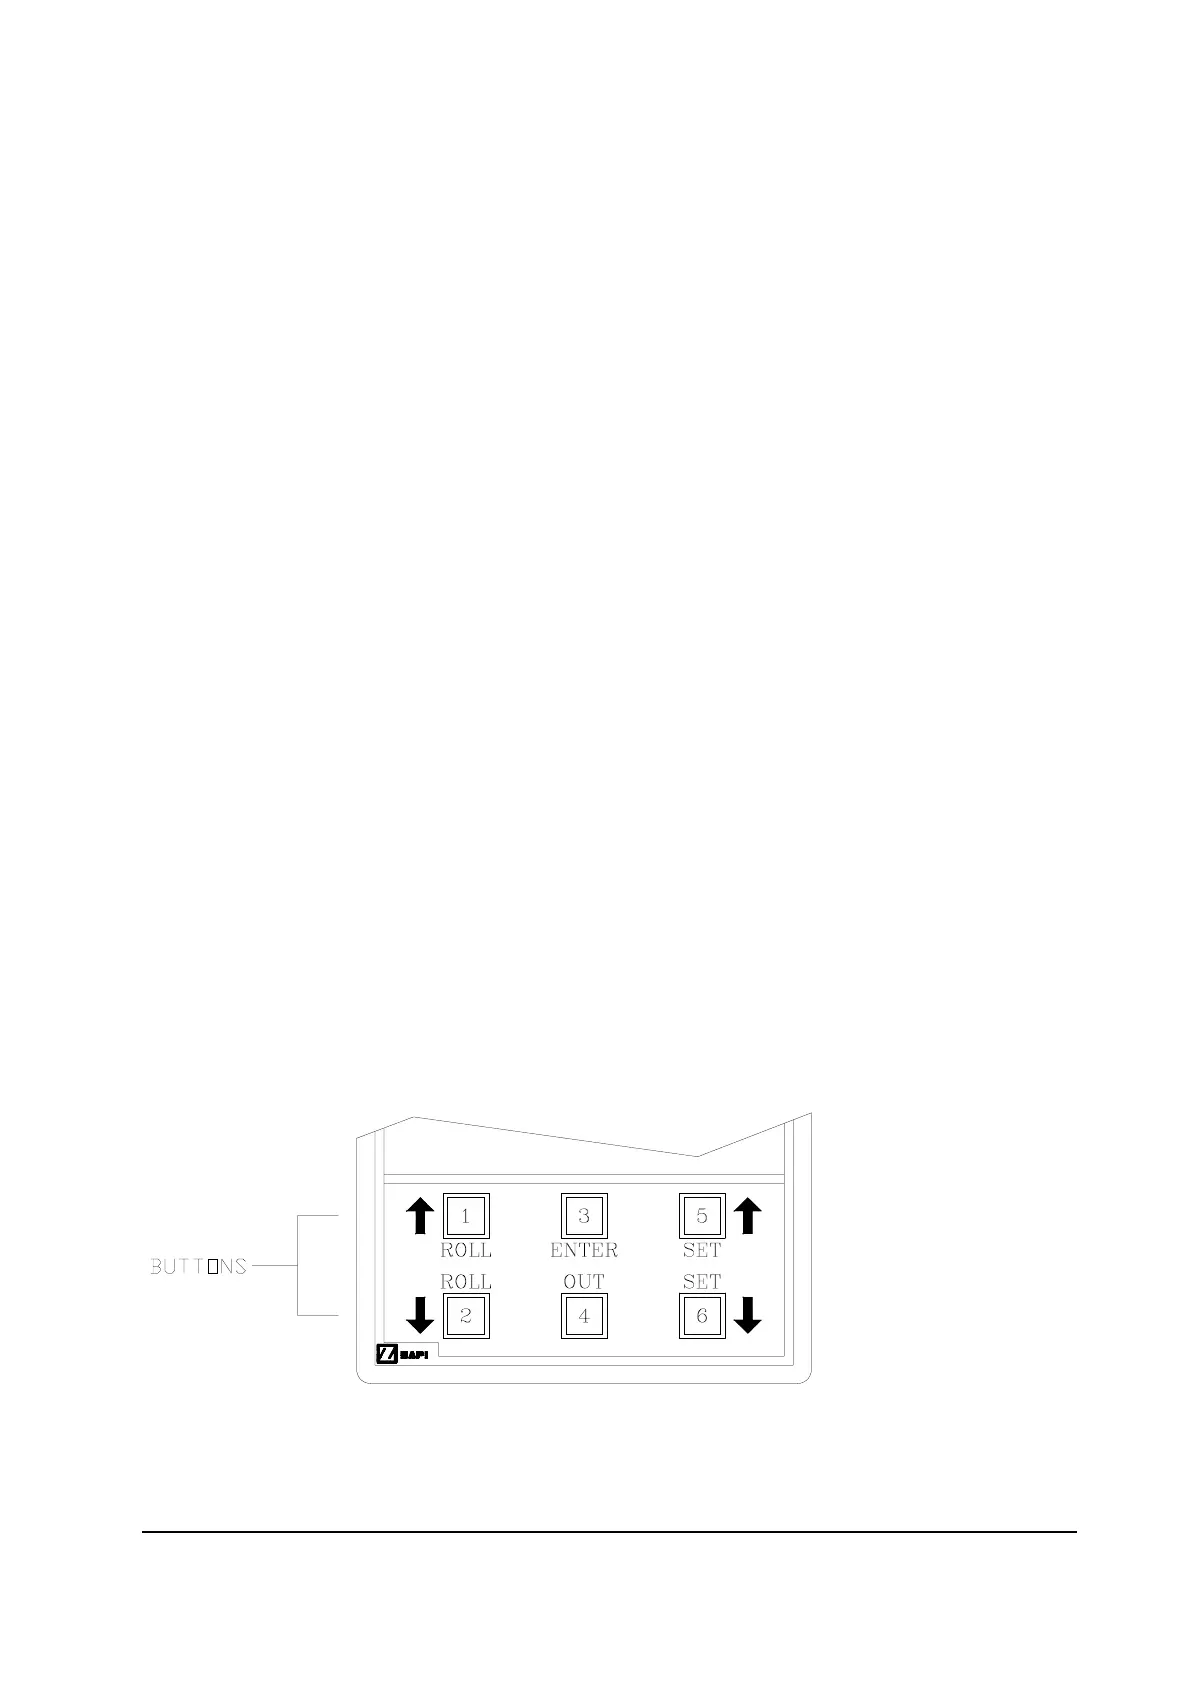
The console has six push-buttons that can be used to modify or visualise the chopper
parameters as described below:
1 Roll-up press to scroll sub-menus or parameters upwards.
2 Roll-down press to scroll sub-menus or parameters downwards.
3 Enter press to access sub-menus. Also used to confirm a new parameter.
4 Out press to exit sub-menus. Also used for non-confirmation of a new
parameter.
5 Set-Up press to increase the value of a parameter.
6 Set-Down press to decrease the value of a parameter.
N.B.: When a parameter has been modified, the new value can be recorded by pressing
key 4 (Out) followed by key 3 (Enter). By pressing key 4 (Out) twice, the new value is
not recorded.
The numbers printed in the triangles on the following console map correspond to the
numbers on the keyboard of the console shown in the diagram below. The position of
the triangle indicates to which sub-menu or parameter the key refers.
Important
THE CONSOLE SHOULD ONLY BE CONNECTED AND DISCONNECTED WITH THE
PLANT TURNED OFF!