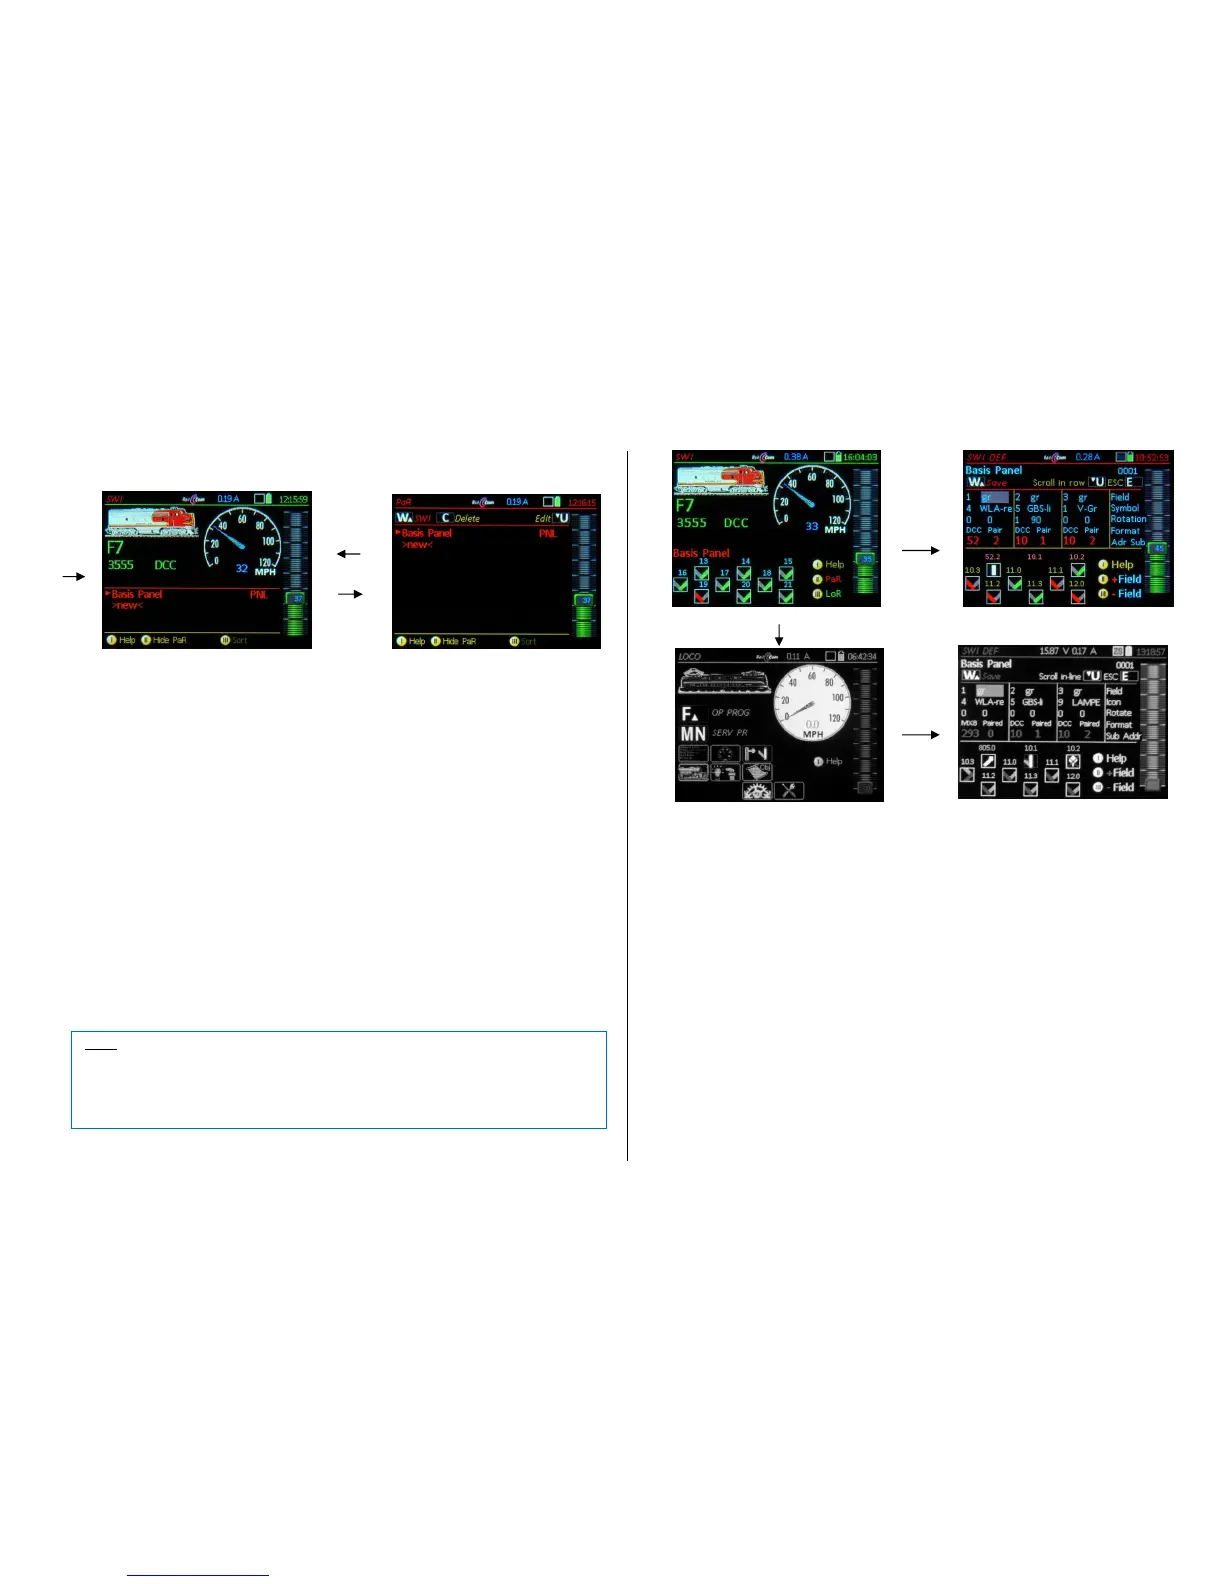
Softkey II PaR opens the “Panel Recall” (PaR) list with existing panels, scroll & select (A), delete (C).
Tapping the PaR list opens to a full-screen.
Scrolling wheel Scroll in the list to select a panel,
Soft-Key III Sorting options:
Scroll to panel, select with Soft-Key III, use scrolling wheel to move it to new position and
press Soft-Key III again to place the panel there.
W-Key or A-Key Activates the selected panel,
C-Key Deletes the selected panel from the PaR (but not from the object database!),
U-Key To edit the panel name.
Creating a new panel
To create a new panel, scroll to the line >NEW< at the end of the panel list and press the A-Key. If the
short list is displayed at this point it will now switch to the full-page view and opens a data input window.
Enter data with the keypad using the -Key (Shift) to switch the keypad between “abc”, “ABC” and “123”.
This new panel initially consists of undefined fields (Icons with “?”) without any addresses assigned,
which can now be replaced and edited with proper icons in the definition screen SWI DEF.
A quick way to define new switch or signal objects
The idea here is to use the default “Basic Panel” to operate turnouts and two-aspect signals, using the
standard “V-icons” and their default positions. Only the addresses assigned by default (10.0, 10.1…)
need to be changed with the actual addresses.
(Shift) + W + (Shift) + U Enters the SWI DEF mode. The (Shift) key moves directly to the
address (and sub-address) input line and the U-Key changes to the option “scroll in line”. The ad-
dresses and sub-addresses can now be added for each icon, confirm each with the A-key or scroll
to the next entry field.
.
There are three entry blocks (for three turnout icons per row) available in the SWI DEF page for icon se-
lection, orientation, adding decoder address/sub-addresses (or modules) and other parameters. The
number in the left top corner of each block indicates which icon is currently being worked on.
Scrolling wheel highlights individual input fields for icon selection and parameters; the cursor ad-
vances automatically to the next (or previous) block when reaching the end or beginning of a block.
The panel automatically adds 3 fields when reaching the end!
U-Key changing the scrolling movement to “in-line mode”; instead of moving the cursor through all
entry fields in each block it moves along the same line from block to block (i.e. the decoder address
line); this makes it easy to quickly change the addresses and sub-addresses for each of the three
icons without having to scroll through all other entry fields. Return to “scroll in block” with “U-Key.
Soft-Key II = + Field adds an additional icon field before the currently marked field; the marked
and subsequent fields are moved down automatically.
Soft-Key III = - Field deletes the marked field (icon) from the panel; the subsequent elements
move up automatically.
Keypad, C-Key deletes entries or individual characters in the value entry fields.
Rocker switch select from several fixed values for input fields that don’t require continuous numer-
ical values, rather predefined values; in the cases “Icon” and “Rotate”, also numbers are placed
ahead of the value field, so that numerical values (with number keys) or predefined values can be
entered (i.e. 0, 1, 2, 3…. or 0, 90, 180, 270 degree for icon rotation).
 Loading...