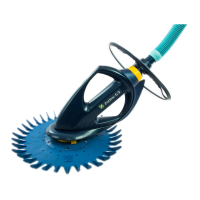
9
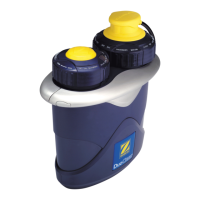
Check that the red indicator light on the switch (viewed from the side) is posioned to seng No. 3 (see image ).
0 1 2 3 4 5 6
6 5 4 3 2 1 0
3
If necessary, use the pool valves to adjust the ow rate so that the indicator light is in posion 3.
• When installing in a pool with a single skimmer, the ow rate is controlled by the ow regulaon valve. The red
indicator light must be in posion 3.
• When installing in a pool with mulple skimmers, leave the valve of the skimmer connected to the hose open, then
gradually close the other skimmer unl the indicator light reaches posion 3.
• When installing on a sucon port, leave the sucon line open and gradually close the skimmer line unl the ow rate
reaches the adjustment posion 3.
If the ow rate is in the low zone, between 0 and 2 (see image ):
• Check and clean the pool lter and strainers if necessary.
• Check that the valves controlling the sucon lines are correctly placed in the open posion.
• Increase the ow rate on the automac ow regulaon valve (see image ).
0 1 2 3 4 5 6
6 5 4 3 2 1 0
0 - 2
If the ow rate is in the high zone, between 4 and 6 (see image ) :
• If the appliance is connected to the sucon port, gradually close the valve unl the ow rate reaches posion 3.
• Reduce the ow rate on the automac ow regulaon valve (see image ).
• Slightly open the boom plug hole to reduce the ow rate a lile more.
0 1 2 3 4 5 6
6 5 4 3 2 1 0
4 - 6
(+) Increase the ow rate
(-) Reduce the ow rate
EN
 Loading...