8
❸ Use
3.1 I Operang principle
The cleaner is independent of the ltraon system and may operate autonomously. Simply connect it to the mains.
It nds the best route to move around and clean the areas of the pool for which it has been designed (depending on the
model: boom, walls, water line). Debris is sucked in and stored in the cleaner's lter.
The control box enables the cleaning operaons to be started, selected and programmed (depending on the model).
3.2 I Pool preparaon
• This product is intended to be used in pools which are permanently installed. Do not use it in
pools which may be dismantled. A permanent pool is built into the ground or on the ground
and cannot be easily dismantled and stored.
• The appliance must operate in pool water with the following properes:
Water temperature Between 15°C and 35°C
pH Between 6.8 and 7.6
Chlorine < 3 mg/ l
• When the pool is dirty, especially when commissioning, remove the largest debris using a net in order to opmise the
appliance's performances.
• Remove any thermometers, toys and other objects that might damage the appliance.
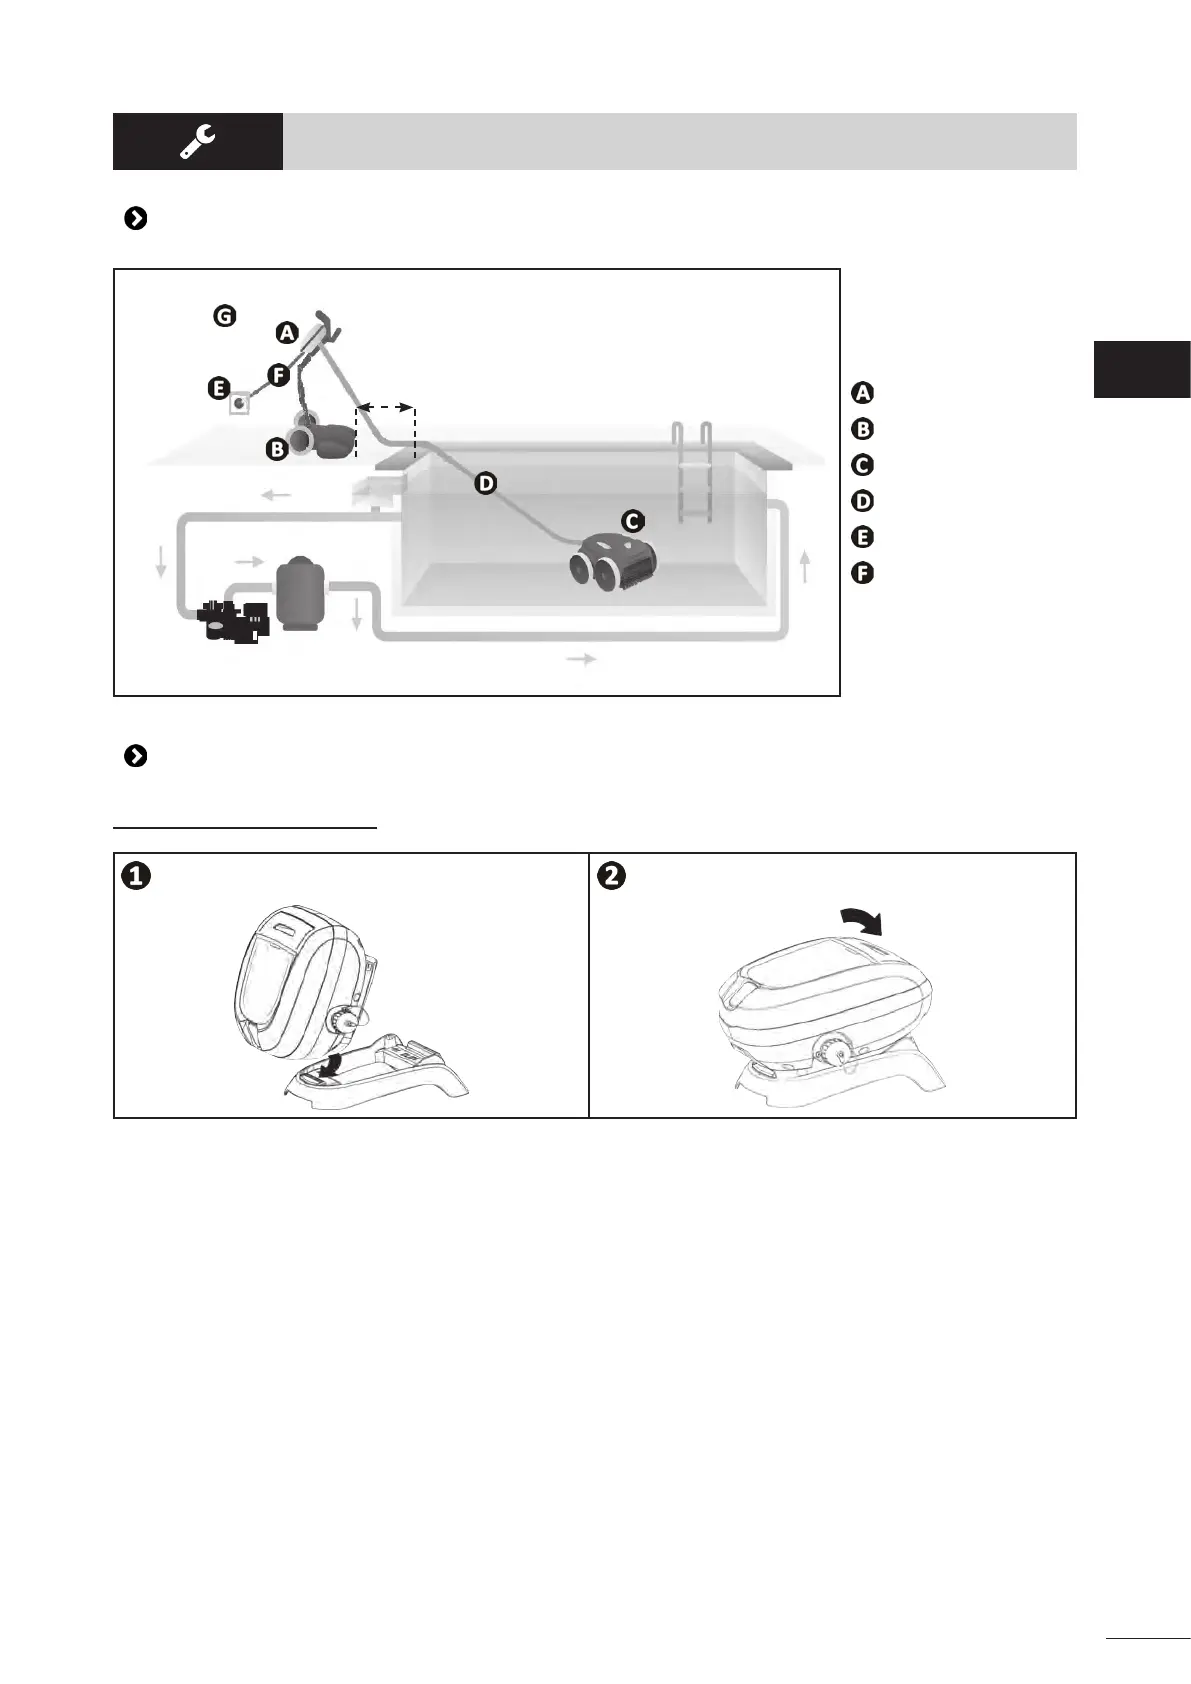
3.3 I Immersing the cleaner
• Roll out the full length of the cable alongside the pool to avoid the cable becoming tangled during immersion (see
image
).
• Place the cleaner vercally into the water (see image ).
• Move it slightly in all direcons so that the air contained in the cleaner escapes (see image ).
• It is essenal that the appliance sinks on its own and seles on the pool boom. While it is immersed, the cleaner
draws the length of cable it needs into the pool (see image
).
EN