Do you have a question about the Zoom A2 and is the answer not in the manual?
Explains symbols indicating dangerous matters and how to handle the device safely.
Details power requirements for AC adapter and battery operation.
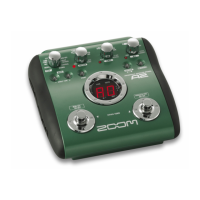
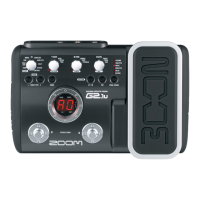
Steps for powering on the unit and connecting the guitar.
How to use foot switches to cycle through available patches.
Using knobs for sound adjustment and keys for bank selection.
Steps to switch the unit to bypass or mute for tuning.
Instructions for playing strings and reading the display for tuning.
Using knobs to adjust volume and tempo, including tap tempo.
How to choose an effect module using the module selector.
Using foot switches to toggle effect modules between on and off.
Using BANK keys to change the effect type within a selected module.
Using parameter knobs 1-3 to modify effect settings.
Starting the process by pressing the STORE key.
Choosing the destination bank and patch number for storage.
Guide to manually detecting and attenuating feedback frequencies.
Explains how the A2 automatically detects and suppresses feedback.
Steps to initiate automatic feedback detection while playing.
Details on connecting the FS01 and assigning its functions.
Starting the reset process by holding the STORE key during power-on.
Confirming the reset to return all settings to factory defaults.
Reduces acoustic feedback by attenuating specific frequency bands.
Solutions for low volume and pickup/amplifier compatibility problems.
| Looper | no |
|---|---|
| Outputs | 1/4" phone jack |
| MIDI I/O | no |
| USB | no |
| Signal Processing | 32bit |
| Input | 1/4" phone jack |
| Output | 1/4" phone jack |
| Effects | Reverb, Delay, Chorus, Flanger, Phaser, Tremolo, Vibrato, Auto Wah, Compressor, EQ |
| Inputs | 1/4" phone jack |
| Power Supply | 9V DC (Power supply included) |