243D Systems, Inc.
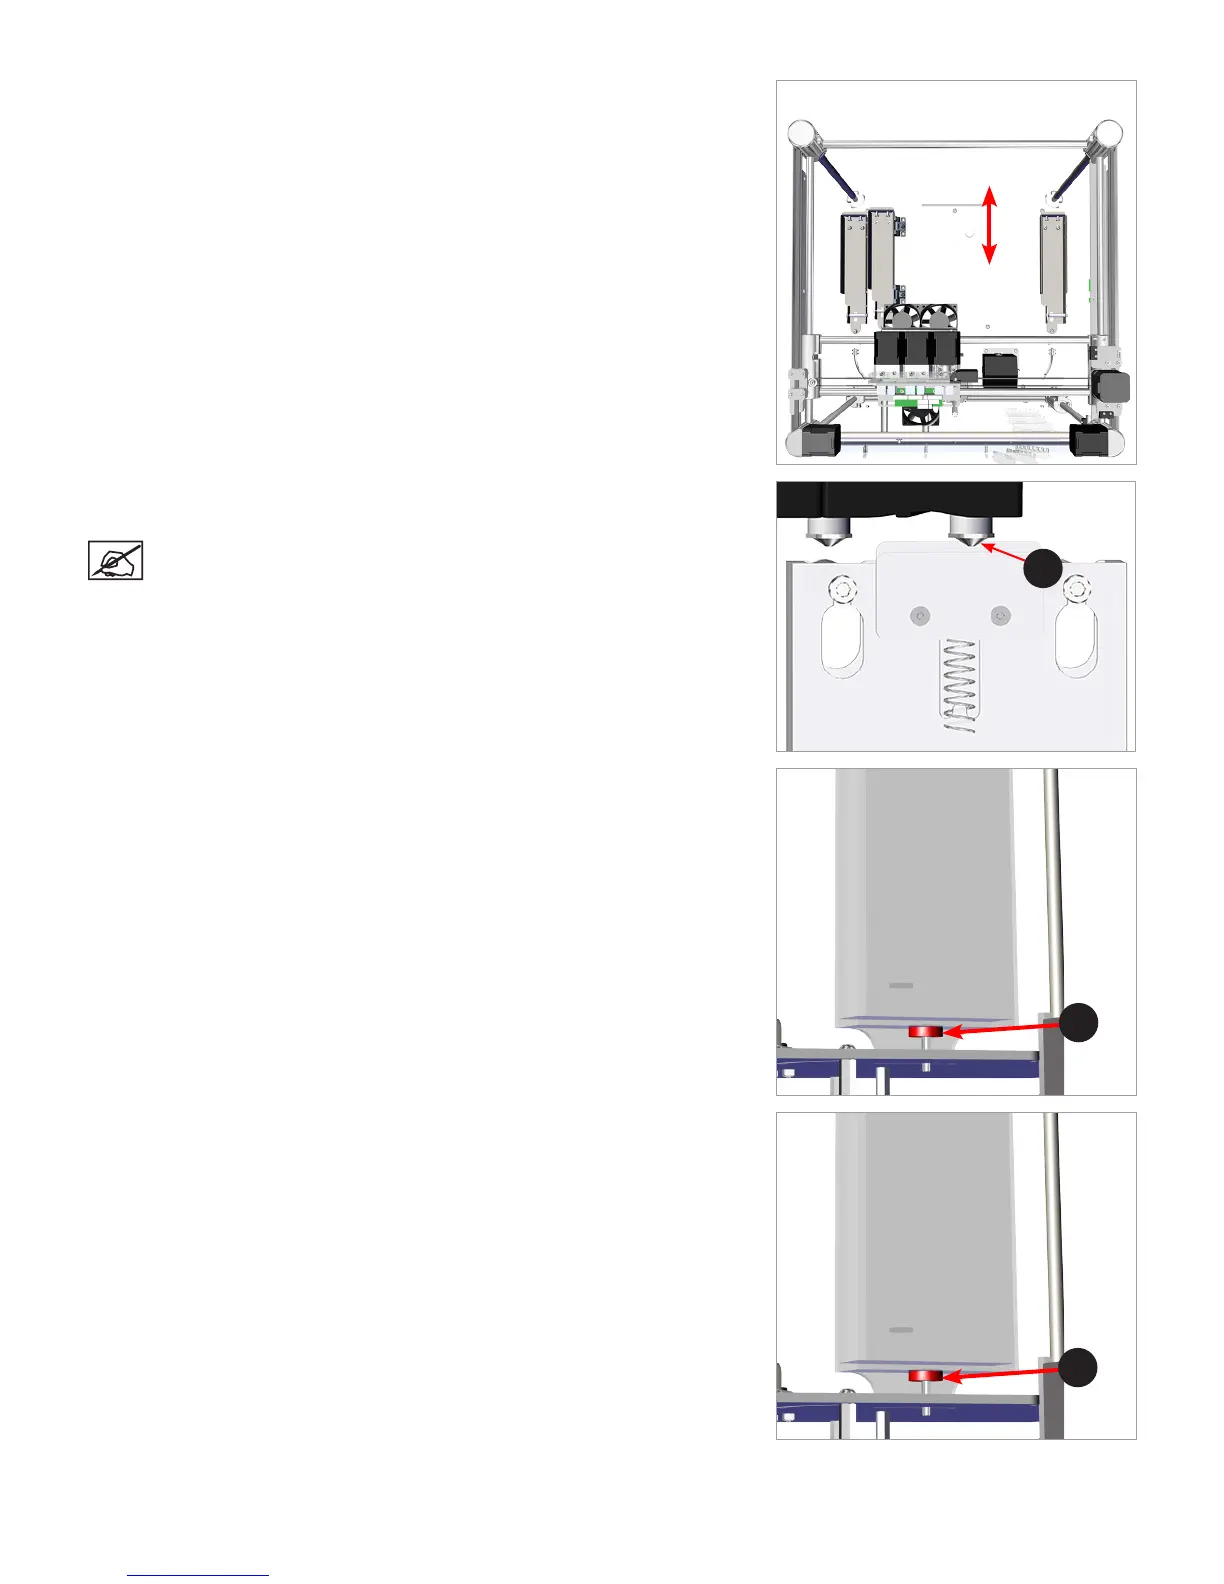
55. Holding on to the extruder carriage assembly, gently position it over the jet wiper
assembly.
56. Verify the wiper blade meets the tapered portion (A) of the print jet tip. If it does,
the jet wiper is properly adjusted. Proceed to step 59.
NOTE: If the wiper tip is too high, proceed to the next step. If the
wiper tip is too low, proceed to step 58.
57. If the wiper blade is too high, remove the jet wiper assembly and turn the
adjustment thumbscrew (A) clockwise. Reinstall the jet wiper and return to step
56.
58. If the wiper tip is too low, remove the jet wiper assembly and turn the adjustment
thumbscrew (A) counter-clockwise. Reinstall the jet wiper and return to step 56.
59. Once satised with the adjustment, connect your printer to utility power and
power on the printer.
View From Top
Front
Back
A
A
A