293D Systems, Inc.
Printing The Level Gap Calibration File
NOTE: Ensure the print pad is completely clean from glue and printed parts before beginning this procedure.
1. Navigate to http://cubify.com/en/CubePro/Activate. Select CALIBRATION
FILES and extract them to your computer’s hard drive.
2. Navigate to the le location and copy the appropriate le to your USB mass
storage device.
NOTE: There are two Level Gap Calibration les as well as four Nozzle Offset Calibration les. The two Level
Gap Calibration les are print material specic. Select the le based on the material cartridge type (ABS or PLA)
installed in cartridge bay 1.
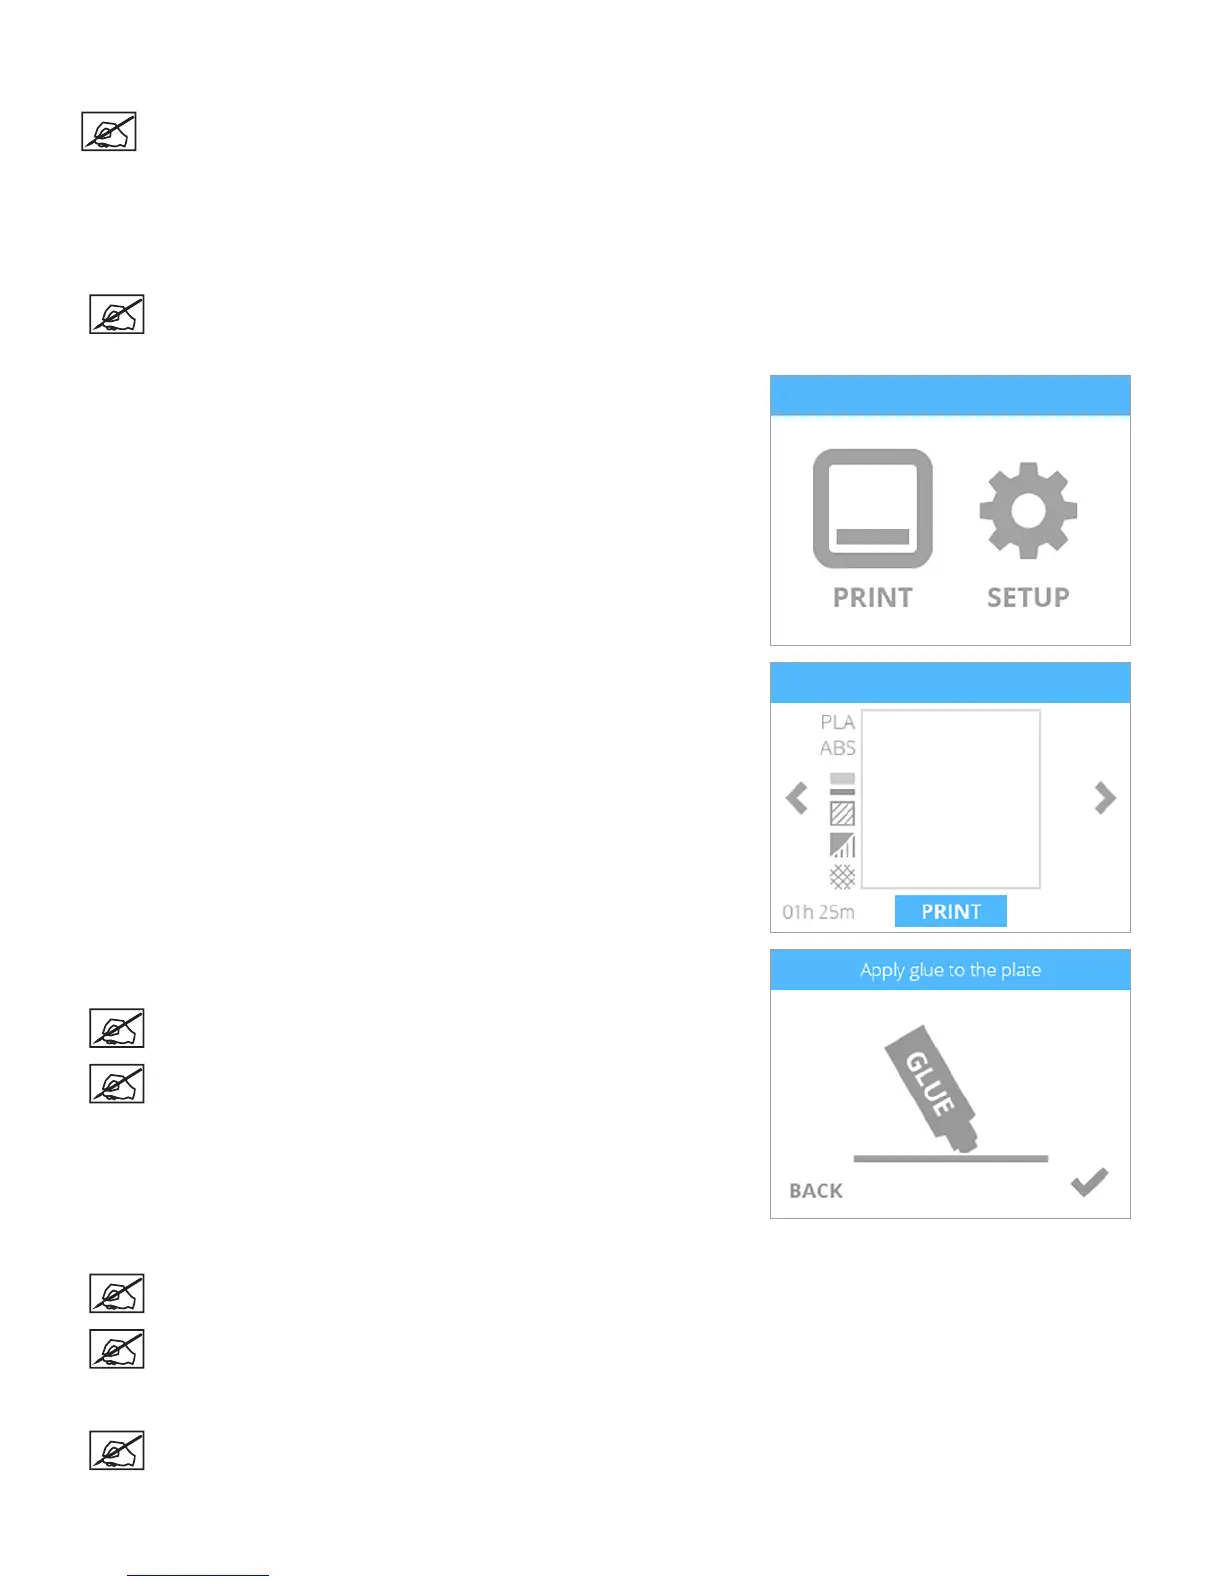
3. Insert the USB mass storage device into the USB host port on the printer and
select PRINT.
4. Using the arrows, navigate to the appropriate Level Gap Calibration le and
select PRINT.
5. Apply two thin layers of Cube Glue to the print pad in an area of 50 mm x 50
mm. Select the checkmark to continue.
NOTE: For more information, refer to the section titled Applying
Cube Glue in the user guide.
NOTE: It may take about ve (5) minutes to print the le.
6. When nished, remove the print pad and verify the Level Gap.
NOTE: Refer to the sections titled Reading The Z-Gap Calibration Print and Reading The Level Gap Calibration
Print.
NOTE: If adjustments are needed, perform this procedure again after making the adjustments. Make sure all glue
and plastic residue have been removed prior to performing this procedure again.
7. Calibrate the offset jets.
NOTE: Refer to the section 6 of this guide.