29
③ Remove the O-rings from pilot case.
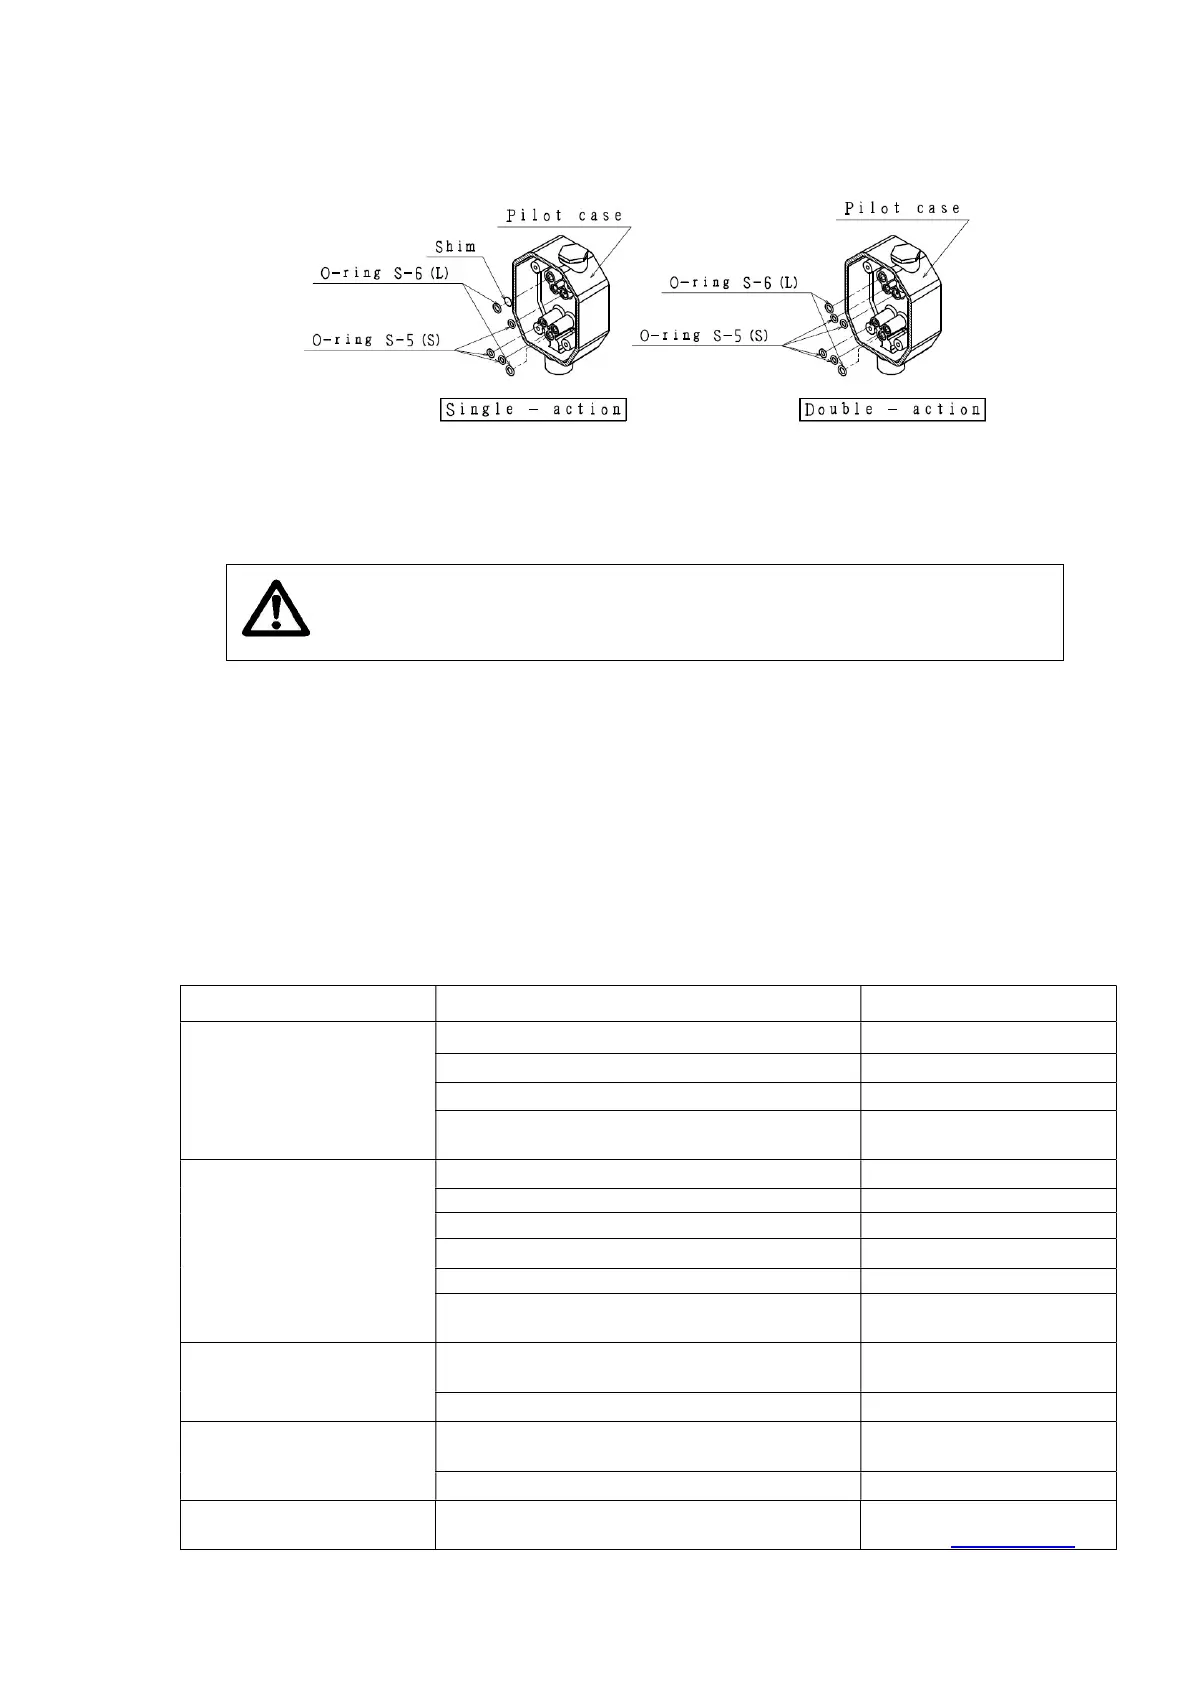
[See figures below]
Replacement
① Place the new O-rings to the pilot case.
In case of Single- action, make sure the shim is placed.
If you lost the shim, use the new shim included in the repair kit.
Caution! Different numbers of the O-rings and shim are used for
Single- action and Double- action.
Please replace them referring to the above figures.
② Place the new pilot relay unit to the pilot case with the four M4 Phillips screws.
Be careful not to drop the O-ring during work.
③ After the installation of the pilot relay unit, start Auto-tuning.
・Be sure to check the noise during Auto-tuning.
・If the noise is loud, Check the position of O-rings and reinstall the pilot unit.
④ Mount the pilot case cover with the three M5 Phillips screws.
10. Troubleshooting
Issue Cause Action
LCD doesn’t display
Bad connection Tighten terminal
Wrong with + / - wiring Re wiring
Breakdown of LCD Replace circuit board
Input signal is less than 3.8 mA
Input signal is more than
Not working
Clogging of fixed orifice Replace fixed orifice
Broken Wires Replace broken wires
Lack of supply air pressure
Supply prescribed air
Shift the set point
Wear on the levers
Replace levers
Sensor was damaged Replace sensor
Continuous hunting
Not stabilized
Heavy overshooting
Mismatching in PID
Re-tuning
Adjust manually
Clogging of fixed orifice Replace fixed orifice
Poor linearity The positioner is installed in poor posture
Reinstall positioner